Saturday 28 August 2010

Chocolate Peanut Butter Ice cream & Daring Baker's Baked Alaska


The August 2010 Daring Bakers’ challenge was hosted by Elissa of 17 and Baking. For the first time, The Daring Bakers partnered with Sugar High Fridays for a co-event and Elissa was the gracious hostess of both. Using the theme of beurre noisette, or browned butter, Elissa chose to challenge Daring Bakers to make a pound cake to be used in either a Baked Alaska or in Ice Cream Petit Fours. The sources for Elissa’s challenge were Gourmet magazine and David Lebovitz’s “The Perfect Scoop”.


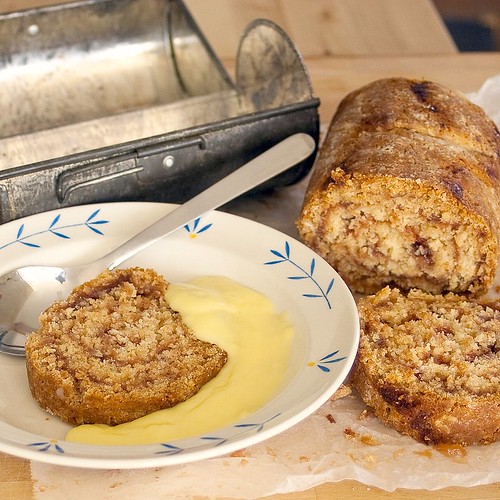
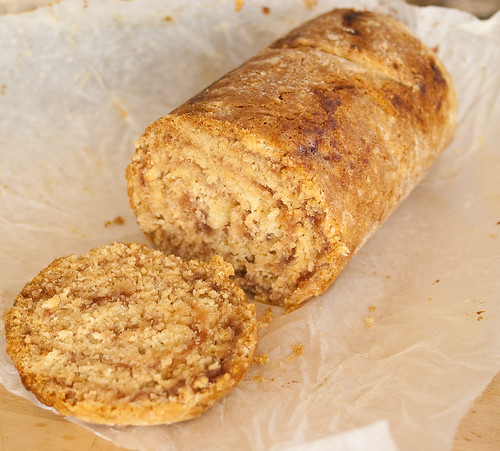
After quite a gap where I have struggled to find motivation, this month's daring baker challenge grabbed me and enticed me to try a recipe that has intrigued me since I was a little kid.  I think it was the most read recipe in one of my childhood cookbooks right at the back with surprisingly clean pages!  The recipe called for both shop bought ice cream and cake rather than making them from scratch.  I didn't even realise that you could make ice cream at home back then.  Although as a kid I read the recipe with lustful regularity, I never attempted to make it, it didn't make any sense - how on earth could you bake ice cream without it melting?  Madness!

halved baked alaska


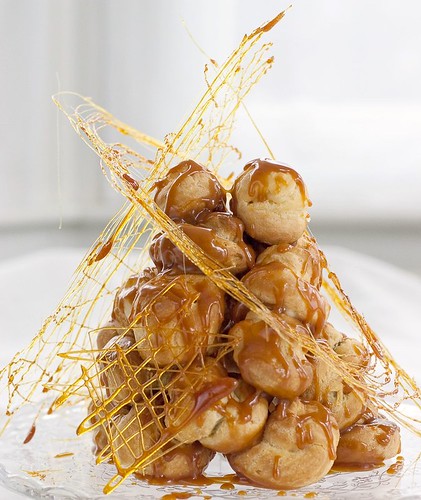
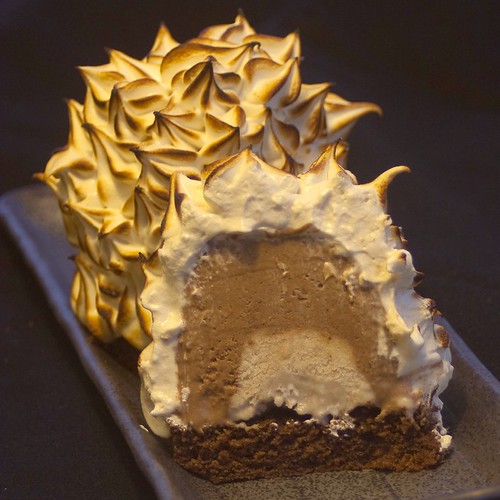
Anyway, yesterday, clad in shoes and a jumper for warmth for the first time this summer, the grey windy and rainy day provided a perfect backdrop for ice cream making and baking.  I was glad of the diversion from the miserable weather.  After much negotiation with the teen, the ice cream flavours were decided as i) chocolate and peanut butter & ii) banana.  The daring baker challenge called for us to make 2 types of ice cream from scratch along with a browned butter pound cake which would provide the base to build the baked alaska on.  I decided to make individual versions with the ice cream frozen into small French tumbler-style wine glasses lined with cling film.  Once the ice cream was un-molded and sat a'top the cake base, a simple meringue could be piped over the whole thing and then The molded ice cream is set upon a gluten free chocolate sponge base before being topped with a piped vanilla meringue which is baked or browned using a blow torch.  
The meringue was a very simple recipe of 2 large egg whites and 100g castor sugar whisked together with a teaspoon of vanilla extract folded in at the end.  I piped this quickly using a star nozzle over the  ice cream bases and then blasted them with a blow torch - I am yet to dare to bake ice cream!
I was persuaded to flavour the cake base with chocolate as well although for me, that has proved one step too far - it will some time before I eat chocolate cake again.

pair baked alaska gr


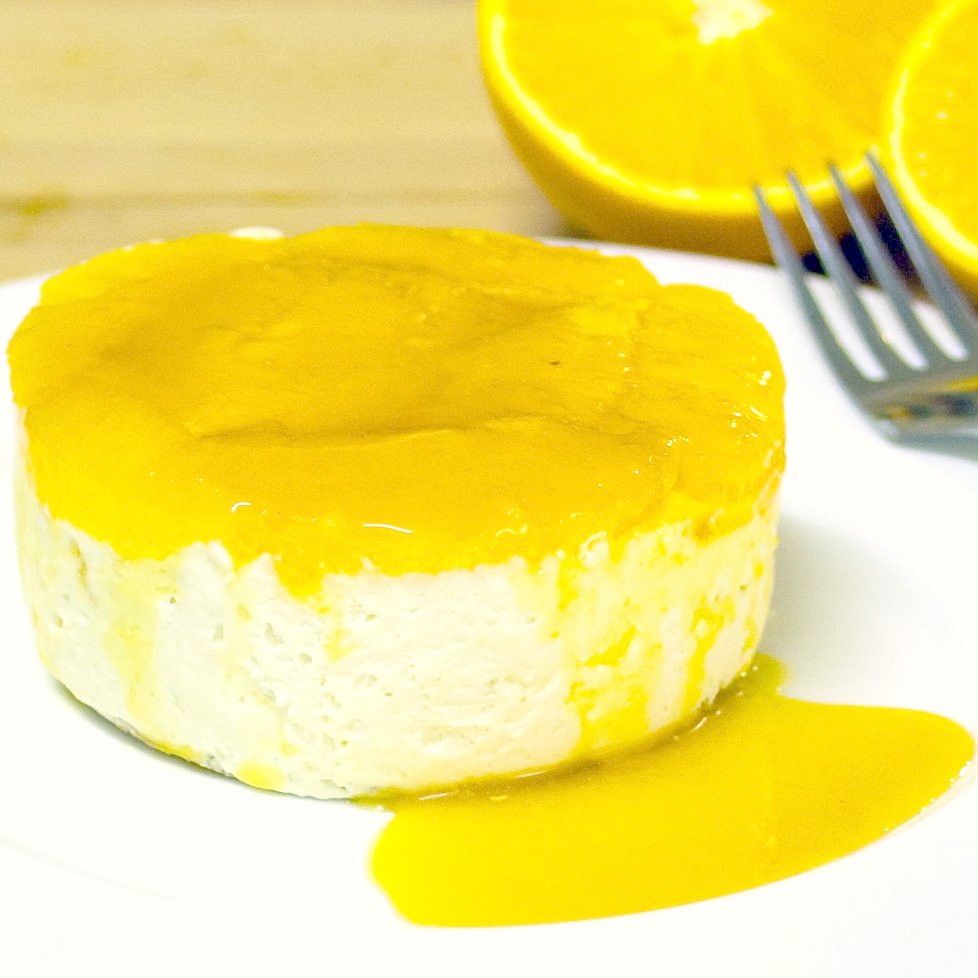
This dessert is rich beyond belief and even my baby French wine glasses proved way too big for the finished individual servings of baked alaska - if there is a next time, shot glasses will be used.  There was no need to serve a main course, this was a dessert-only dinner which had to be followed by a 5k run to settle my stomach!

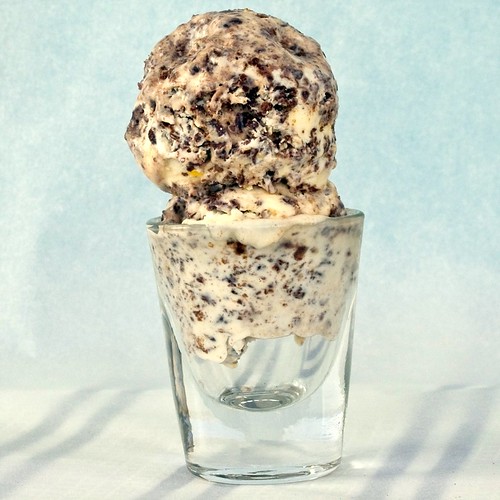
Much as I love a rich creamy ice cream (and for a simple flavour like vanilla I would definitely stick to the original recipe) for this combination of chocolate and peanut butter, I reduced the egg content of the recipe and used my own fall-back recipe for a (slightly) lighter ice cream.  This ice cream has been a regular for us all summer, we love the combination of salty crunchy peanut butter with a creamy sweet chocolate ice cream.  When I am making this for 'normal' consumption,  I would not add the peanut butter mix until the ice cream has almost finished churning so that the peanut butter ends up rippled through the ice cream rather than fully combined.  However for this baked alaska, I have fully mixed it in so that the ice cream will be consistently frozen throughout. 

Chocolate & Peanut Butter Ice cream:

  • 100g 70% Belgian chocolate
  • 240ml / 1 cup double (heavy) cream
  • 3tbsp dutch processed cocoa powder
  • 240ml / 1 cup double cream 
  • 125g crunchy unsweetened peanut butter
  • a pinch of sea salt
  • 30g agave nectar or sweet freedom
  • 360ml / 1.5 cups whole milk
  • 140g or 2/3 cup white sugar
  • 3 large eggs
  • 1 tsp madagascan vanilla extract 
  1. Break up the chocolate and place in a microwaveable bowl with 1 cup double cream.  Heat on high for 45 seconds then stir until the chocolate melts into the cream.  Whisk in the cocoa powder and set aside.
  2. Mix the peanut butter with the second cup of double cream, the sea salt and the sweetener, set aside.
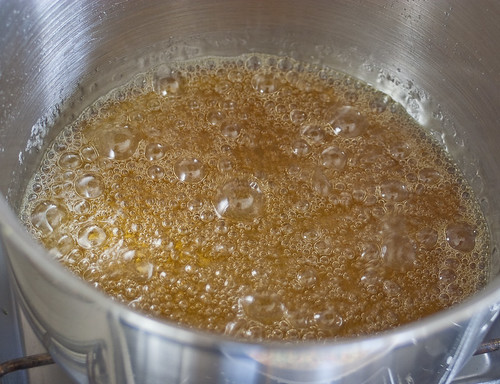
  3. In a heavy-bottomed pan, gently heat the milk and sugar stirring constantly until the sugar dissolves.  Remove from the heat as soon as this happens.
  4. Whisk the eggs in a large heatproof bowl.  Keep beating the eggs whilst pouring over the warm sweetened milk.  Beat until thoroughly combined, then pour the whole mixture back into the pan.
  5. Add the chocolate and cream mix to the pan and stir to combine.  Heat the whole chocolate custard mix very gently, stirring constantly until the custard is thick - do not let this boil, nor stop stirring until the custard is ready.  
  6. To check whether the custard is done, use your finger to draw a line through some cooked custard on the back of the spoon or spatula you are using to stir - when the bare line remains clear through the custard, then the mix is ready.  The custard will be thick and creamy but with a slightly jelly-like consistency, this is due to using whole eggs rather than simply egg yolks. 
  7. To cool the custard, you can simply place the whole pan in an ice bath or a sink or washing up bowl half-filled with cold water.  Make sure that you don't splash water into the custard as it cools - but don't put a lid on the pan as that will slow down the cooling process.  Change the water 2 or 3 times until the custard is at room temperature.  Now you can chill the custard in the fridge for an hour or so before freezing it.
  8. Once the custard is lightly chilled, add the peanut butter mix in large dollops but don't mix in too much (the churning will do this)  and now you can churn the mix as per your ice-cream maker's instructions.  If you don't have an ice-cream machine, you can decant the custard into a freezer-proof box and place in the freezer for 3 hours.  After three hours, take the box out and stir vigorously with a fork to break up the ice crystals.  Repeat this process hourly until the mixture is thick and creamy and too difficult to stir, at which point - if you are making baked alaska - you can decant the ice cream into the mold for freezing.

Thursday 27 May 2010

gluten free pièce montée (Daring Bakers May 2010)


The May 2010 Daring Bakers’ challenge was hosted by Cat of Little Miss Cupcake. Cat challenged everyone to make a piece montée, or croquembouche, based on recipes from Peter Kump’s Baking School in Manhattan and Nick Malgieri.

So, this month's Daring Baker challenge was to make a pièce montée or croquembouche.  This is an epic 3-D dessert of French and Italian origin and are served as wedding and baptism cakes in France.
A proper croquembouche (and mine is not quite) is a gravity defying pyramid of choux pastry puffs filled with sweet pastry cream and drizzled in caramel or maybe chocolate to provide some glue for construction purposes.  When I first figured out that the puffs were constructed around an inedible cone I was a bit disappointed, much the same as I when I (finally) realised that the 'celebration' cakes that languish in the windows of some bakeries are actually foam-filled moulds - Pah, humbug!
I decided that I wanted my version to be all edible though as a result, it is slightly less impressive than the architectural cone or cocktail stick versions.

piece montee full SM

The challenge recipe did not provide a gluten free alternative recipe so I used a recipe that I have been working on.

unfilled choux puffs SM

It isn't quite perfect or foolproof yet, so whilst the piped shapes puff up beautifully, they are not completely hollow inside.  Since I need to be able to fill the puffs with pastry cream, I cut a little hole out of the bottom of each puff and picked out the filling (which tends to sit on the bottom of the puff) then piped the filling in and replaced the bottom.


I used the suggested recipes for the sweet pastry cream which were chocolate and vanilla so filled half the choux pastry balls with each variety.  I like the element of surprise with different fillings, though last time I made this dessert with a raspberry mousse filling which was lovely too.

The most fun however, was in the decoration: spun sugar.  It was a damp day when I made the decoration which is not the best weather to be working with this delicate confection, you really need a dry tim environment, not Spring time (or any other time) in England.  I had to work fairly quickly to make the shapes then build the dessert and photograph it before the sugar softened.  I had no more than a couple of hours before the sugar began to soften and warp and the dessert began to gently collapse.  I got a bit carried away with the sugar spinning and made loads more than I needed.  Luckily the teen feels a need for empty calories (her definition) today so is crunching her way through it now!


And there we have it, a really fun daring baker challenge. I will publish the recipe once I have put the finishing touches to this gluten-free choux pastry recipe, then you should have a go at making one too.

Monday 24 May 2010

gluten free ginger bread spread (speculoos a tartiner)


I love speculoos biscuits. I mean, I really really love them! I used to get excited every time I discovered one of those slim, delicately spiced and caramelised biscuits nestled on the saucer almost hidden by my coffee cup. Until quite recently, though, I could only experience that thrill in Europe, not at home in the UK. Now times have changed and I could, if I wanted, buy bulk packs of speculoos in my local cash and carry (though in the UK they are just called caramelised biscuits, or some such). And now of course, even if I wanted to eat them, I couldn't, because they contain wheat.
So, when food blogger and writer David Lebovitz wrote a post on speculoos spread I was envious and intrigued in equal measure. I read the post a couple of times and then carried on as normal ignoring the faint pangs of jealousy growing in the pit of my stomach. Ignoring, that is, until one morning a few days later when the sun was shining, my kitchen was quiet and I, for once in a very long time, actually felt like cooking.
I searched around the internet until I found an ingredients list for the Lotus brand of 'Speculoos a Tartiner'. It made me laugh to read it - 57% crushed biscuits, sugar and vegetable oil to make a sweet smooth spread.  Duh, how obvious!


Somewhere in the depths of my freezer I had a gluten free half batch of David Lebovitz's Chez Panisse Ginger Snap dough which needed to be eaten. I figured that I could mix up some speculoos spices, sprinkle over the dough, knead it in and bake the revised version. This might on be an unorthodox way to make Speculoos but in this case, imperfections don't matter as I am going to grind up them up anyway!
One of my favourite memories of speculoos is the blend of spices mingling with the rich caramel flavour, so I decided that since I was already going to use my food processor to grind the biscuits, I might as well also make some caramel and grind that up to make caramel powder to use instead of sugar. So by 8.10 in the morning I was pouring a cup and a half of nut brown caramel onto my lined baking sheet to cool and preparing my spices to add to the defrosting log of ginger biscuit dough. One day, I may come back to this recipe again and create a proper gluten-free speculoos biscuit from scratch, but for now the buttery spicy dough of David's Chez Panisse ginger snap recipe is definitely delicious enough to satiate my immediate desire for this sweet creamy spicy spread.
I added extra spices to the dough to give a touch of speculoos fragrance to the ginger and cinnamon of the cookie dough.  My mix contained white pepper, coriander, nutmeg, clove, cardamom seeds and anise but you can add or remove spices to suit your palate (or dig out your favourite speculoos recipe and bake those, of course!).   You can of course use shop-bought speculoos biscuits instead but if you do you might need to reduce the caramel powder to 90g as speculoos are a bit sweeter than the ginger biscuits I used.
The spread will go through a strange "Oops, I've failed" phase as you mix it together.  In fact, it looked so odd that I didn't even bother taking photos of the method as I was so sure that it had gone wrong!  But I persevered and I was very glad I did as the crumbly lumpy mess slowly transformed into a smooth creamy spread. 
There is, of course, a flaw in my plan: I have absolutely no idea what the original 'speculoos a tartiner' tastes like so I have nothing to compare my own version to.  I can however confirm that it is delicious: gently spicy, sweet and smooth but with a few crumbs for texture.  If you can resist tasting this for a day or two, you will be rewarded with an even richer, more rounded flavour.
At the end of the day when the teen appeared, I mentioned that I had been messing around the kitchen but got no reaction (that's teenagers for you!) so I was amazed to discover the contents of the jar had almost disappeared the next morning ... I am now mixing up the next batch of cookies, I'll be making two jars this time!


ginger bread spread recipe (to make 1 jar)

ingredients:
  • 160g speculoos cookies or ginger snaps (as per details below) 
  • 120g ground caramel powder
  • 90g sunflower oil (or other neutral oil)
  • 60ml water
  • 15g nutritional soya lecithin (this will stop the spread separating once mixed & stored in the jar, it is great if you happen to have some but it is by no means essential)
  • 15ml lemon juice 
  • 1/4 tsp sea salt
method - spread
  1. weigh 160g cookies into a food processor and process to a fine-ish powder, make sure there are no chunks left.
  2. add 120g powdered caramel (or 90g depending on your taste) and process again to combine.
  3. sprinkle in the lecithin (if using) and process again till fully combined.
  4. leave the processor mixing and add 1/4 tsp sea salt through the feeder tube.
  5. now pour in 90g oil and let the mix process to a rough puree
  6. pour in the lemon juice and don't panic when the mix turns into thick pasty lumps, it is OK (promise!)
  7. gradually tip in the water watching the mix as it becomes smooth and homogenous. stop adding water when you think you have the consistency you want - if you are using wheat-flour biscuits you may find you need slightly less water than with gluten free.
  8. stop the processor and taste the spread, add a little more lemon juice if you like.
  9. decant into a sterilised jar and store in the fridge for up to 2 weeks.
speculoos biscuits:
  • a half batch (with extra spices) of David Lebovitz's chez panisse ginger snaps*
  • extra spices ground in coffee grinder: 3 white peppercorn, 1 black peppercorn 1 cardamom pod, 2 clove, a good grating of nutmeg, 1/2 star anise.
  • if you are making your own biscuits, add the extra spices at the same time as those in the recipe and follow the method as shown.
  • * to make the recipe gluten free replace the flour in the recipe with 260g rice flour PLUS 1/2 tsp xanthan gum or use your favourite gluten free mix.
ingredients: caramel powder
  • 200g white sugar
  • 135g water
method: caramel
  1. line a large heavy baking sheet with non-stick baking paper and set aside.
  2. take a large heavy based saucepan, sprinkle the sugar and water into the pan and it on a gentle heat without stirring.
  3. leave the pan on the heat allowing the sugar to dissolve and the syrup to boil gently.
  4. keep an eye on the gently boiling syrup as it begins to colour, leaving it until it is a rich middling brown colour.
  5. pour the syrup onto a lined baking sheet and leave it to set.
  6. once the caramel is cold and set, break it up into small pieces and place them in a food processor.
  7. whizz until the caramel becomes a fine yellow powder, then tip out of the processor and store in an airtight jar.

Tuesday 27 April 2010

gluten free jam roly-poly, Daring Bakers April 2010

The April 2010 Daring Bakers’ challenge was hosted by Esther of The Lilac Kitchen. She challenged everyone to make a traditional British pudding using, if possible, a very traditional British ingredient: suet. 

It is unseasonably warm and blue outside so making such a traditional winter pudding seems a little anachronistic as I watch my courgette seedlings stretch up towards the sunlight, growing at least a centimetre a day.  The Daring Baker challenge for this month was to make a pudding of suet pastry, suet was the only required ingredient, so this could have been anything from steamed treacle pudding to a wintery steak and kidney savoury pudding.  I was at a loss for an idea of what to make until I found this, in a local junk/kitchenalia shop and when I found the original instructions inside, then my mind was made up - a jam roly poly in its' own proper tin.

jam roly-poly -2

Jam roly-poly is the epitome of proper English puddings, a suet pastry roll filled with sweet jam and cooked by a combination of steaming and baking, this pudding would be a familiar item to any school pupil educated in both state and private schools in the UK last century (and yes, of course that includes me!).
I compared the recipe supplied with the tin to the version that appears in the 1923 copy of Mrs Beeton's Cookery that was given to my Grandmother in that year and they were almost identical, Mrs B suggested less baking powder and more salt so I tweaked the recipe a little to find some middle ground.
A quick glance at more modern recipes revealed that very little else had changed, so I was ready to roll!  Apparently jam roly-poly is also known as Dead Man's Leg, which is slightly less appetising I think.  From that nick-name, the pudding then became known as Dead Man's Arm as house-wive's used the sleeves of their husband's old shirts to contain the pudding for baking, personally I think I will stick with roly-poly!

jam roly-poly in tin

Creating a gluten free version took a little thought.  I think that if I was really keen on this type of pudding, I would spend a little more time developing the pastry recipe.  In an ideal world, the pastry would be more flakey and layered than my version, which is slightly softer in crumb than I would aspire to.  The pastry for the pudding is not sweet, there is a touch of sugar to hint at the direction of the filling but the sweetness is supplied by the jam filling.

whole jam roly-poly

I used, quite literally, the first jar of jam I could find in my store cupboard.  Now I have to own up that I have 3 batches of jam made last year, all of which were stashed in a cupboard quickly and label-less.  I know, big sin!  So when I grabbed the first jar, I was hoping for a thick strawberry jam with lots of fruit (and possibly a tad to much pectin) which would have remained in a thick layer between the rolls of the pudding.  Unfortunately I grasped a jar of quince jelly, sweet yet gently acidic but soft rather than sticky in texture.  The jam, as you can see in the picture, has soaked into the pastry a little, so the roll effect of the pastry is slightly less defined than I would like.  This doesn't detract from the taste at all, and with a slick of home made custard, this makes a delicious and filling winter pudding.  The pudding only takes about 15 minutes to put together, and an hour or so to cook, so it is not a difficult recipe to try (once the weather is cooler!).

jam roly-poly, gluten-free pudding

Jam Roly-Poly

Ingredients
  • 95g rice flour
  • 50g corn flour
  • 50g tapioca starch
  • 1dsp arrowroot flour
  • 1dsp psyllium husks
  • 2 tsp baking powder
  • 1/2 tsp salt
  • 40g castor sugar
  • 100g gluten free (or butcher's) suet
  • 120ml milk
  • 150g jam
Equipment
  • Mixing bowl
  • baking paper
  • foil, 
  • baking or roasting rack that fits inside a roasting tray
Method
  1. Cut and grease a piece of baking paper approx 30cm square.
  2. Cut a piece of foil of a similar size (not needed if you have a roly poly tin).
  3. Preheat the oven to 200°C.
  4. Mix together all the ingredients except the jam to create a firm pastry.
  5. Tip the pastry out onto a floured surface and roll out to create a rectangle of pastry approx 15cm x 30cm (with the short side nearest you).
  6. Spread the surface of the pastry with all the jam.
  7. Roll up the pastry from the short end facing you, to create a roll 15cm by about 8cm deep.
  8. Using a couple of spatulas, lift the roll onto the greased baking paper and roll the baking paper loosely around the pudding (the pudding needs room to expand as it cooks).
  9. Fold the ends to create a tight seal, if you have a proper tin then pop the wrapped pudding into the tin and close.  If not then wrap the pudding loosely in a piece of foil, again sealing the ends tightly but leaving room for the pudding to expand.
  10. Place the wrapped pudding on a roasting rack in a roasting pan filled with water to a level just below the roasting rack, loosely cover the pan with foil and place in the pre-heated oven for 1 hour.
  11. When the pudding is cooked remove the pan from the oven, and unwrap the pudding carefully, beware of any build up of steam.
  12. Cut the pudding into slices about 2cm wide and serve each slice with custard, cream or ice cream.
gluten-free jam roly-poly & custard

Saturday 27 March 2010

Daring Bakers March 2010 Orange Tian


The 2010 March Daring Baker’s challenge was hosted by Jennifer of Chocolate Shavings. She chose Orange Tian as the challenge for this month, a dessert based on a recipe from Alain Ducasse’s Cooking School in Paris.

 This is my third challenge and I feel as though I have got the hang of the concept. I have read enviously as other daring bakers amended recipes and thought up interesting flavour combinations as variations on the published recipes. Whilst I had some wild ideas and great ambitions for variations on this month's theme, I have a bad back at present which means I can only stand for a few minutes at a time. So instead of being an opportunity to get creative, simply the act of making this was the challenge this month!
I live gluten free I also adapted the pastry recipe to create a gluten free version. I based this recipe on a version that I found here and was delighted to discover, at the same time, another gluten free blog to read (thanks Natascha!) and another reason to brush up my French. To make my life a bit easier, I substituted the marmalade for the orange and cardamom marmalade that I made recently.


Preparation time:
- Pate Sablee: 20 minutes to make, 30 minutes to rest, 15 minutes to roll out, 20 minutes to bake
- Orange segments: 20 minutes, overnight to sit
- Caramel: 15 minutes, overnight to sit
- Whipped Cream: 15 minutes
- Assembling: 20 minutes
- Freezer to Set: 10 minutes

Equipment required:
• Cookie cutters . Ideally, you should have about 6 cookie cutters to build the desserts in and cut the circles of dough (see photo). The cookie cutters will be the size of your final dessert, so they should be the size of an individually-sized tart mold. If you don’t have round cookie cutters you could use an individually-sized cheesecake mold without its base.
• A food processor (although the dough could be made by hand too)
• A stand-up or hand mixer
• Parchment paper or a silicone sheet
• A baking sheet
• A rolling pin

For the gluten free pate sable - my recipe is here

For the Marmalade:

* 100g freshly pressed orange juice
* 1 large orange used to make orange slices
* cold water to cook the orange slices
* 5g pectin
* granulated sugar: use the same weight as the weight of orange slices once they are cooked

1. Finely slice the orange and place in a medium-sized pot filled with cold water.
2. Simmer for about 10 minutes, discard the water, re-fill with cold water and blanch the oranges for another 10 minutes.
3. Blanch the orange slices 3 times. This process removes the bitterness from the orange peel, so it is essential to use a new batch of cold water every time when you blanch the slices.
4. Once blanched 3 times, drain the slices and let them cool.
5. Once they are cool enough to handle, finely mince them (using a knife or a food processor).
6. Weigh the slices and use the same amount of granulated sugar.
7. In a pot over medium heat, add the minced orange slices, the sugar you just weighed, the orange juice and the pectin.
8. Cook until the mixture reaches a jam consistency (10-15 minutes).
9. Transfer to a bowl, cover with plastic wrap and put in the fridge.

For the Orange Segments:

* 8 oranges

1. Cut the oranges into segments over a shallow bowl and make sure to keep the juice.
2. Add the segments to the bowl with the juice.

For the Caramel:

* 200g granulated sugar
* 400g orange juice

1. Place the sugar in a pan on medium heat and begin heating it.
2. Once the sugar starts to bubble and foam, slowly add the orange juice.
3. As soon as the mixture starts boiling, remove from the heat and pour half of the mixture over the orange segments.
4. Reserve the other half of the caramel mixture in a small bowl — you will use this later to spoon over the finished dessert.
5. When the dessert is assembled and setting in the freezer, heat the kept caramel sauce in a small saucepan over low heat until it thickens and just coats the back of a spoon (about 10 minutes). You can then spoon it over the orange tians.

[Tip: Be very careful when making the caramel — if you have never made caramel before, I would suggest making this step while you don’t have to worry about anything else. Bubbling sugar is extremely, extremely hot, so make sure you have a bowl of ice cold water in the kitchen in case anyone gets burnt!]

Set cream

* 200g heavy whipping cream
* 3 tbsp hot water
* 1 tsp Gelatine
* 1.5tbsp orange marmalade (see recipe above)

1. In a small bowl, add the gelatine and hot water, stirring well until the gelatine dissolves. Let the gelatine cool to room temperature while you make the whipped cream.
2. Combine the cream in a chilled mixing bowl. Whip the cream using a hand mixer on low speed until the cream starts to thicken for about one minute. Increase the speed to medium-high.
3. Whip the cream until the beaters leave visible (but not lasting) trails in the cream, then add the cooled gelatine slowly (discarding the water) and beating continuously.
4. Continue whipping until the cream is light and fluffy and forms soft peaks. Transfer the whipped cream to a bowl and fold in the orange marmalade.

Assembling the Dessert:
Make sure you have some room in your freezer. Ideally, you should be able to fit a small baking sheet or tray of desserts to set in the freezer.
Line a small tray or baking sheet with parchment paper or a silicone sheet. Lay out 6 cookie cutters onto the parchment paper/silicone.
Drain the orange segments on a kitchen towel.
Have the marmalade, whipped cream and baked circles of dough ready to use.
Arrange the orange segments at the bottom of each cookie cutter. Make sure the segments all touch either and that there are no gaps. Make sure they fit snuggly and look pretty as they will end up being the top of the dessert. Arrange them as you would sliced apples when making an apple tart.
Once you have neatly arranged one layer of orange segments at the bottom of each cookie cutter, add a couple spoonfuls of whipped cream and gently spread it so that it fills the cookie cutter in an even layer. Leave about 1/4 inch at the top so there is room for dough circle.
Using a butter knife or small spoon, spread a small even layer of orange marmalade on each circle of dough.
Carefully place a circle of dough over each ring (the side of dough covered in marmalade should be the side touching the whipping cream). Gently press on the circle of dough to make sure the dessert is compact.
Place the desserts to set in the freezer to set for 10 minutes.
Using a small knife, gently go around the edges of the cookie cutter to make sure the dessert will be easy to unmold. Gently place your serving plate on top of a dessert (on top of the circle of dough) and turn the plate over. Gently remove the cookie cutter, add a spoonful of caramel sauce and serve immediately.
Resources:
http://www.wisegeek.com/what-is-a-tian.htm (An article about the dessert known as tian.)
YouTube link on how to segment an orange: http://www.youtube.com/watch?v=ZG5mcEEBlcI
To learn more about Pectin: http://en.wikipedia.org/wiki/Pectin
What to substitute for Pectin: http://www.gourmetsleuth.com/Dictionary/P/Pectin-6222.aspx

Friday 26 March 2010

gluten free sablé pastry recipe (sweet pastry for desserts)


Here is the gluten free sablé pastry that I created for a Daring Baker's challenge.
This is a simple sweet pastry which is great for making sweet tart cases or even simple biscuits to serve with rich desserts.  It is based on a combination of recipes - a gluten free sable recipe that I found here along with my shortcrust pastry recipe here.  This volume of pastry made 8 x 10cm tart cases.
Don't skip the chilling step, it really helps to firm up the dough and makes it much easier to handle.  You can freeze the dough either unbaked, at the chilling stage or once the tart case(s) have been baked blind.

gluten free sablé pastry
  • 125g rice flour
  • 1/4 tsp xanthan gum
  • 25g glutinous rice flour
  • 25g cornstarch
  • 5g arrowroot flour
  • 60g cold cubed salted butter (if unsalted, add a pinch of salt to the dough)
  • 60g icing (confectioners) sugar
  • 60g ground almonds
  • 1 whole egg
method:
  1.  sieve the flours together with the xanthan gum
  2. beat the butter and sugar together with the ground almonds and rice flour until you have fine bread crumbs.
  3. add the whole egg and beat again to bring together.  if the pastry doesn't naturally form into a ball, give it a squeeze and see if that holds it together - if so then take it out of the mixer and gently knead together to form a ball.  If it is still too dry, add a little cold water if the pastry dough and beat a little longer before testing again and kneading in to a ball.
  4. form the kneaded dough into a rectangular slab (more surface area will chill more quickly), wrap in cling film and chill for 30 minutes or until you are ready to use it.
Roll out and use as per your recipe, dusting the work surface and pastry with a little rice flour if it is sticky.

You will need to bake this pastry blind before you fill it.  To do this:
  • roll the pastry out and line your tart tin.  
  • cut a piece of baking parchment to fit the flat base inside  your filled tin.  
  • place the paper onto the pastry base.  
  • cover the baking parchment with a layer of dried beans, rice, lentils or baking beans if you have them (ensure that the beans remain on the parchment otherwise they will bake into the pastry base)
  • bake the tart case for 20 minutes or so until the edges are lightly brown and the base of the pastry case is firm.
If rolled to 1/4" thickness, bake at approx 175°C for 15-20 minutes until golden.  If the centre is a little undercooked, you can remove the beans and the paper and return the case to the oven for 5 minutes.

    Monday 15 March 2010

    a quick apology


    I am frustratedly absent from blogging at present, and am very sorry for this. I have been on great painkillers that have made back pain and arthritis completely manageable for the last year or so, but my body has decided that it no longer likes the drugs.  So until I can get the painkillers right, or jump the queue for back surgery, I am taking a quiet break.  It hopefully will only be another week or so until I have this cracked but until then, under warning from the teen (who will verify that I talk drug-induced jibberish all day), I am banned from blogging!  (By the way, I would like to point out that I consider myself far too young to have arthritis or need back surgery ... since my bio pic of a brownie will not reveal this!) 


    In the meantime, check out this food photography and cooking course that I hope to do later in the year with one of my favourite photographers, an amazing cook and one of my favourite parts of France - what could be better!

    Monday 1 March 2010

    vanilla ice cream recipe


    I hesitate to say it, but I think that we may be slowly emerging from this long cold winter. Down here on the south coast, we have been taken aback by the volume and frequency of the snow, and I know even now it is too early to say it is past, merely that we may be over the worst!

    gervais - j'en veux logo


    The last burst of snow was heralded by the most rapid freeze I have ever experienced, it reminded me of a favourite film, The Ice Storm, and the creeping cracking ice grasping and enrobing everything in its' path. That Wednesday evening, wet rainy roads turned to sheet ice in a matter of minutes and our simple journey from one part of town to another became an epic adventure - sliding backwards down a hill, slipping off the road, into a wall and failing even to get over speed bump due to the lack of momentum and the severity of the ice. Having said all that you might think that our car was written off and we both ended up in neck braces, but no, all these manoeuvres were carried out gracefully at no more than 5 miles per hour, thankfully! The following day delivered an epic walk up iced hills to get to work, I fell over so many times on the way there, far too many times to count during a mere couple of miles walk!

    I don't recollect ever spending a full winter sleeping in climbing socks, pj's, thermals and a fleece under a thick wool blanket and a down duvet. Crazy cold, or crazy susceptibility, at least. Whilst I haven't enjoyed the piercing cold it has, for some reason, awakened an interest in icecream. I have found myself thinking often about methods of making, ingredients and flavours. I have a list of recipes to try, but before I do, I thought that I would indulge in a flavour that I hope will be well received at home.

    vanilla ice cream scoop 4

    There seems to be a sudden fashion in our house for all things peanut butter related. My husband has always snacked on wholemeal toast with peanut butter and the teen could demolish boxes full of Reese's peanut butter cups given the chance, and I have recently become very fond of a bastardisation (or should I say adaptation?) of the Indonesian salad Gado Gado. This recipe isn't actually that far from the real mccoy, but most closely ressembles the gado gado salad that I remember feasting on at Rasa Sayang in Soho more than twenty years ago.  I am not sure how authentic that meal really was though it was definitely a great meal in wonderful company.  Isn't it funny how the memory of a good meal sticks with you, even down the years?

    Anyway, back to peanuts. They have most recently made an appearance in a chocolate peanut ganache made to fill some not-too-good macarons I made. We decided not to fill them as, although tasty, they were not up to much visually. So with the choc peanut butter ganache on the worktop, I was at a loss for something to do with it. Not for long though, as my ice cream ponderings came flooding back.  I mixed up and churned a batch of vanilla ice cream, which in its' naked form is often ignored in our freezer.  However I split the mix in half and stirred half a batch of chocolate peanut ganache into half the ice cream before freezing.  I have managed to salvage a scraping to photograph whilst the plain vanilla has lingered untouched, so far.  I will crunch up the failed batch of chocolate macarons and stir them into this half batch, along with some crushed salted peanuts and grated Galaxy chocolate.  I know it won't be hanging round for long after that!


    Vanilla ice cream
    • 5 egg yolks
    • 500g double cream
    • 150g castor sugar
    • 250g whole milk
    • 1 tsp vanilla extract (*please see foot note)
    • a pinch of sea salt.
    For a proper recipe and method, can I suggest that I have a look at David Lebovitz's blog and his vanilla ice cream recipe here.  My method is not ideal, indeed frankly, it is just lazy and it can easily go wrong!
    Still, if you haven't heeded my warning, here is my method:
    1. mix the egg yolks together with the vanilla extract in a 1 pint pyrex jug.
    2. pour the cream, milk and sugar into a thick bottomed pan
    3. heat the pan gently, stirring constantly until the sugar has dissolved, this will happen whilst the milk is finger-hot if you use castor sugar.
    4. pour about 1/4 pint of the just-warm cream mixture into the jug whilst stirring the egg yolks briskly with a fork,  as long as the cream is cool the eggs should mix into the cream without cooking
    5. whilst stirring the pan, pour the egg yolk mix back into the pan.
    6. put the pan back on to the heat and continue to warm the cream mix over a low heat whilst stirring constantly but gently.
    7. keep stirring gently as the cream heats up slowly towards boiling, spluttering a little.
    8. let the cream simmer and continue to stir gently.  You should notice the cream thickening gradually,  don't stir too vigorously or else the mix can separate.
    9. after 5 minutes take the pan off the heat.  now you want to stop the pan cooking and start cooling the custard down as soon as possible.  you can do this by putting the pan in a bowl filled with iced water, unless you are like me and never have enough room in your freezer for the quantities of ice required to do this efficiently.
    10. the alternative is to fill your washing up bowl about 1/3 full with some cold water and place your pan into the cold water - don't let go of the handle until you are certain that the pan is not floating & make sure that tap is turned off.
    11. the cold water will begin to cool the ice cream down, change the cold water periodically to speed up the cooling proces.  stir periodically to ensure a skin doesn't form (and to help it cool quicker).
    12. on a cold-ish winter's day it took about 40 minutes for my custard to cool down.
    If you summarise that, you warm your milk, cream and sugar, chuck a bit in your egg yolks and stir, pour the yolks into the main pan and stir constantly until the custard is thick.  Then cool by putting the pan in water.  Top tip - don't be an idiot and leave the tap running whilst the pan is in the water as you might end up with watery custard!
    1. set up your icecream machine and pour the mixture in to churn as per the machine's instructions.
    2. if you don't have an ice cream machine you can pour the cream mixture into a 1L freezer box and place in the freezer.  Take the ice cream out every 60 minutes, stir thoroughly then replace in the freezer.
    3. whilst the ice cream is churning, take half a recipe of chocolate peanut ganache and warm very gently in a microwave or bain marie until just melted.
    4. pour in 50g double cream to thin, then add this sauce to the ice cream in the last 5 minutes of churning (if you making this manually, pour the sauce in when the ice cream is quite thick, give a good stir to distribute it like a raspberry ripple icecream, then freeze for a final hour).
    5. store the churned icecream in the freezer until ready for use.  take it out of the freezer 10-15 minutes before serving to allow it to soften up before serving.
    I forget how easy it is to make a really top quality ice cream at home, most often because I don't have much room in the freezer to store it.  Admittedly our freezer is getting a little bit full now, 2 flavours of ice creams, 2 sorbets and tiramisu - the dessert bug has really bittten me, so watch out for more recipes soon!

    *using vanilla extract - I don't want to be controversial, by all means use a vanilla pod but it does add an extra stage infusing the milk/cream before adding the sugar.  I use Nielsen Massey Madagascan vanilla extract and find it excellent in most desserts, especially in sweet cooked/baked products.

    Saturday 27 February 2010

    gluten free tiramisu, daring bakers feb'10


    The February 2010 Daring Bakers’ challenge was hosted by Aparna of My Diverse Kitchen and Deeba of Passionate About Baking. They chose Tiramisu as the challenge for the month. Their challenge recipe is based on recipes from The Washington Post, Cordon Bleu at Home and Baking Obsession.

    I greeted this Daring Baker's challenge with some degree of trepidation as tiramisu is not a dessert that I have chosen to eat very often over the years.  I have never seen a gluten free version which means my memories are even more vague and I am dredging back a long way for a point of reference.

    According to the Daring Baker hosts, Aparna of My Diverse Kitchen and Deeba of Passionate About Baking, this is the story behind this rich dessert:

    "The perfect Tiramisu is a balance of flavors of a sweet zabaglione, strong coffee, marsala wine, creamy mascarpone cheese and the dusting of unsweetened cocoa.  
    Tiramisu is said to have its origins in Treviso (Italy), and there are quite a few stories about how it came to be created.  One story traces the tiramisu as far back as the Renaissance claiming that it was first made in honour of the visit of Grand Duke Cosimo di Medici to Tuscany. Yet another one points to the tiramisu being an adaptation of the "Zuppa Inglese" referring to the sponge cake and cream layered English Trifle.  However, experts in this area generally agree that the tiramisu as we know it today, was born in the ‘70s.  Some believe that the Tiramisu was created in the the Le Beccherie (a restaurant in Treviso). Others suggest that Tiramisu was first made in 1971 by an Italian baker named Carminantonio Iannaccone in a small bakery in Treviso, Italy."

    I love the fact that two passionate bakers from India are encouraging us to create a multi-faceted dessert from Italy in our many kitchens all around the world.  That is the Daring Bakers for you!

    For any-one who cares (and that includes me!) tiramisu, or rather tirami su literally means "pick me up" or "pull me up" in reference to the effects of the sugar and espresso in the dessert.

    There were no shortcuts in this recipe and method, the challenge was made up of 4 technical components, all of which had to be followed in order to successfully complete the challenge.  The whole process took me 5 sessions to complete, baking the biscuits and making the cheese in evenings during the week, then starting the zabaglioni and the pastry cream early on a weekend morning before constructing and chilling the dessert later the same afternoon.  Of course, as all bloggers know, the dish isn't completed until photographed and written up so that accounts for the final session today.  I am very glad that I chose to complete this challenge very early in the month as I think I would have panicked if I had left this to the last minute!


    As this dish is quite complex, I am going to break down the elements into separate posts which I will add in the next few days:
    • savoiardi biscuits
    • home-made marscapone cheese
    • cooked zabaglioni
    • pastry cream 
    Each component is a valuable technique in its' own right and very useful in a baker's repetoire.  Compiling the dish seems a touch bizarre after all the effort that goes into making the elements.  Fundamentally, you just mix all the sauce elements together until they are creamy, then layer the cream with the savoiardi biscuits.  Ta-daa!! Tiramisu :)

    tiramisu

    Thursday 18 February 2010

    orange & cardamom marmalade bars


    UMME5EB3TG5E
    Now that I have made marmalade, I am constantly thinking of recipes to include it.  I really don't want to find any jars stuffed at the back of a cupboard two years down the line.
    I have been working in the bakery at work for the past couple of weeks.  We are busy with new customers so the orders are coming in fast and furiously and it is all hands on deck.  At present though, we just don't have enough hands so we are all flat out all day trying to get enough baked and packed to fill the pallets quickly enough.  It is always good to be back doing the hands on work but the collapsed discs in my back are screaming out by the end of every day and it is all I can do to swallow some food, painkillers and collapse.  It is almost unheardof for me, but twice this week I haven't even had the energy to turn my computer on at home!
    I spend my days thinking of healthy sensible recipes that I can make at home which will sustain me during each working day and ensure that I finish the day feeling healthy rather than drained.  However, having made marmalade this week, everything I make this week is going to contain this rich bitter jam and so will not rank too highly on the health scales!
    orange marmalade bars

    This bar is (yet!) another variation on Nanaimo bars, but the filling is a blend of bittersweet marmalade and custardy cream.  With a crushed chocolate biscuit base and a chocolate topping, it is also a more substantial take on jaffa cakes.  I have changed the recipe a bit, to lower the sugar content and take out the raw egg in the base.  I am really looking forward to the bitter note of the marmalade cutting through the sweetness of the custardy layer and the chocolate on top.  A little piece mid-afternoon should give me just enough ooomph to get me through till the end of the day & see me home with a smile, I hope, and that will definitely make me more popular in my house!

    orange & cardamom marmalade bars
    base layer
    • 100g butter
    • 10g ground flax with 30g water
    • 300g gluten free chocolate shortbread crumbs
    • 50g ground almonds
    • 25g icing sugar
    • 1/2 tsp vanilla extract
    1. Line an 8" square baking tin
    2. Melt the butter
    3. Mix flax and water & leave to stand for 5 minutes.
    4. Add 1/2 tsp vanilla extract then stir it all into the butter.
    5. Stir the butter mix in to the crumb then pour into the prepared tin.
    6. Press in to create a firm even base, chill until the middle layer is ready.
    middle layer
    • 100g softened butter
    • 100g marmalade (I used my orange and cardamom recipe here)
    • 25g custard powder
    • 125g icing sugar
    1. beat butter and marmalade together until smooth and creamy
    2. sieve the icing sugar and custard powder together then add to the butter
    3. beat with a hand beater until well combined and smooth
    4. spread over the biscuit base and chill
    top layer
    • 55g milk chocolate
    • 60g (70%) dark chocolate
    • 25g butter
    1. melt chocolates and butter together over a low heat or in microwave
    2. allow to cool (but still liquid)
    3. pour over the middle layer and chill until set

    Monday 15 February 2010

    gluten free pot sticker dumplings (metric)


    I posted the original recipe and method for these a few months ago, but never quite got round to converting the recipe from cups into metric measures.
    The teen and I made these as part of our spurious Chinese New Year's Eve feast dinner this weekend so I have finally got round to writing up the metric measures.  This time we made the filling with minced chicken thighs (including the fat & a bit of finely chopped skin) replacing the pork, as we were having pork belly elsewhere in the meal, it made a great substitution with a dash of chinese rice wine & an extra pinch of salt.

    Please refer back to the original post for the original filling and method here.


    Pot sticker wrappers:
    • 175g rice flour
    • 40g tapioca starch
    • 40g corn starch
    • 46g sweet rice flour
    • 1 tsp xanthan gum
    • 1/2 tsp psyllium husks
    • 1/2 tsp kuzu
    • 1/4 tsp salt
    • 1 large egg
    • 120g cold water
    Method:
    1. Sieve all the dry ingredients together.
    2. Beat the egg into the cold water.
    3. Whilst stirring your flour, gradually pour in the water making sure the flour absorbs the water as you go.
    4. Bring the lumps of flour together in the bowl by hand.
    5. If the dough is too wet or sticky add more sweet rice flour, if it is too dry add water 1 tablespoon at a time.
    6. Knead this for a couple of minutes on a work surfaced sprinkled with a little corn starch
    7. Divide the dough into 4 equal pieces.  Leave all but 1 piece in a bowl under a damp tea towel.
    8. Dust your work surface with corn starch and roll out the small piece of dough until it is between 1/16th" & 1/8th" thick.  
    9. Using a 3-3.5 inch round cutter, cut out as many shapes as you can, put the circles to one side under a damp cloth and carry on with each piece of dough in turn.  I found that if you collected up the trimmings and sprinkled a couple of drops of water on them, you could combine them into the next piece of dough without any problems.
    10. Carry on until all the pot stickers are cut out.  This recipe makes 50 dumpling skins.
    click here for a filling recipe and cooking method

    Sunday 14 February 2010

    oxtail stew recipe

    It's still winter, it's still cold and there is even more snow forecast.  On top of that, it is February, credit card bills from Christmas are overdue and there still isn't enough sun or daylight to keep everyone in good cheer.  At this time of year I find myself turning to slow-cooked stews, vegetable soups and casseroles for the family. 
    Last week, I spotted oxtail on the butchers counter and bought a few pieces to try it on the family. 
    The teen grew into a phase of really fussy eating between about 5 and 13,  she has slowly eased out of it trying first mussels, then meat with bones in (that was a big one!) but I am yet to persuade her of the flavour and enjoyment to be found in offal and other trimming cuts.  But she does love beef, so since it is less than a pace from a rump steak to the tail, I thought I would risk the minimal cost and make an oxtail stew.
    oxtail stew
    This is a very easy and lazy recipe making best use of a slow cooker or aga to gently heat the stew for hours at a time. Early one morning this week, whilst waiting my eyes to focus in the grey dawn and the coffee to brew, I roughly chopped up some celery, carrots & onions and slowly fried them off in a touch of olive oil with a clove or 2 of garlic added. This was piled into the slow cooker with herbs, a few pieces of oxtail, some left over red wine and beef stock.  And that was it, slow cooking for 10 hours to create a rich and unctous stew with delicious gravy. 
    Serve with good crusty bread or mashed potato, a touch of mustard and a glass of red wine or proper beer.

    oxtail stew (per person)
    • 2-3 pieces oxtail
    • 1/2 medium onion
    • 1/2 clove garlic, finely chopped
    • 1 carrot, sliced
    • 1/2 stick celery, sliced
    • 1 tsp rice flour
    • 1/2 sprig thyme
    • 1/2 bay leaf
    • 1/4 pt beef stock
    • 1 glass red wine (or more beef stock)
    1. dry fry the oxtail in a hot pan to caramelise all over then take out
    2. add a dash of olive oil, the chopped onion and garlic to the hot pan, fry over low heat for 5 minutes
    3. add the carrot and celery, fry for another 5 minutes
    4. sprinkle over flour, and fry for a couple more minutes
    5. transfer the contents of the frying pan to a casserole or slow cooker
    6. add the oxtail and herbs
    7. pour over the stock and wine, and stir 
    8. if using slow cooker, close lid and turn onto low heat for 10 hours
    9. for casserole, bring to the boil on a hob then transfer to a low oven (140°C) for 3-4 hours
    10. to serve, remove herbs, serve with a green salad and crusty bread or mashed potatoes and mustard.

    Thursday 11 February 2010

    Buy "A Hand for Haiti" E-recipe book NOW!


    Lauren who blogs at Celiacteen has pulled together a collection of recipes donated by bloggers from all around the world, which is being sold to raise funds for the Red Cross in Haiti.

    This is a collection of over 85 recipes and more than half of them are gluten free.  Every one needs a few gluten free recipes in their collection so what a great way to gain a few new recipes as well as a chance to discover lots of food bloggers from all around the globe.
    This is a great cause, and really we are lucky to be rewarded with so many great recipes for such a small donation. 

    The book sells for a minimum of $10 Canadian dollars, but when you consider that $15 Canadian dollars is still less than £10, this book is worth at least $15 Canadian dollars of every-one's money.

    PLEASE BUY THIS TODAY - if you buy before the end of FRIDAY 12th FEBRUARY,  the Canadian government will MATCH each donation that you make.  Really!  So, spend a tenner, get a cook book and the warm cosy feeling of knowing that $30 Canadian dollars will be donated to the Red Cross for Haiti.

    There isn't much more to say, just buy it!

    Thank you :)

    Monday 8 February 2010

    Puy Lentils recipe


    The teen has just burnt a pan of lentils.  She was making some for her to take to college for lunch tomorrow and she used the last of the puy lentils we have in the house.  She is currently trying very hard not to slam the cupboard doors as she clears up the mess and the burnt pan.  She is not a happy kid as she is faced with having to eat a canteen lunch tomorrow.  I was going to suggest making an alternative version but decided to bite my tongue and beat a hasty retreat instead.

    In the kitchen cupboard we have a good selection of  pulses : brown lentils, yellow split peas, chana dahl, chickpeas, kidney beans, black eye peas, cannelini and haricot, just off the top of my head.  But I know that not one of these will make an acceptable substitute for her, not today.  So the teen thinks she is going hungry and the world is a dark dank place.

    When I was her age, doing A-levels, I attended a college with tertiary and sixth form classes on the same site.  The subsidised canteen was run by the City & Guilds catering students, and the food was good (most of the time!).  That didn't stop me though, on a quest to save my allowance and part-time wages for the weekends.  I would walk the mile and a half each way and eat the cheapest food I could buy there.  The canteen sold breakfast sandwiches, 3 course lunches and proper puddings but it didn't take long to work out the cheapest foods on offer.  On the average day, it was a heaped plate of plain white rice with beansprouts,which off the top of my head (and we are going back a few years)  cost 26p, 15p for the rice, 11p for the beansprouts.  I know it sounds as though I was being really tight, and I probably was, but I really enjoyed the food.  It was simple, fresh and filling.  They had soy sauce behind the counter and with a beg and a smile, a dash of dark rich soy and a bit of fresh salad, this was a fine meal.  There was one dark shadow that could spoil the meal though, and I have never, ever understood this.  The beansprouts were baked "au gratin".  Yes, really.  A deep gastronorm tray of beansprouts seasoned then pushed under a grill with a thick layer of sharp catering cheddar-style cheese.  You had to avoid the cheese and there was a knack to doing it.  The dinner ladies thought that the cheesey topping was the best part of the dish, so they would bestow it with a smile and a heavy hand to favoured students and wouldn't take no for an answer.  The only way to solve the problem was to arrive about 5 minutes after the canteen opened.  This would ensure that you weren't first in the queue, the staff were fairly busy and would already have bestowed their gift of cheese on earlier visitors meaning you would likely as not get a scoop of slightly softened sprouts missing the dreaded cheese.  I have no idea why they made beansprouts au gratin though I am glad to say that I have never seen it on a menu since.  If you have, you may well have been eating the food created by one of my north London college alumni (sorry!).

    So back to the task in hand.  This is the recipe that the teen was making.  These lentils can be served as a side or a vegetarian main, or tossed in a vinaigrette, they can be served as a salad.  They are really popular in our house and were eaten with glee by our kids when other vegetables were shunned.  The lentils will stay firm if you leave them to stand after they have boiled but if you are pushed for time, you can simmer them a little more (adding a little extra water) for around 15 minutes instead.

    Puy Lentils

    250g puy (small green french) lentils
    2 sticks celery
    1 carrrot
    1 clove garlic
    1 bay leaves
    1 lemon, zested and juiced
    2 sprigs thyme
    salt and pepper
    2 dsp (2 x 10ml) olive oil

    Method:
    • Dice the celery and carrots and finely chop the garlic.
    • Rinse the lentils.
    • Pour 1 dsp olive oil into a heavy bottomed saucepan with a lid.
    • Heat gently then add the garlic and vegetables and stir, allowing to soften in the oil, about 10 mins.
    • Add the lentils and turn in the oil until covered.
    • Pour on cold water until the lentils are covered, about 2 cm above the surface of the lentils.
    • Add the bay leaves and thyme, cover with a lid.
    • Bring to the boil and turn down to a gentle boil for 10 mins.
    • Turn the heat off after 10 minutes and leave to stand for 30 minutes.  
    • The lentils should cook through but will still have some bite (ie not mushy).
    To serve hot (rather than use in salad):
    • Remove the bay leaves and thyme stems. 
    • Bring to the boil again with the lid off.
    • Add the zest and juice of the lemon and season to taste.
    • Pour over the 2nd dsp of olive oil and stir through, serve.
    If you are going to use these as a salad:
    • Drain once cool
    • Remove the bay leaves and thyme stems.  
    • Add the lemon zest and juice along with the 2nd dsp olive oil.
    • Season to taste and serve with chopped parsley.

    Saturday 6 February 2010

    orange & cardamom marmalade recipe


    During our mammoth kitchen clear-out, I felt it my duty to venture right to the back of (nearly) every cupboard and the fridges to investigate the contents.  Right at the very back of the little fridge snuggled a jar with the merest scrapings of its' contents remaining inside.  This is a really bad habit of mine.  When I am totally in love with a food, I can never bring myself to finish it, in case I forget it, or I am craving the flavour one day.  I am not entirely sure of the reason but I know that it reflects an element of my personality that a psych would probably make a mountain out of!

    orange & cardamom marmalade on toast 2a
    The jar concerned bears a black lid and label with contents almost as dark, and is the remnants of our last jar of Kush Cuisine's Orange & Mango Marmalade with Cardamom.  When we used to sell at farmers markets in London we would see them at the Blackheath market.  I say we, but in fact my alternate Sundays never coincided with them, and it was my husband who attended on those days whilst I was working back in the bakery.  And so it was him who came home with this delicious thick marmalade studded with deeply perfumed crunchy cardamom seeds.  I love it, and having given up the markets, have had to ration myself to the occassional serving in order to make the jar last longer.  And then one day there was one last serving left in the jar and it was pushed further to the back of the fridge to save rather than actually finishing it.

    Today though, I made rice flour drop scones for breakfast and feasted on them with the last of this delicious marmalade, safe in the knowledge that the citrussy smell wafting through our kitchen was heralding the creation of my first ever batch of marmalade, flavoured with cardamom in deference to Kush's masterpiece.

    If you ever find yourself at a farmers market in London, do check out Kush and grab a jar of their delicious marmalade ... alternatively, of course you could have a go at this recipe and see how your own version matches up!

    cardamom seeds, pods & seville orange 1a
    I have based my recipe and method on a combination of this recipe on Delia's site here and a recipe from The Times here, have a look (and you will be able to see how my impatience changed the methods!)  This can be  a bit time-consuming to make and you need to plan in advance.  Obviously getting your Seville oranges is the first mission as they are only in season in January and February.  If you can lay your hands on some, but don't have time to use them, stick them in the freezer and you will be able to make the marmalade whenever you fancy.


    Seville bitter orange marmalade infused with cardamom

    Ingredients:

    • 1.5kg seville oranges
    • 10g black cardamom seeds (after podding)
    • 2kg granulated sugar
    • 2.2l water

    Equipment:
    • 2 large pans with a lid & some foil, 1 x muslin square (I am using a new baby square), big sieve & bowl, jam thermometer or a few chilled saucers, 6-7 x 500g jars with lids & waxed paper to seal.
    Method:
    1. Wash the oranges and scrub with a bit of washing up liquid if they are coated in a shiny layer of wax.
    2. Place in the large pan and fill up with water
    3. Bring to a boil, and reduce heat to a simmer. Seal the top of the pan with a piece of foil and then place the lid over.
    4. Simmer at a very low temperature until the oranges are softened by a combination of the steam and hot, hot water - this took about 2 hours for me.
    5. Whilst the oranges simmer, de-seed the green cardamom pods by toasting the whole pods gently in a frying pan until they swelled up in  the heat, open the pods with your finger nail or the tip of a sharp knife and scrape out the seeds.  There is no denying this is tedious work so if you can find good quality ready-seeded black cardamom seeds, I suggest you use them!
    6. Leave the oranges to sit in the water until cool enough to handle (retain the water afterwards).
    7. Place the sieve over a big bowl.  Slice each orange in half, using a spoon scrape out the pith, pips and inners of each orange half into the sieve.
    8. Add all the orange inners to the water your cooked your oranges in and bring this to a rolling boil to reduce by half in about 20 minutes.
    9. Whilst this is boiling, warm your sugar either by placing the sealed bags on your radiator (my lazy method) or sprinkling the sugar into a couple of baking trays and placing in a low oven at about 100°C for 10-15 minutes.
    10. Slice your orange skins into thick or thin strips - depending on what you prefer in your marmalade.  For me this is short thick chunks (though thin slivers are much more photogenic of course!).
    11. Once the twenty minutes is up and the orange liquid is reduced by half, place the sieve over your second pan and drain the cooked orange liquid into the clean pan.  Scrape through the sieve with a big spoon to extract as much of the juices and goodness into the pan below.
    12. Add the orange peel to the pan of juices along with the cardamom seeds.  Bring this to the boil and slowly add the sugar stirring constantly to ensure it dissolves quickly.
    13. Once the sugar has dissolved turn up the heat and boil rapidly for 10-15 minutes.Whilst this is happening, wash your jars and lids then sterilise in the oven at 150°C for 15 minutes.
    14. Check the setting point of the marmalade - if you have a sugar thermometer you are looking for the temperature to reach 106°C (220°F).  If you don't have a sugar thermometer grab a chilled saucer and scoop out a spoonful of the syrupy dark juices onto the saucer.  Leave to sit for a minute or two then tilt the saucer from side to side.  If the liquid is set, the skin will stop the marmalade running across the saucer as you tilt.  If not, the liquid will run and needs to boil for another 10 minutes or so.
    15. Repeat the test until the marmalade is ready and once setting point has been reached, take the pan off the heat and leave to sit for half an hour to cool a little.
    16. Ladle the cooled marmalade into your cooled sterilised jars and place a piece of waxed paper over the top before placing a lid on each jar.
    Notes - I found that the oranges were a bit over cooked - when I came to remove the pith and inners the skin fell apart making the whole process very messy.  This also made it harder to cut the skin into even shreds so I ended up using a pair of scissors and sandwiching several pieces together to cut..  In future I would only boil for an hour, then leave to cool for a maximum of 2 hours and hopefully this will do the trick.

    Sunday 31 January 2010

    gluten free macaroni cheese


    This recipe is a homage to the macaroni cheese created recently by Helen Graves for Fiona Beckett's bloggers Mac & Cheese competition here and is, to my mind, the most genius adaptation of a recipe familiar to most of us.  You can find Helen's recipe and the story behind it here.

    I love macaroni, the slightly denser hollow pasta tubes with it's satisfying bite but am yet to find a gluten free version in the UK.  In fact, on the day I went to buy pasta for this, I could only find corn & rice fusilli which is certainly not a combination I would choose naturally.  But since it was the only pasta on the shelf, it is now the pasta which is enveloped in the most cheesy sauce awaiting baking for tonight's supper (and probably tomorrow night's too).

    The genius behind Helen's mac & cheese is that she cooked her pasta in a ham stock, this was the bit that really grabbed me.  So yesterday morning I found myself in a queue ten deep at our local butcher crossing my fingers that no-one else in front of me had read Helen's blog and was also queueing for one of the 3 remaining ham hocks on the platter in the window.  I watched a couple of young women in front of me buy the best part of half a pig cut to their requirements: joints, chops, boned belly, mince all packed into big clear plastic sacks and pay the most ludicrously low price for the lot ... all freerange and locally farmed, and all such amazing value.  It was also great to watch that their order didn't phase the butchers or annoy anyone else in the queue, in fact it didn't actually seem to slow up the queue very much at all, two butchers diverted to process their order and the other 3 carried on serving the rest of us.  I spotted a pack of oxtail which I couldn't leave without buying, along with some lamb steaks for the teen who made marinated shish kebabs, tabbouleh with quinoa, hummous and pitta for supper for us all last night (it was lovely!).

    The ham hocked simmered during the afternoon as we cleaned up around the on-going building works.  I left it to cool in the stock over night and  today converted it into the most unctuous pasta & cheese bake.  The pasta was cooked in the stock for 2/3 of the packet cooking time before draining into a second pan.  As I was leaving the pasta al dente (gluten free pasta gets soggy so quickly), it seemed sensible to try to squeeze even more of that flavoursome stock into the dish.  So veering away from Helen's recipe I made the cheese sauce with half soya milk and half stock (using the pasta cooking stock).  I was trying to capture as much of the flavour of the stock as possible whilst at the same time reducing the dairy content - quite difficult when the recipe calls for 500g cheese!  I used a mixture of cheeses, very  much what we had in the fridge at the time, which was Sussex High Weald's Ashdown Forrester, Bookham's Sussex Charmer, the tail end of a Wensleydale and also a hunk of artisan Red Leicester.  This has made a very rich quite complex flavour though lacking a little bite which 100g of really good cheddar would have added.  Next time I will use the same combination but with the cheddar, 100g of each.

    So here we are, I know it taste's great (chef's perks!) even though it hasn't yet been baked in the oven.  There is enough pasta and cheese to feed a small army ... or our family for today, and possibly tomorrow!


    Ham hock stock:
    • 1 ham hock 
    • 1 celery stick
    • 1 carrot
    • 1 onion
    • 1 bay leaf
    • 6 peppercorns
    1. Cover all of these with water in a large pan, bring to a boil.  
    2. Once boiling turn heat down to a simmer, cover with a lid and leave to cook for 2-3 hours.  
    3. When meat is tender and flakey, turn heat off and leave the hock to cool in the stock.
    4. Once cold, drain the stock and pick the meat off the ham hock.  Chop the meat finely and chill until needed.
    Pasta
    • 1 x 500g gluten free pasta (macaroni if you can get it)
    • ham stock
    1. Bring the stock to a rolling boil (don't salt).  
    2. Add the pasta and cook for just over half the time stated on the pack.  
    3. Drain the pasta into a sieve placed over a second pan.
    Cheese sauce
    • 50g butter
    • 30g rice flour
    • 350g soya milk
    • 350g ham stock
    • 500g grated cheese
    1. In a heavy bottomed saucepan, make the bechamel by melting the butter, then adding the flour.  
    2. Stir or whisk the two together over a gently heat and keep stirring for 3-4 minutes allowing the flour to cook through.  The flour will come together into a thick mass which will then break down again as you continue to cook.
    3. Take the pan off the heat, pour in the soya milk whilst whisking constantly and keep whisking whilst the sauce thickens.  Add the hot stock and simmer the sauce gently for a few minutes.  
    4. Remove from the heat and stir in the cheeses, stir gently until fully melted.  
    5. Sprinkle over the ham reserved from the hock.  Taste and season with nutmeg, pepper and / or mustard to taste.


    Assemble the mac by adding the pasta to the cheese sauce and mixing together.  Pour into a large baking dish.  Bake at 200°C until hot throughout and browned on the tip.  Before baking, if you want to, you can top this as per Helen's suggestion with more cheese mixed with breadcrumbs.  However by this stage I was beginning to worry that we might all die of heart attacks whilst eating this (!) so I omitted this crunchy cheesy topping and opted instead to serve with a crunchy chicory & little gem lettuce salad with a mustardy vinaigrette.

    Friday 29 January 2010

    gluten free peanut butter shortbread bars

    I have been making more than my fair share of exceedingly sweet things this month, as I have completed my first Daring Baker's challenge.  I usually actively try to avoid baking really sugary treats, as I find sugar so addictive that I have to exercise extreme will-power not to eat everything at once.  However the rest of the family are rather partial to sugary snacks, so I have made the odd recipe to keep them all happy!

    peanut butter shortbread bars We are having a big, big clear out of our small, small kitchen at present in preparation for a bit of a re-jig to make the workspace a bit more practical.  So every evening has seen me with my head stuck right to the back of the cupboards, packing boxes and investigating sell-by dates.
    And oh, the shame! One unidentifiable tin was dated 1-10-2003 which means that it has moved house with us at least once and possibly up to 3 occasions.  The label was gone and whilst I was quite happy to open and investigate, I was out-voted and the tin was binned.  We had the weirdest selection of wafer biscuits and digestifs from central European countries, pasta from East Germany (thank you to the many language student visitors) as well as a random selection of cup-a-soups (some of which are now out of production, does this make them collectors items?) which pre-dated my going gluten free.  It is going to take a while for us to get the kitchen re-organised, so I can only apologise for the fact that I will continue to be a bit light on new recipes for the next couple of weeks.  Once we are there though, we will christen the space with a roast Rib of Beef from Paganum which is taunting me with it's deep red and creamy white beauty whilst patiently waiting for us to demolish it.

    In the depths of one cupboard languished a huge tub of wholesome peanut butter, dark brown and chunky, with neither salt nor sugar added.  It was well within date but the tail end has been neglected in favour of a jar of glowing yellow American Skippy peanut butter recently acquired from Costco.  Whilst the flavour of this wholesome version was still great, the contents were drying and lumpy yet too good to chuck, so I looked for a way of using this up.  Another find was a box of homemade biscuits - the last of the shortbread that we made at Christmas as gifts but ungiven due to the snowy weather.  And when a tin of condensed milk rolled out of the cupboard onto my toe (ouch!), a plan was formed.


    There are two ways of making this, both are quick and easy but they depend on the ingredients that you have to hand.   If you don't have a bunch of biscuits to hand - and to be honest, if you have to buy gluten-free biscuits you probably don't then want to crush them up and use them for something other than dunking in a good cup of tea - you can bake the base fresh, which is quick and easy too.  Of course, and as usual, you can substitute the gluten free flour ingredients for wheat flour if you want.  You can omit the peanut butter filling and replace it with a jar or tin of ready made dulce de leche for an even quicker recipe.  Both the biscuit base and the baked shortbread base can be used for a myriad of other toppings and bar-style cookies so they are both really handy recipes to have in your repertoire.
    I made this last night with the crushed biscuit base, the 3 stages took no more than 20 minutes in total with chilling time on top.  If you freeze your biscuits before you use them, the chilling time will be reduced.

    Ingredients

    Crushed biscuit base:
    • 100g melted butter
    • 300g crushed gluten free biscuits (digestives, shortbread, any plain biscuits)
    • 25g cocoa powder (if you want a chocolatey base)

      peanut butter shortbread
    • line an 8"x8" square tin with non-stick baking paper.
    • crush the biscuits.  I chucked the biscuits in to a pyrex mixing bowl, grabbed a flat-ended rolling pin and pounded them with the blunt end as if I were using a big pestle & mortar.
    • pour over the melted butter and cocoa if required and stir through until fully mixed
    • press the mixture into the tin firmly and then chill in the fridge until cold and set.
    Baked shortbread base (this is a basic traditional shortbread recipe)
    • 150g rice flour
    • 30g cornstarch or maize meal (subtitute potato starch or millet flour if necessary)
    • 120g salted butter at room temperature
    • 60g sugar

    • beat the sugar and butter together
    • add the flour and mix until you have big breadcrumbs
    • press the breadcrumbs into the tin to form an even base layer
    • prick the surface lightly (not all the way through) with a fork every 3cm
    • bake at 160°C for 20 minutes and allow to cool in the tin before adding the next layer
    Whilst the base is cooling, make the middle layer ...
    • 85g peanut butter
    • 75g condensed milk
    • 20g custard powder (substitute with 20g tapioca starch, 5g sugar & 1tsp vanilla extract if you can't find or tolerate it)
    • a sprinkling of sea salt
    • beat the condensed milk and peanut butter together until creamy
    • add the custard powder and beat again, the mix will become firmer due to the starch
    • spread the mixture over the chilled base layer and return to the fridge for about 30 minutes
    Whilst the middle layer is cooling ...
    • 75g plain chocolate broken in to pieces (I used a 70% Belgian bar available from all supermarkets)
    • 65g milk chocolate (in this case - Galaxy)
    • 25g butter
    • Melt the chocolate ingredients together, keeping the mixture as cool as possible.
    • Allow the chocolates to cool as much as they can whilst remaining runny
    • Spread the chocolate over the cooled peanut butter layer
    • Chill again and allow around an hour before serving.