Showing posts with label gluten free baking. Show all posts

Friday, 29 January 2010

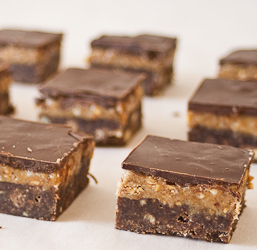
gluten free peanut butter shortbread bars

I have been making more than my fair share of exceedingly sweet things this month, as I have completed my first Daring Baker's challenge.  I usually actively try to avoid baking really sugary treats, as I find sugar so addictive that I have to exercise extreme will-power not to eat everything at once.  However the rest of the family are rather partial to sugary snacks, so I have made the odd recipe to keep them all happy!

peanut butter shortbread bars We are having a big, big clear out of our small, small kitchen at present in preparation for a bit of a re-jig to make the workspace a bit more practical.  So every evening has seen me with my head stuck right to the back of the cupboards, packing boxes and investigating sell-by dates.
And oh, the shame! One unidentifiable tin was dated 1-10-2003 which means that it has moved house with us at least once and possibly up to 3 occasions.  The label was gone and whilst I was quite happy to open and investigate, I was out-voted and the tin was binned.  We had the weirdest selection of wafer biscuits and digestifs from central European countries, pasta from East Germany (thank you to the many language student visitors) as well as a random selection of cup-a-soups (some of which are now out of production, does this make them collectors items?) which pre-dated my going gluten free.  It is going to take a while for us to get the kitchen re-organised, so I can only apologise for the fact that I will continue to be a bit light on new recipes for the next couple of weeks.  Once we are there though, we will christen the space with a roast Rib of Beef from Paganum which is taunting me with it's deep red and creamy white beauty whilst patiently waiting for us to demolish it.

In the depths of one cupboard languished a huge tub of wholesome peanut butter, dark brown and chunky, with neither salt nor sugar added.  It was well within date but the tail end has been neglected in favour of a jar of glowing yellow American Skippy peanut butter recently acquired from Costco.  Whilst the flavour of this wholesome version was still great, the contents were drying and lumpy yet too good to chuck, so I looked for a way of using this up.  Another find was a box of homemade biscuits - the last of the shortbread that we made at Christmas as gifts but ungiven due to the snowy weather.  And when a tin of condensed milk rolled out of the cupboard onto my toe (ouch!), a plan was formed.


There are two ways of making this, both are quick and easy but they depend on the ingredients that you have to hand.   If you don't have a bunch of biscuits to hand - and to be honest, if you have to buy gluten-free biscuits you probably don't then want to crush them up and use them for something other than dunking in a good cup of tea - you can bake the base fresh, which is quick and easy too.  Of course, and as usual, you can substitute the gluten free flour ingredients for wheat flour if you want.  You can omit the peanut butter filling and replace it with a jar or tin of ready made dulce de leche for an even quicker recipe.  Both the biscuit base and the baked shortbread base can be used for a myriad of other toppings and bar-style cookies so they are both really handy recipes to have in your repertoire.
I made this last night with the crushed biscuit base, the 3 stages took no more than 20 minutes in total with chilling time on top.  If you freeze your biscuits before you use them, the chilling time will be reduced.

Ingredients

Crushed biscuit base:
  • 100g melted butter
  • 300g crushed gluten free biscuits (digestives, shortbread, any plain biscuits)
  • 25g cocoa powder (if you want a chocolatey base)

    peanut butter shortbread
  • line an 8"x8" square tin with non-stick baking paper.
  • crush the biscuits.  I chucked the biscuits in to a pyrex mixing bowl, grabbed a flat-ended rolling pin and pounded them with the blunt end as if I were using a big pestle & mortar.
  • pour over the melted butter and cocoa if required and stir through until fully mixed
  • press the mixture into the tin firmly and then chill in the fridge until cold and set.
Baked shortbread base (this is a basic traditional shortbread recipe)
  • 150g rice flour
  • 30g cornstarch or maize meal (subtitute potato starch or millet flour if necessary)
  • 120g salted butter at room temperature
  • 60g sugar

  • beat the sugar and butter together
  • add the flour and mix until you have big breadcrumbs
  • press the breadcrumbs into the tin to form an even base layer
  • prick the surface lightly (not all the way through) with a fork every 3cm
  • bake at 160°C for 20 minutes and allow to cool in the tin before adding the next layer
Whilst the base is cooling, make the middle layer ...
  • 85g peanut butter
  • 75g condensed milk
  • 20g custard powder (substitute with 20g tapioca starch, 5g sugar & 1tsp vanilla extract if you can't find or tolerate it)
  • a sprinkling of sea salt
  • beat the condensed milk and peanut butter together until creamy
  • add the custard powder and beat again, the mix will become firmer due to the starch
  • spread the mixture over the chilled base layer and return to the fridge for about 30 minutes
Whilst the middle layer is cooling ...
  • 75g plain chocolate broken in to pieces (I used a 70% Belgian bar available from all supermarkets)
  • 65g milk chocolate (in this case - Galaxy)
  • 25g butter
  • Melt the chocolate ingredients together, keeping the mixture as cool as possible.
  • Allow the chocolates to cool as much as they can whilst remaining runny
  • Spread the chocolate over the cooled peanut butter layer
  • Chill again and allow around an hour before serving.
Wednesday, 27 January 2010

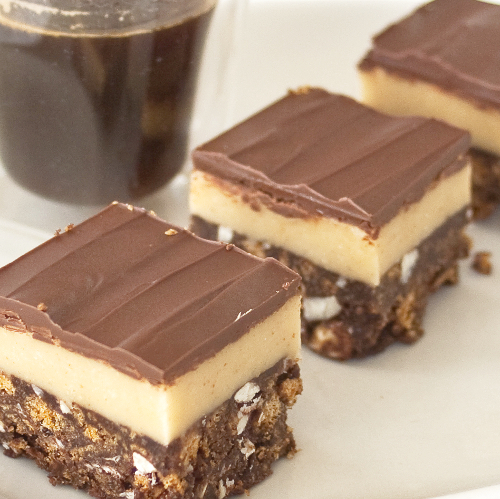
daring bakers - nanaimo bars - january 2010


The January 2010 Daring Bakers’ challenge was hosted by Lauren of Celiac Teen. Lauren chose Gluten-Free Graham Wafers and Nanaimo Bars as the challenge for the month. The sources she based her recipe on are 101 Cookbooks and www.nanaimo.ca.

This is my first attempt at a Daring Baker challenge.  The Daring Bakers (and Daring Chefs) are a worldwide collective of foodbloggers who participate each month in a challenge, each making to the same recipe and then posting their experiences and photos of their results.  I have followed the Daring Bakers for quite a while and often wished I was taking part, so now I have taken the plunge. On starting Daring Baker, I had been expecting to have to convert each recipe to gluten-free but amazingly, my first challenge is a gluten free recipe - this makes for a very easy life.  Lauren who converted this recipe and hosted this challenge is a cool gluten free blogger from Canada, if you haven't come across her site and her recipes you are missing out, so do have a look at her blog here.


Nanaimo bars originate from a town called Nanaimo in Canada.  These were chosen to remind us and celebrate next month's Winter Olympics which are being staged in Canada.  I am really looking forward to the Winter olympics and am loving the BBC trail for them too. I will definitely make this recipe again to welcome the games into our house (a lame excuse, I know!).

It may seem complicated or unnecessary to make these biscuits from scratch for the biscuit base, but it isn't.  We don't have graham crackers in stores in the UK so it is often suggested to substitute with digestive biscuits, but don't, as there is little similarity.  Instead grab your rolling pin and knock up a batch of these, you won't regret it!
By the way, I have deviated from the traditional path a little to create a less sweet and, to my mind, more interesting filling.  Hopefully I haven't insulted the folk of Nanaimo in doing this.  If it is any consolation, the nut (any nut will do) filling tastes great!


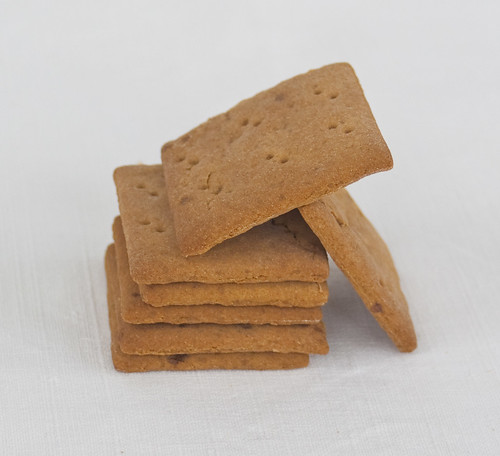
Gluten-Free Graham Wafers
Ingredients
gluten free graham crackers
  • 138g glutinous rice flour
  • 100g Tapioca Starch/Flour
  • 65g buckwheat flour or potato starch (the original recipe called for Sorghum flour but it is v.difficult to find a completely gluten free source in the UK, so I have substituted this).
  • 200g dark muscavado sugar
  • 1 tsp bicarbonate of soda
  • 3/4 tsp or 4g salt
  • 100g butter or very chilled dairy free margarine
  • 80g honey
  • 75ml whole milk
  • 30ml (2 tbsp) pure vanilla extract
Directions:
  1. Chop the butter into a very fine dice then freeze for 30 minutes.  If using dairy free margarine, freeze 100g then chop or grate once frozen.
  2. Sieve flours and bicarbonate of soda together.
  3. In a small bowl, whisk together the honey, milk and vanilla.
  4. Combine the flours, brown sugar and salt in a mixer
  5. Blend using the paddle beater to combine, then add the chilled butter
  6. Blend again until the mix is the consistency of a coarse meal (no chunks of butter should be visible).
  7. Add the liquid blend to the flour mixture and mix again until the dough barely comes together. It will be very soft and sticky.
  8. Turn the dough onto a surface well-floured with sweet rice flour and pat the dough into a rectangle about 1 inch thick. Cut in half, bag each piece and chill until firm, about 2 hours, or overnight.
  9. Sift an even layer of sweet rice flour onto the work surface and roll 1 piece of the dough into a long rectangle, about 1/8 inch thick. The dough will be quite sticky, so flour as necessary.
  10. Cut into 2 inch squares, prick with a fork over each biscuit, set on a baking tray.
  11. If the dough is sticky, chill the trays for half an hour before baking (I baked these on the snowiest weekend in early January so didn't need to do this).  Gather the scraps together and set aside. Repeat with the second batch of dough.
  12. Adjust the rack to the upper and lower positions and preheat oven to 180°C
  13. Gather the scraps together into a ball, chill until firm, and reroll. Dust the surface with more sweet rice flour and roll out the dough to get a couple more wafers.
  14. Bake for 15 minutes, until browned and slightly firm to the touch, rotating sheets halfway through to ensure even baking. This might take a little longer, but not much, The biscuits will come out soft but crispen on cooling.  If they don't get fully crisp pop them back in the oven for another 5 minutes.
When cooled completely, place 160g biscuits in a food processor and pulse to make crumbs. Another way to do this is to place in a large ziplock bag, force all air out and smash with a rolling pin until wafers are crumbs.


nanaimo bars, uncutFor Nanaimo Bars
base layer
  • 115g butter
  • 50g granulated sugar
  • 35g cocoa
  • 1 egg or 8g ground flax with 30g water
  • 160g gluten free graham cracker crumbs (as above)
  • 130g coconut (omitted as I am intolerant of coconut, additional graham crumbs to replace)
  • 55g almonds, finely chopped
  1. Line an 8" square baking tin
  2. Melt the butter, sugar and cocoa together in a double boiler or microwave
  3. Add the egg or flax and stir well until thickened
  4. Stir in the crumb, coconut and nuts then pour into the prepared tin.
  5. Press in to create a firm even base, chill until the middle layer is ready.
middle layer
  • 70g butter
  • 80g peanut butter
  • 20g custard powder
  • 30g double cream
  • 200g icing sugar
  1. soften butter and peanut butter in a microwave until soft.
  2. sieve the icing sugar and custard powder together then add to the butters
  3. pour over the cream
  4. beat with a hand beater until well combined and smooth
  5. spread over the biscuit base and chill
top layer
  • 55g milk chocolate
  • 60g (70%) dark chocolate
  • 25g butter
  1. melt chocolates and butter together over a low heat or in microwave
  2. allow to cool (but still liquid)
  3. pour over the middle layer and chill until set
nanaimo bar
Additional Information by Lauren: 

These bars freeze very well, so don’t be afraid to pop some into the freezer.
The graham wafers may be kept in an airtight container for up to 2 weeks (mine lasted about that long). If making the graham crackers with wheat, replace the gluten-free flours (tapioca starch, sweet rice flour, and sorghum flour) with 2 ½ cups plus 2 tbsp of all-purpose wheat flour, or wheat pastry flour.

Thursday, 26 November 2009

chewy honey & apricot flapjacks


There were just too many mentions of flapjack around me recently to ignore them.  Autumn brings on our desire for comforting snacks full of slow release energy to keep us warm and snug, I used to bake flapjacks almost every day, soft chewy ones too, not crunchy ones but haven't baked any for ages.  When it dawned on me that I hadn't any little snacks for tomorrow's lunchboxes then baking flapjacks seemed to be the obvious solution.

A quick disclaimer: I don't eat oats, (so this is a truly altruistic post)! if you are not gluten intolerent, feel free to skip the next bit and dive straight into the recipe.


I know that I am walking into a minefield by posting an oat-based recipe here.  "Are oats gluten-free?" is the subject of much debate, with some people being able to tolerate them, others not.
Gluten free oats are now available in the UK as well as the states. In the UK you can now buy gluten free oats in all Waitrose stores under the brand "Delicious Alchemy".  I haven't tried them (the recipe below was made with regular oats).  In the states Bob's Red Mill, among others, supply gluten-free oats.
It is worth pointing out that gluten-free in this sense means un-contaminated with gluten.  These oats are often grown on farms and milled on sites that do not handle wheat at all, so there is no possibility of harvest-related contamination.  They are tested using ELISA testing to prove a gluten content of less than 20ppm.
However, some people still can't tolerate oats even with the gluten contamination removed.  In the UK the contamination issue has meant that it really difficult for us to work out whether we are sensitive to the cellular formula of oats, or just the wheat-related contamination. The only way to find out is to try - of course it is up to you whether or not you do.  If you do want to try, then these are the people who can help you:

UK:  Waitrose

USA (& worldwide shipping):  Bob's Red Mill
13521 SE Pheasant Court, Milwaukie, Oregon 97222.  USA
Phone: 001 503 654-3215.   Fax: 001 503 653-1339

Right, with that out of the way, here's the recipe - it is so easy and tastes fantastic!

Chewy honey & apricot flapjacks

Ingredients:
  • 140g salted butter
  • 125g light muscovado sugar
  • 30g glucose syrup (from supermarket in cake decorating / home baking)
  • 70g honey (eucalyptus gives a great caramel flavour)
  • 175g apricots, chopped
  • 300g rolled oats (GF if required)
Equipment:  9"x12" baking tin (1" deep) lined with baking paper.
Oven:  pre-heat to 150°C

Method:
  1. put the butter, sugar, glucose syrup and honey in a large saucepan (I use a wok!)
  2. heat over a low heat and stir regularly to ensure it neither sticks nor burns
  3. when the sugar has dissolved add the apricots
  4. stir to cover the apricots in the caramel
  5. add the oats and mix till all the oats are coated in the caramel
  6. press the oat mixture into the tin
  7. bake at 150°C for 20 minutes
  8. take out the oven and leave to cool in the tin for around 45 mins
  9. cut the flapjack into portions before it is fully cold
  10. wrap each piece and store in an airtight container to ensure they stay soft
Beware - the pieces are inclined to crumble if you try to eat them before they are cold, but it is very hard to resist!

Sunday, 22 November 2009

gluten free chocolate cupcakes


With no apologies, this is another recipe baked to cheer up the teen. She is already sorely missing the summer sunlight and the other day, life got a bit too much for her.  She had a miserable day for no particular reason (we all know that feeling) and then got soaked on the way home.  She was so down in the dumps, I wasn't sure what - apart from the new season's unaired Gossip Girl episodes - would cheer her up.  As I am neither pirate nor hacker, she had to suffice with repeats and a plate of cupcakes!


I haven't baked cupcakes for years so I scaled down my old recipe and reworked it for us today.  Naturally it's gluten free and for the benefit of my conscience, a bit healthier, using a natural sweetener as well as sugar in the cakes (but I forgot to do the same in the icing).  The teen hasn't noticed the difference so far, well, not until she reads this!

Ingredients
  • 2 medium eggs
  • 175g castor sugar
  • 75g light agave syrup
  • 1 tsp vanilla extract
  • 125ml (1/2 cup) rapeseed or sunflower oil
  • 200g white rice flour
  • 60g cocoa
  • 40g millet flour
  • 30g tapioca flour
  • 30g glutinous rice flour
  • 6g (1 dsp) arrowroot flour
  • 1.5 tsp gf baking powder
  • 1/2 tsp xanthan gum
  • 150ml (1/2 cup) rice or cow's milk 
Icing:
  • 125g (1/2 cup) margarine
  •  125g (1/2 cup) butter
  • 1 tsp vanilla extract
  • 425g (3.5 cups) sifted confectioners' sugar
  • liquid colourings as required + 1 tbsp milk
  • 75g cocoa powder (1/2 cup + 1 tbsp)
  • 100g dark chocolate melted in 50g milk
Method
  • line 16 holes in 1-2 deep muffin pans with cupcake liners (I used 2.5" liners)
  • weigh up all dry ingredients and sieve together.
  • preheat oven to 180° C.
  • beat eggs and sugar in a mixer for one minute until the mix makes thin visible ribbons on the surface.
  • add agave nectar & vanilla extract, beat for another 30 seconds.
  • add dry ingredients, along with the oil and milk.
  • beat everything together for 1 minute.
  • using a dessert spoon, scoop a large spoonful of the mix and use to fill one liner
  • repeat until all the mix is used.
  • bake for 20 mins until firm and a skewer inserted into the tcake comes out clean.
  • leave he cupcakes to cool in the tin for 5 mins before removing to a cooling rack.
  • ice once cold.
Icing
  • this makes too much icing but I find it to fiddly to make smaller quantities
  • melt the chocolate in milk in the microwave (approx 30 secs in 800W oven)
  • stir to ensure it is fully blended and creamy
  • beat butter and margarine together in food mixer or processor until soft and creamy(unless you bravely do this by hand).
  • divide this mixture in half, leaving just 125g in the mixing bowl.
  • sift in 250g (2 cups) icing sugar and mix till combined - this will give a stiff mix.
  • divide this equally into small bowls - 1 for each colour.  
  • add colouring as per instructions and mix into the icing
  • add milk, 1 tsp at a time to make a smooth but slightly stiff icing paste
  • cover each bowl with damp cloth and set aside whilst you make the chocolate icing
  • put the rest of the butter mix into your mixing bowl
  • sift 175g (1.5 cups) icing sugar & 75g cocoa powder into the butter 
  • mix until fully blended
  • add milk, 1 tsp at a time, until the icing is creamy but still stiff
  • add the melted chocolate ganache mix to the chocolate icing
  • mix briefly and then scrape into smaller bowl or piping bag ready to use.


We decorated our cakes simply using teaspoons to spread the icing - not a professional job but lots of fun.  The teen shredded some chocolate for decorating.
We also made very pink colouring by grating 40g beetroot and squeezing the juice through a piece of gauze.  This gave about 2 tbsp juice which we used like normal food colouring.  Our green colour was achieved using colouring (I haven't started squeezing spinach or wheat grass for colouring ... yet!).


Tuesday, 6 October 2009

Mark Bittman's crustless gluten free almond tart


My first ever parent-free overseas visit was, like most English schoolkids, a day trip to Boulogne.  This included the obligatory visit to Auchan which, thinking back, was more for the teacher's sanity than the kid's education!  How influential that trip was - so much so that I still remember exactly what I brought back: 4 different cheeses, the stone pot of grain mustard and a crepe pan.

I fell in love with the array of pans, coffee filters and implements that greeted me in aisle after aisle in this enormous supermarket.  This was heaven beyond my wildest 11 year old dreams.  But what to buy?  I settled on a crepe pan as it was the cheapest non-stick pan in the store.  Non-stick was aspired-to but untested in our household.  I relished the thought of arriving home and presenting my mum with this new modern pan in which we would create paper-thin lacey crepes flambeed with brandy, instead of our more familiar thicker pancakes rolled up with a sprinkling of Jif lemon juice and granulated sugar.

Thursday, 17 September 2009

gluten free gougere bites


I am so happy!

I'm standing in my little kitchen, blogging this amidst a pile of gluten free flour bags, cobnuts in 3 states - shelled, unshelled and heaps of the cracked and rejected shell as well as little plates of scones, plums and the general clutter of a day's work.

I took a break in the middle of my working day to try out a savoury idea.  Taking the concept from a David Lebovitz recipe here, I attempted to bake a gluten free version of those little savoury choux pastry balls - gougère bites.
Choux pastry seemed a completely unachievable gluten free concoction but believe me, it is simple - you just need a strong arm to beat the mix and rudimentary piping or spooning skills.
So with a glass of wine and a little pile of these savoury gems, let me share the recipe. Please do try them, it is such a joy to eat something so light and delicious AND gluten free!

Gluten free gougère bites

100g corn flour (white starch not yellow maize flour)
1 tsp xanthan gum
1/4 tsp salt
ground black pepper
100ml milk
75ml water
50g butter
2 large eggs - beaten
90g grated cheese (mature cheddar, parmesan or a mix)
Preheat oven to 220°C

1. Sieve the cornflour and xanthan gum together.

2. Melt butter with liquid ingredients, salt and pepper in heavy bottomed saucepan.

3. Once butter has melted, tip all flour into pan in one go - take pan off the heat and beat until the flour is combined with the liquids.  This will take some doing - and the mix may end up in large lumps rather than in one clump, but that is ok.

4. Put the pan back over a very low heat, immediately add the egg - a little at a time - beating again each time unti lthe egg is combined.

5. As soon as all the beaten egg has been mixed into the batter, sprinkle on 2/3 of the cheese and mix in thoroughly.

6. If you have a piping bag, spoon the mixture in to a bag with a 1.5cm plain  nozzle and pipe the dough into cherry sized balls.  If you don't have a piping bag you can use a thick freezer bag cutting a 1cm hole across one corner to pipe through.  Alternatively use 2 wet teaspoons and form little balls on a lined baking sheet.

7. Sprinkle the finished balls with the remaining cheese and place in the oven for 10 mins.

8. After 10 mins turn the oven down to 190°C and bake for a further 10 mins.

At the end of the baking time, take the tray out of the oven and pierce each puff with the tip of a sharp knife then return to the oven for a further 5 minutes.
Serve the puffs warm - either fresh from the oven or gently reheated - preferably with a glass of wine and friends!
For anyone who has been following the photography steep learning curve - this is the set up that I took the photo above with.  A huge development on the photos I was taking 3 days ago!

gluten free scones


A few weeks ago Madalene at the British Larder posted about strawberry scones here.  I read the recipe and enjoyed the prose but thought nothing more of it, apart from yum!  But I woke up this morning with a real craving for scones, maybe it takes that long for the power of suggestion to permeate my brain (I pity advertisers if that is the case!).  So earlier and more enthusiastically than usual, I leapt out of bed and made these for breakfast.

I haven't tasted scones for years, and for some reason I had decided that a gluten free version would be far to difficult to create.  But it isn't, they are really simple and delicious, so here is the recipe for you to try too.

Simple sweet scones


175g rice flour
50g millet flour
1/2 tsp xanthan gum
1 tsp bicarbonate of soda
1/2 tsp psyllium husks (optional)
a pinch of salt
25g butter (room temp)
50g golden castor sugar
150g plain yoghurt
35g milk


Weigh & sieve the dry ingredients together then rub the butter into flour mix.
Sprinkle over the sugar and stir through the flour mix.
Pour on the yoghurt.  At this point I found it easiest to grab a spatula and cut through the mix as though making pastry, not stirring but drawing the sharp edge through the mix as if cutting with a knife.  Continue until you have brought the mix together into clumps, then add the milk and stir the mix until the dough comes together.

Now you can tip the dough out onto a floured surface and knead it briefly to create a smooth dough.  There aren't many opportunities for gluten free bakers to knead so enjoy it - but don't get too carried away or the scones will end up dry.

Roll the dough out till 1.5cm thick.
Cut out scones around 5cm in diameter, gently roll the leftovers back together and roll again until the dough is all used.  Beware though, that the scones don't like much handling so try to cut out as many as possible in the first go.
Place the scones on flour dusted baking tray and brush with milk to glaze.

Bake in pre-heated oven at 225° C for 8-10 minutes.
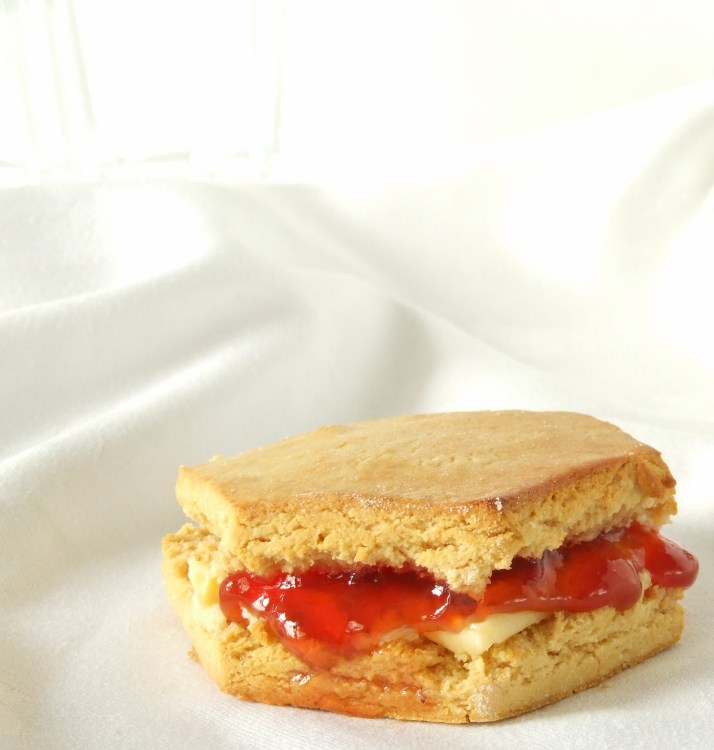
Serve warm with butter and jam - enjoy!

Friday, 21 August 2009

Shock and awe, the making of a gluten free pizza!


Oh my, what have I let myself in for?
It took ages for me to pluck up courage to start writing a blog. I read endlessly around different genres, thought deeply about how portray myself, how to find my true voice (without swearing, that is!).  But I have just discovered that I didn't actually think about the process of documenting my cooking processes and how that would work.
And that is where the awe kicks in. I have just had the briefest glimpse of how difficult this process is.  I am blown away by all the bloggers out there who put themselves through this experience on an almost daily basis, on top of their working and family lives, for my, and many others, entertainment.
Thank you so much!
It is far more difficult than it looks to create a recipe from scratch (maybe this was my mistake, I am not inclined to follow recipes whilst I cook), to remember what ingredients you use (and when), and then take useable photos as you go along.  It has just taken me 1 3/4 hours to get 2 pizzas on the table so another lesson learnt there - never, ever do this when you are hungry.  I have just learnt that my stomach rules my style and the closer I got to getting the gf pizza into the oven, the less important style became.  In reality that has also been by biggest mistake. I rushed greasing the tray for the gluten free dough / paste and it stuck. I baked at 235 deg C but it still stuck in the middle. I am going to give this recipe another go tomorrow, and I will see if i can cure it then. Otherwise it may be a case of reducing the amount of liquid. If you should try this and have any ideas, please let me know!

Quick Thin Crust pizza base
(gluten free, of course)

The recipe.
My base owes much to every gluten free blogger I have ever read. I have benefitted hugely from all their experiences and so when I came to make this, I was able to reach into the cupboard and guess at the ingredients. My baking cupboard is a tip.Ingredients are squeezed into every space on a double level cupboard, so the lazy person in me grabbed the 1st 3 gluten free flours I found. I think I could just have easily used sweet rice flour, gram flour (garbanzo bean flour), teff flour or a ready mix such as Doves Farm. As it was I found rice flour, sorghum and tapioca.
In my professional life I don't use tapioca at all as I meet so many people who can't tolerate it. But I don't have a problem as long as I use it in moderation. Sorghum flour only reached my shelves a month ago. I have read often of glutenfreegirl's successes with sorghum but could never find a gluten free source in the UK. Having trailed round many ethnic shops in London, harangued all our work suppliers and still had no joy, a flash of inspiration came in the form of Taj Mahal in Hove. A desperate drive over for work testing rewarded me with the last 4kg on the shelves and fun in the kitchen. It hasn't proved to be the holy grail that I was hoping for, but to be honest, I know that I was being unrealistic to hope for everything in one grain. I don't eat sorghum often either but that is because I am unsure whether this particular brand is 100% pure. When we get some testing facilities in the bakery I will test a sample and then let you know. I hope it does turn out to be clean as it is a real bonus to the UK gluten free baker's repetoire.

                                                    100g rice flour
50g sorghum flour
50g tapioca flour
3.5g (1/2 sachet) yeast
2.5g (1/2 tsp) baking powder*
5g (1 tsp) salt. I am sure you can use less, I just got carried away.
2.5g (1/2 tsp) sugar
250ml warm water
15ml (1 tbsp) olive oil

Simply chuck everything in together and stir. It will be lumpy at first unless you have sieved all your flours (for yeasted doughs I don't often bother).
  *If you are using a retail brand baking powder you may find that it is activated by the warm water. The brand I use is commercial and it only reacts at temperatures of more than 45 deg C, I think most retail brands react at cooler temperatures. If you do find that your brand is triggered by cool water, you could put your yeast, sugar plus 50ml warm water (at blood temp - 38 deg C or slightly higher if you are in a rush) in a separate cup and stir until dissolved. Mix the remaining 200ml water with the rest of your ingredients and add the yeast mixture once it has started to form a few bubbles.

After a couple of minutes vigorous stirring, you will find your pizza base looks smooth and, well, paste-like. It won't look appetising but that doesn't metter yet.  I don't recommend tasting it though, most gluten free doughs are not pleasant raw!

Grease (really thoroughly) a baking tray approx 12" x 8" and spread the batter over the tray, right up to the edges.. Now sensible people will grease some film and lay this over the batter.  However I got distracted by the phone at this point and forgot, I chucked the tray into the oven (as it had been used about 10 mins before) and chatted to my mum for ten minutes.


When I got off the phone I discovered the batter had dried out and cracked a little but it had gained a little bit of spring (prod it and see what I mean) so I decided that was enough. I spread reduced sieved tomatoes over it as a base sauce then sprinkled a few slim slices of courgette, mushrom and red onion on top. A short ration of peperoni slices (that is what happens if you attempt blog-cooking hungry!) and fresh mozerella with a few basil leaves finished the pizza off and into the oven at 235 deg C for 20 mins.

Please don't take my word for it on oven timings. I have been using my fan oven for several years, I know what works for me, where the hot spots are and how to rotate trays to get them evenly browned, I don't know your oven so I suggest you use an oven thermometer, check every 5 minutes, and probably rotate your tray each time too.


I've already mentioned my pizza stuck to the tray, but hopefully that will be cured shortly!
The thing is, it tasted great. Ultra thin, crispy you could taste each individual topping, which is just right by my standards.

Just for the record I made some wheat bases for my daughter and friends too - whilst they enjoyed theirs, they decided the gluten free pizza was better - a definite 1-0 to us!

I'm dreaming of eating... more gluten free pizza