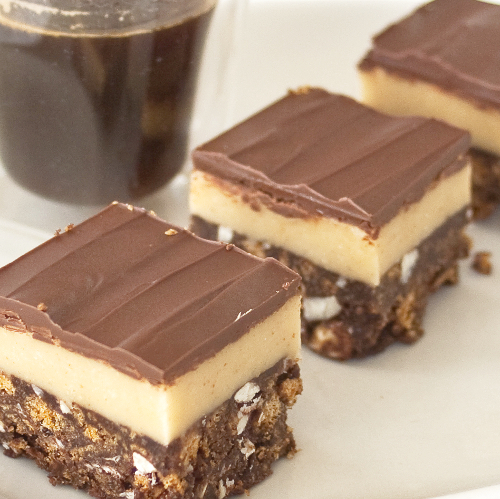
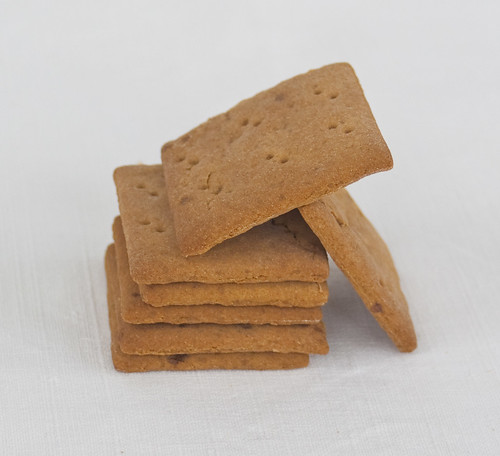
The January 2010 Daring Bakers’ challenge was hosted by Lauren of Celiac Teen. Lauren chose Gluten-Free Graham Wafers and Nanaimo Bars as the challenge for the month. The sources she based her recipe on are 101 Cookbooks and www.nanaimo.ca.
This is my first attempt at a Daring Baker challenge. The Daring Bakers (and Daring Chefs) are a worldwide collective of foodbloggers who participate each month in a challenge, each making to the same recipe and then posting their experiences and photos of their results. I have followed the Daring Bakers for quite a while and often wished I was taking part, so now I have taken the plunge. On starting Daring Baker, I had been expecting to have to convert each recipe to gluten-free but amazingly, my first challenge is a gluten free recipe - this makes for a very easy life. Lauren who converted this recipe and hosted this challenge is a cool gluten free blogger from Canada, if you haven't come across her site and her recipes you are missing out, so do have a look at her blog here.
Nanaimo bars originate from a town called Nanaimo in Canada. These were chosen to remind us and celebrate next month's Winter Olympics which are being staged in Canada. I am really looking forward to the Winter olympics and am loving the BBC trail for them too. I will definitely make this recipe again to welcome the games into our house (a lame excuse, I know!).
It may seem complicated or unnecessary to make these biscuits from scratch for the biscuit base, but it isn't. We don't have graham crackers in stores in the UK so it is often suggested to substitute with digestive biscuits, but don't, as there is little similarity. Instead grab your rolling pin and knock up a batch of these, you won't regret it!
By the way, I have deviated from the traditional path a little to create a less sweet and, to my mind, more interesting filling. Hopefully I haven't insulted the folk of Nanaimo in doing this. If it is any consolation, the nut (any nut will do) filling tastes great!
Gluten-Free Graham Wafers
Ingredients
- 138g glutinous rice flour
- 100g Tapioca Starch/Flour
- 65g buckwheat flour or potato starch (the original recipe called for Sorghum flour but it is v.difficult to find a completely gluten free source in the UK, so I have substituted this).
- 200g dark muscavado sugar
- 1 tsp bicarbonate of soda
- 3/4 tsp or 4g salt
- 100g butter or very chilled dairy free margarine
- 80g honey
- 75ml whole milk
- 30ml (2 tbsp) pure vanilla extract
- Chop the butter into a very fine dice then freeze for 30 minutes. If using dairy free margarine, freeze 100g then chop or grate once frozen.
- Sieve flours and bicarbonate of soda together.
- In a small bowl, whisk together the honey, milk and vanilla.
- Combine the flours, brown sugar and salt in a mixer
- Blend using the paddle beater to combine, then add the chilled butter
- Blend again until the mix is the consistency of a coarse meal (no chunks of butter should be visible).
- Add the liquid blend to the flour mixture and mix again until the dough barely comes together. It will be very soft and sticky.
- Turn the dough onto a surface well-floured with sweet rice flour and pat the dough into a rectangle about 1 inch thick. Cut in half, bag each piece and chill until firm, about 2 hours, or overnight.
- Sift an even layer of sweet rice flour onto the work surface and roll 1 piece of the dough into a long rectangle, about 1/8 inch thick. The dough will be quite sticky, so flour as necessary.
- Cut into 2 inch squares, prick with a fork over each biscuit, set on a baking tray.
- If the dough is sticky, chill the trays for half an hour before baking (I baked these on the snowiest weekend in early January so didn't need to do this). Gather the scraps together and set aside. Repeat with the second batch of dough.
- Adjust the rack to the upper and lower positions and preheat oven to 180°C
- Gather the scraps together into a ball, chill until firm, and reroll. Dust the surface with more sweet rice flour and roll out the dough to get a couple more wafers.
- Bake for 15 minutes, until browned and slightly firm to the touch, rotating sheets halfway through to ensure even baking. This might take a little longer, but not much, The biscuits will come out soft but crispen on cooling. If they don't get fully crisp pop them back in the oven for another 5 minutes.
 For Nanaimo Bars
base layer
- 115g butter
- 50g granulated sugar
- 35g cocoa
- 1 egg or 8g ground flax with 30g water
- 160g gluten free graham cracker crumbs (as above)
- 130g coconut (omitted as I am intolerant of coconut, additional graham crumbs to replace)
- 55g almonds, finely chopped
- Line an 8" square baking tin
- Melt the butter, sugar and cocoa together in a double boiler or microwave
- Add the egg or flax and stir well until thickened
- Stir in the crumb, coconut and nuts then pour into the prepared tin.
- Press in to create a firm even base, chill until the middle layer is ready.
- 70g butter
- 80g peanut butter
- 20g custard powder
- 30g double cream
- 200g icing sugar
- soften butter and peanut butter in a microwave until soft.
- sieve the icing sugar and custard powder together then add to the butters
- pour over the cream
- beat with a hand beater until well combined and smooth
- spread over the biscuit base and chill
- 55g milk chocolate
- 60g (70%) dark chocolate
- 25g butter
- melt chocolates and butter together over a low heat or in microwave
- allow to cool (but still liquid)
- pour over the middle layer and chill until set
These bars freeze very well, so don’t be afraid to pop some into the freezer.
The graham wafers may be kept in an airtight container for up to 2 weeks (mine lasted about that long). If making the graham crackers with wheat, replace the gluten-free flours (tapioca starch, sweet rice flour, and sorghum flour) with 2 ½ cups plus 2 tbsp of all-purpose wheat flour, or wheat pastry flour.


your crackers alone look delicious and the bars are so pretty and divine looking. amazing work with this challenge.
ReplyDeletethe bars look so lovely..great work.
ReplyDeletepretty pretty pictures! your nanaimo bars look so perfect!
ReplyDeleteBeautiful job
ReplyDeleteBoth your Nanaimo bars and the wafers looks amazing
Wow your crackers look great.
ReplyDeleteLooks neat, beautiful and delicious. Well done!
ReplyDeleteThey look fantastic, and I don't think anyone here will be offended by your changing of the filling! I am Canadian and find them too sweet too, so I made a more custardy layer than the original. Beautiful photos!
ReplyDeleteWell done on the challenge! Your bars look so neat and well made, and I love the idea of adding peanut butter.
ReplyDeleteI'm so glad I could be the one to welcome you into the Daring Bakers =D. Isn't it nice not to have to adapt? Your wafers and bars look sensational!
ReplyDeleteAlso, making them for the Olympics is most definitely not a lame excuse! I think I'll be doing the same =D.
One among the neatest bars I 've seen around.
ReplyDeleteThe nut middle layer sounds great and as you say probably a better level of sweetness for us Brits. I did like the original version but more than about a 1" square started to make me feel I'd go into sugar shock.. much like Kendle Mintcake ! Glad to find your blog too!
ReplyDeletePerfect treat for my little brother - he needs a high power snack when he's out on a cold moor on a game shoot and this fits the bill!
ReplyDeleteLovely! Count me as another Canadian who finds the original too sweet for my taste (and I have a sweet tooth!). Peanut butter filling hits the mark for us so it's my Nanaimo bar of choice. I was in Nanaimo this past summer and they were nice folks, so I'm sure they don't mind :)
ReplyDeleteThat looks delicious - definitely will be passing this recipe on to my Bro and his g/f who live in Canada :)
ReplyDeleteooh that looks lovely. Curling is big where I live in Scotland, two of the Team GB going to Canada come from our town.
ReplyDeleteCongrats on completing your first challenge and your bars look so even!! Great job!
ReplyDeleteWow, your bars look so neat and delicious, well done :)
ReplyDeleteThank you for all your comments.
ReplyDeleteI really enjoyed making these bars as well as the challenge of making a recipe which I would probably overlook otherwise.
Having never heard of Nanaimo in Canada before this challenge, I have know discovered several connections with the town from within my own family ... not least, though quite the most random being that the cat of my cousin's neighbours in the west of France comes from Nanaimo, now that is one well-travelled cat!