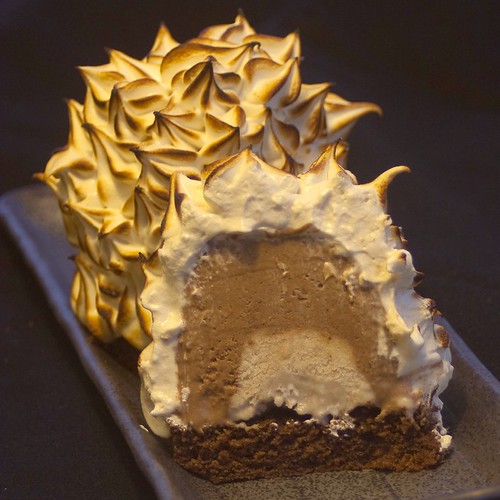
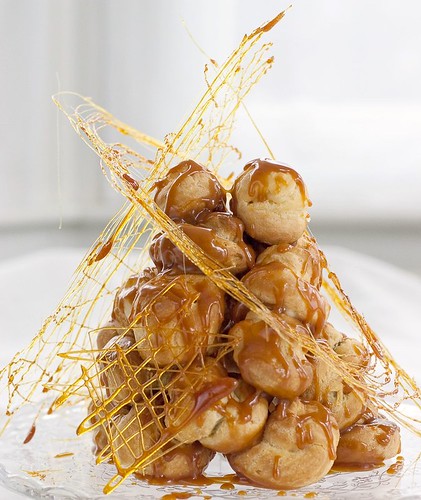
The August 2010 Daring Bakers’ challenge was hosted by Elissa of 17 and Baking. For the first time, The Daring Bakers partnered with Sugar High Fridays for a co-event and Elissa was the gracious hostess of both. Using the theme of beurre noisette, or browned butter, Elissa chose to challenge Daring Bakers to make a pound cake to be used in either a Baked Alaska or in Ice Cream Petit Fours. The sources for Elissa’s challenge were Gourmet magazine and David Lebovitz’s “The Perfect Scoop”.
After quite a gap where I have struggled to find motivation, this month's daring baker challenge grabbed me and enticed me to try a recipe that has intrigued me since I was a little kid. I think it was the most read recipe in one of my childhood cookbooks right at the back with surprisingly clean pages! The recipe called for both shop bought ice cream and cake rather than making them from scratch. I didn't even realise that you could make ice cream at home back then. Although as a kid I read the recipe with lustful regularity, I never attempted to make it, it didn't make any sense - how on earth could you bake ice cream without it melting? Madness!
Anyway, yesterday, clad in shoes and a jumper for warmth for the first time this summer, the grey windy and rainy day provided a perfect backdrop for ice cream making and baking. I was glad of the diversion from the miserable weather. After much negotiation with the teen, the ice cream flavours were decided as i) chocolate and peanut butter & ii) banana. The daring baker challenge called for us to make 2 types of ice cream from scratch along with a browned butter pound cake which would provide the base to build the baked alaska on. I decided to make individual versions with the ice cream frozen into small French tumbler-style wine glasses lined with cling film. Once the ice cream was un-molded and sat a'top the cake base, a simple meringue could be piped over the whole thing and then The molded ice cream is set upon a gluten free chocolate sponge base before being topped with a piped vanilla meringue which is baked or browned using a blow torch.
The meringue was a very simple recipe of 2 large egg whites and 100g castor sugar whisked together with a teaspoon of vanilla extract folded in at the end. I piped this quickly using a star nozzle over the ice cream bases and then blasted them with a blow torch - I am yet to dare to bake ice cream!
I was persuaded to flavour the cake base with chocolate as well although for me, that has proved one step too far - it will some time before I eat chocolate cake again.
This dessert is rich beyond belief and even my baby French wine glasses proved way too big for the finished individual servings of baked alaska - if there is a next time, shot glasses will be used. There was no need to serve a main course, this was a dessert-only dinner which had to be followed by a 5k run to settle my stomach!
Much as I love a rich creamy ice cream (and for a simple flavour like vanilla I would definitely stick to the original recipe) for this combination of chocolate and peanut butter, I reduced the egg content of the recipe and used my own fall-back recipe for a (slightly) lighter ice cream. This ice cream has been a regular for us all summer, we love the combination of salty crunchy peanut butter with a creamy sweet chocolate ice cream. When I am making this for 'normal' consumption, I would not add the peanut butter mix until the ice cream has almost finished churning so that the peanut butter ends up rippled through the ice cream rather than fully combined. However for this baked alaska, I have fully mixed it in so that the ice cream will be consistently frozen throughout.
Chocolate & Peanut Butter Ice cream:
- 100g 70% Belgian chocolate
- 240ml / 1 cup double (heavy) cream
- 3tbsp dutch processed cocoa powder
- 240ml / 1 cup double cream
- 125g crunchy unsweetened peanut butter
- a pinch of sea salt
- 30g agave nectar or sweet freedom
- 360ml / 1.5 cups whole milk
- 140g or 2/3 cup white sugar
- 3 large eggs
- 1 tsp madagascan vanilla extract
- Break up the chocolate and place in a microwaveable bowl with 1 cup double cream. Heat on high for 45 seconds then stir until the chocolate melts into the cream. Whisk in the cocoa powder and set aside.
- Mix the peanut butter with the second cup of double cream, the sea salt and the sweetener, set aside.
- In a heavy-bottomed pan, gently heat the milk and sugar stirring constantly until the sugar dissolves. Remove from the heat as soon as this happens.
- Whisk the eggs in a large heatproof bowl. Keep beating the eggs whilst pouring over the warm sweetened milk. Beat until thoroughly combined, then pour the whole mixture back into the pan.
- Add the chocolate and cream mix to the pan and stir to combine. Heat the whole chocolate custard mix very gently, stirring constantly until the custard is thick - do not let this boil, nor stop stirring until the custard is ready.
- To check whether the custard is done, use your finger to draw a line through some cooked custard on the back of the spoon or spatula you are using to stir - when the bare line remains clear through the custard, then the mix is ready. The custard will be thick and creamy but with a slightly jelly-like consistency, this is due to using whole eggs rather than simply egg yolks.
- To cool the custard, you can simply place the whole pan in an ice bath or a sink or washing up bowl half-filled with cold water. Make sure that you don't splash water into the custard as it cools - but don't put a lid on the pan as that will slow down the cooling process. Change the water 2 or 3 times until the custard is at room temperature. Now you can chill the custard in the fridge for an hour or so before freezing it.
- Once the custard is lightly chilled, add the peanut butter mix in large dollops but don't mix in too much (the churning will do this) and now you can churn the mix as per your ice-cream maker's instructions. If you don't have an ice-cream machine, you can decant the custard into a freezer-proof box and place in the freezer for 3 hours. After three hours, take the box out and stir vigorously with a fork to break up the ice crystals. Repeat this process hourly until the mixture is thick and creamy and too difficult to stir, at which point - if you are making baked alaska - you can decant the ice cream into the mold for freezing.


