Saturday, 27 February 2010

gluten free tiramisu, daring bakers feb'10


The February 2010 Daring Bakers’ challenge was hosted by Aparna of My Diverse Kitchen and Deeba of Passionate About Baking. They chose Tiramisu as the challenge for the month. Their challenge recipe is based on recipes from The Washington Post, Cordon Bleu at Home and Baking Obsession.

I greeted this Daring Baker's challenge with some degree of trepidation as tiramisu is not a dessert that I have chosen to eat very often over the years.  I have never seen a gluten free version which means my memories are even more vague and I am dredging back a long way for a point of reference.

According to the Daring Baker hosts, Aparna of My Diverse Kitchen and Deeba of Passionate About Baking, this is the story behind this rich dessert:

"The perfect Tiramisu is a balance of flavors of a sweet zabaglione, strong coffee, marsala wine, creamy mascarpone cheese and the dusting of unsweetened cocoa.  
Tiramisu is said to have its origins in Treviso (Italy), and there are quite a few stories about how it came to be created.  One story traces the tiramisu as far back as the Renaissance claiming that it was first made in honour of the visit of Grand Duke Cosimo di Medici to Tuscany. Yet another one points to the tiramisu being an adaptation of the "Zuppa Inglese" referring to the sponge cake and cream layered English Trifle.  However, experts in this area generally agree that the tiramisu as we know it today, was born in the ‘70s.  Some believe that the Tiramisu was created in the the Le Beccherie (a restaurant in Treviso). Others suggest that Tiramisu was first made in 1971 by an Italian baker named Carminantonio Iannaccone in a small bakery in Treviso, Italy."

I love the fact that two passionate bakers from India are encouraging us to create a multi-faceted dessert from Italy in our many kitchens all around the world.  That is the Daring Bakers for you!

For any-one who cares (and that includes me!) tiramisu, or rather tirami su literally means "pick me up" or "pull me up" in reference to the effects of the sugar and espresso in the dessert.

There were no shortcuts in this recipe and method, the challenge was made up of 4 technical components, all of which had to be followed in order to successfully complete the challenge.  The whole process took me 5 sessions to complete, baking the biscuits and making the cheese in evenings during the week, then starting the zabaglioni and the pastry cream early on a weekend morning before constructing and chilling the dessert later the same afternoon.  Of course, as all bloggers know, the dish isn't completed until photographed and written up so that accounts for the final session today.  I am very glad that I chose to complete this challenge very early in the month as I think I would have panicked if I had left this to the last minute!


As this dish is quite complex, I am going to break down the elements into separate posts which I will add in the next few days:
  • savoiardi biscuits
  • home-made marscapone cheese
  • cooked zabaglioni
  • pastry cream 
Each component is a valuable technique in its' own right and very useful in a baker's repetoire.  Compiling the dish seems a touch bizarre after all the effort that goes into making the elements.  Fundamentally, you just mix all the sauce elements together until they are creamy, then layer the cream with the savoiardi biscuits.  Ta-daa!! Tiramisu :)

tiramisu

Thursday, 18 February 2010

orange & cardamom marmalade bars


UMME5EB3TG5E
Now that I have made marmalade, I am constantly thinking of recipes to include it.  I really don't want to find any jars stuffed at the back of a cupboard two years down the line.
I have been working in the bakery at work for the past couple of weeks.  We are busy with new customers so the orders are coming in fast and furiously and it is all hands on deck.  At present though, we just don't have enough hands so we are all flat out all day trying to get enough baked and packed to fill the pallets quickly enough.  It is always good to be back doing the hands on work but the collapsed discs in my back are screaming out by the end of every day and it is all I can do to swallow some food, painkillers and collapse.  It is almost unheardof for me, but twice this week I haven't even had the energy to turn my computer on at home!
I spend my days thinking of healthy sensible recipes that I can make at home which will sustain me during each working day and ensure that I finish the day feeling healthy rather than drained.  However, having made marmalade this week, everything I make this week is going to contain this rich bitter jam and so will not rank too highly on the health scales!
orange marmalade bars

This bar is (yet!) another variation on Nanaimo bars, but the filling is a blend of bittersweet marmalade and custardy cream.  With a crushed chocolate biscuit base and a chocolate topping, it is also a more substantial take on jaffa cakes.  I have changed the recipe a bit, to lower the sugar content and take out the raw egg in the base.  I am really looking forward to the bitter note of the marmalade cutting through the sweetness of the custardy layer and the chocolate on top.  A little piece mid-afternoon should give me just enough ooomph to get me through till the end of the day & see me home with a smile, I hope, and that will definitely make me more popular in my house!

orange & cardamom marmalade bars
base layer
  • 100g butter
  • 10g ground flax with 30g water
  • 300g gluten free chocolate shortbread crumbs
  • 50g ground almonds
  • 25g icing sugar
  • 1/2 tsp vanilla extract
  1. Line an 8" square baking tin
  2. Melt the butter
  3. Mix flax and water & leave to stand for 5 minutes.
  4. Add 1/2 tsp vanilla extract then stir it all into the butter.
  5. Stir the butter mix in to the crumb then pour into the prepared tin.
  6. Press in to create a firm even base, chill until the middle layer is ready.
middle layer
  • 100g softened butter
  • 100g marmalade (I used my orange and cardamom recipe here)
  • 25g custard powder
  • 125g icing sugar
  1. beat butter and marmalade together until smooth and creamy
  2. sieve the icing sugar and custard powder together then add to the butter
  3. beat with a hand beater until well combined and smooth
  4. spread over the biscuit base and chill
top layer
  • 55g milk chocolate
  • 60g (70%) dark chocolate
  • 25g butter
  1. melt chocolates and butter together over a low heat or in microwave
  2. allow to cool (but still liquid)
  3. pour over the middle layer and chill until set

Monday, 15 February 2010

gluten free pot sticker dumplings (metric)


I posted the original recipe and method for these a few months ago, but never quite got round to converting the recipe from cups into metric measures.
The teen and I made these as part of our spurious Chinese New Year's Eve feast dinner this weekend so I have finally got round to writing up the metric measures.  This time we made the filling with minced chicken thighs (including the fat & a bit of finely chopped skin) replacing the pork, as we were having pork belly elsewhere in the meal, it made a great substitution with a dash of chinese rice wine & an extra pinch of salt.

Please refer back to the original post for the original filling and method here.


Pot sticker wrappers:
  • 175g rice flour
  • 40g tapioca starch
  • 40g corn starch
  • 46g sweet rice flour
  • 1 tsp xanthan gum
  • 1/2 tsp psyllium husks
  • 1/2 tsp kuzu
  • 1/4 tsp salt
  • 1 large egg
  • 120g cold water
Method:
  1. Sieve all the dry ingredients together.
  2. Beat the egg into the cold water.
  3. Whilst stirring your flour, gradually pour in the water making sure the flour absorbs the water as you go.
  4. Bring the lumps of flour together in the bowl by hand.
  5. If the dough is too wet or sticky add more sweet rice flour, if it is too dry add water 1 tablespoon at a time.
  6. Knead this for a couple of minutes on a work surfaced sprinkled with a little corn starch
  7. Divide the dough into 4 equal pieces.  Leave all but 1 piece in a bowl under a damp tea towel.
  8. Dust your work surface with corn starch and roll out the small piece of dough until it is between 1/16th" & 1/8th" thick.  
  9. Using a 3-3.5 inch round cutter, cut out as many shapes as you can, put the circles to one side under a damp cloth and carry on with each piece of dough in turn.  I found that if you collected up the trimmings and sprinkled a couple of drops of water on them, you could combine them into the next piece of dough without any problems.
  10. Carry on until all the pot stickers are cut out.  This recipe makes 50 dumpling skins.
click here for a filling recipe and cooking method

Sunday, 14 February 2010

oxtail stew recipe

It's still winter, it's still cold and there is even more snow forecast.  On top of that, it is February, credit card bills from Christmas are overdue and there still isn't enough sun or daylight to keep everyone in good cheer.  At this time of year I find myself turning to slow-cooked stews, vegetable soups and casseroles for the family. 
Last week, I spotted oxtail on the butchers counter and bought a few pieces to try it on the family. 
The teen grew into a phase of really fussy eating between about 5 and 13,  she has slowly eased out of it trying first mussels, then meat with bones in (that was a big one!) but I am yet to persuade her of the flavour and enjoyment to be found in offal and other trimming cuts.  But she does love beef, so since it is less than a pace from a rump steak to the tail, I thought I would risk the minimal cost and make an oxtail stew.
oxtail stew
This is a very easy and lazy recipe making best use of a slow cooker or aga to gently heat the stew for hours at a time. Early one morning this week, whilst waiting my eyes to focus in the grey dawn and the coffee to brew, I roughly chopped up some celery, carrots & onions and slowly fried them off in a touch of olive oil with a clove or 2 of garlic added. This was piled into the slow cooker with herbs, a few pieces of oxtail, some left over red wine and beef stock.  And that was it, slow cooking for 10 hours to create a rich and unctous stew with delicious gravy. 
Serve with good crusty bread or mashed potato, a touch of mustard and a glass of red wine or proper beer.

oxtail stew (per person)
  • 2-3 pieces oxtail
  • 1/2 medium onion
  • 1/2 clove garlic, finely chopped
  • 1 carrot, sliced
  • 1/2 stick celery, sliced
  • 1 tsp rice flour
  • 1/2 sprig thyme
  • 1/2 bay leaf
  • 1/4 pt beef stock
  • 1 glass red wine (or more beef stock)
  1. dry fry the oxtail in a hot pan to caramelise all over then take out
  2. add a dash of olive oil, the chopped onion and garlic to the hot pan, fry over low heat for 5 minutes
  3. add the carrot and celery, fry for another 5 minutes
  4. sprinkle over flour, and fry for a couple more minutes
  5. transfer the contents of the frying pan to a casserole or slow cooker
  6. add the oxtail and herbs
  7. pour over the stock and wine, and stir 
  8. if using slow cooker, close lid and turn onto low heat for 10 hours
  9. for casserole, bring to the boil on a hob then transfer to a low oven (140°C) for 3-4 hours
  10. to serve, remove herbs, serve with a green salad and crusty bread or mashed potatoes and mustard.

Thursday, 11 February 2010

Buy "A Hand for Haiti" E-recipe book NOW!


Lauren who blogs at Celiacteen has pulled together a collection of recipes donated by bloggers from all around the world, which is being sold to raise funds for the Red Cross in Haiti.

This is a collection of over 85 recipes and more than half of them are gluten free.  Every one needs a few gluten free recipes in their collection so what a great way to gain a few new recipes as well as a chance to discover lots of food bloggers from all around the globe.
This is a great cause, and really we are lucky to be rewarded with so many great recipes for such a small donation. 

The book sells for a minimum of $10 Canadian dollars, but when you consider that $15 Canadian dollars is still less than £10, this book is worth at least $15 Canadian dollars of every-one's money.

PLEASE BUY THIS TODAY - if you buy before the end of FRIDAY 12th FEBRUARY,  the Canadian government will MATCH each donation that you make.  Really!  So, spend a tenner, get a cook book and the warm cosy feeling of knowing that $30 Canadian dollars will be donated to the Red Cross for Haiti.

There isn't much more to say, just buy it!

Thank you :)

Monday, 8 February 2010

Puy Lentils recipe


The teen has just burnt a pan of lentils.  She was making some for her to take to college for lunch tomorrow and she used the last of the puy lentils we have in the house.  She is currently trying very hard not to slam the cupboard doors as she clears up the mess and the burnt pan.  She is not a happy kid as she is faced with having to eat a canteen lunch tomorrow.  I was going to suggest making an alternative version but decided to bite my tongue and beat a hasty retreat instead.

In the kitchen cupboard we have a good selection of  pulses : brown lentils, yellow split peas, chana dahl, chickpeas, kidney beans, black eye peas, cannelini and haricot, just off the top of my head.  But I know that not one of these will make an acceptable substitute for her, not today.  So the teen thinks she is going hungry and the world is a dark dank place.

When I was her age, doing A-levels, I attended a college with tertiary and sixth form classes on the same site.  The subsidised canteen was run by the City & Guilds catering students, and the food was good (most of the time!).  That didn't stop me though, on a quest to save my allowance and part-time wages for the weekends.  I would walk the mile and a half each way and eat the cheapest food I could buy there.  The canteen sold breakfast sandwiches, 3 course lunches and proper puddings but it didn't take long to work out the cheapest foods on offer.  On the average day, it was a heaped plate of plain white rice with beansprouts,which off the top of my head (and we are going back a few years)  cost 26p, 15p for the rice, 11p for the beansprouts.  I know it sounds as though I was being really tight, and I probably was, but I really enjoyed the food.  It was simple, fresh and filling.  They had soy sauce behind the counter and with a beg and a smile, a dash of dark rich soy and a bit of fresh salad, this was a fine meal.  There was one dark shadow that could spoil the meal though, and I have never, ever understood this.  The beansprouts were baked "au gratin".  Yes, really.  A deep gastronorm tray of beansprouts seasoned then pushed under a grill with a thick layer of sharp catering cheddar-style cheese.  You had to avoid the cheese and there was a knack to doing it.  The dinner ladies thought that the cheesey topping was the best part of the dish, so they would bestow it with a smile and a heavy hand to favoured students and wouldn't take no for an answer.  The only way to solve the problem was to arrive about 5 minutes after the canteen opened.  This would ensure that you weren't first in the queue, the staff were fairly busy and would already have bestowed their gift of cheese on earlier visitors meaning you would likely as not get a scoop of slightly softened sprouts missing the dreaded cheese.  I have no idea why they made beansprouts au gratin though I am glad to say that I have never seen it on a menu since.  If you have, you may well have been eating the food created by one of my north London college alumni (sorry!).

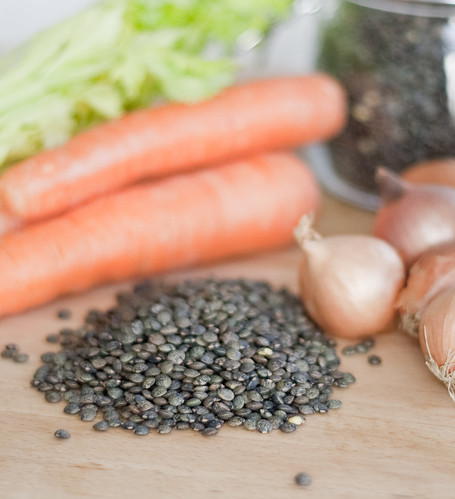
So back to the task in hand.  This is the recipe that the teen was making.  These lentils can be served as a side or a vegetarian main, or tossed in a vinaigrette, they can be served as a salad.  They are really popular in our house and were eaten with glee by our kids when other vegetables were shunned.  The lentils will stay firm if you leave them to stand after they have boiled but if you are pushed for time, you can simmer them a little more (adding a little extra water) for around 15 minutes instead.

Puy Lentils

250g puy (small green french) lentils
2 sticks celery
1 carrrot
1 clove garlic
1 bay leaves
1 lemon, zested and juiced
2 sprigs thyme
salt and pepper
2 dsp (2 x 10ml) olive oil

Method:
  • Dice the celery and carrots and finely chop the garlic.
  • Rinse the lentils.
  • Pour 1 dsp olive oil into a heavy bottomed saucepan with a lid.
  • Heat gently then add the garlic and vegetables and stir, allowing to soften in the oil, about 10 mins.
  • Add the lentils and turn in the oil until covered.
  • Pour on cold water until the lentils are covered, about 2 cm above the surface of the lentils.
  • Add the bay leaves and thyme, cover with a lid.
  • Bring to the boil and turn down to a gentle boil for 10 mins.
  • Turn the heat off after 10 minutes and leave to stand for 30 minutes.  
  • The lentils should cook through but will still have some bite (ie not mushy).
To serve hot (rather than use in salad):
  • Remove the bay leaves and thyme stems. 
  • Bring to the boil again with the lid off.
  • Add the zest and juice of the lemon and season to taste.
  • Pour over the 2nd dsp of olive oil and stir through, serve.
If you are going to use these as a salad:
  • Drain once cool
  • Remove the bay leaves and thyme stems.  
  • Add the lemon zest and juice along with the 2nd dsp olive oil.
  • Season to taste and serve with chopped parsley.

Saturday, 6 February 2010

orange & cardamom marmalade recipe


During our mammoth kitchen clear-out, I felt it my duty to venture right to the back of (nearly) every cupboard and the fridges to investigate the contents.  Right at the very back of the little fridge snuggled a jar with the merest scrapings of its' contents remaining inside.  This is a really bad habit of mine.  When I am totally in love with a food, I can never bring myself to finish it, in case I forget it, or I am craving the flavour one day.  I am not entirely sure of the reason but I know that it reflects an element of my personality that a psych would probably make a mountain out of!

orange & cardamom marmalade on toast 2a
The jar concerned bears a black lid and label with contents almost as dark, and is the remnants of our last jar of Kush Cuisine's Orange & Mango Marmalade with Cardamom.  When we used to sell at farmers markets in London we would see them at the Blackheath market.  I say we, but in fact my alternate Sundays never coincided with them, and it was my husband who attended on those days whilst I was working back in the bakery.  And so it was him who came home with this delicious thick marmalade studded with deeply perfumed crunchy cardamom seeds.  I love it, and having given up the markets, have had to ration myself to the occassional serving in order to make the jar last longer.  And then one day there was one last serving left in the jar and it was pushed further to the back of the fridge to save rather than actually finishing it.

Today though, I made rice flour drop scones for breakfast and feasted on them with the last of this delicious marmalade, safe in the knowledge that the citrussy smell wafting through our kitchen was heralding the creation of my first ever batch of marmalade, flavoured with cardamom in deference to Kush's masterpiece.

If you ever find yourself at a farmers market in London, do check out Kush and grab a jar of their delicious marmalade ... alternatively, of course you could have a go at this recipe and see how your own version matches up!

cardamom seeds, pods & seville orange 1a
I have based my recipe and method on a combination of this recipe on Delia's site here and a recipe from The Times here, have a look (and you will be able to see how my impatience changed the methods!)  This can be  a bit time-consuming to make and you need to plan in advance.  Obviously getting your Seville oranges is the first mission as they are only in season in January and February.  If you can lay your hands on some, but don't have time to use them, stick them in the freezer and you will be able to make the marmalade whenever you fancy.


Seville bitter orange marmalade infused with cardamom

Ingredients:

  • 1.5kg seville oranges
  • 10g black cardamom seeds (after podding)
  • 2kg granulated sugar
  • 2.2l water

Equipment:
  • 2 large pans with a lid & some foil, 1 x muslin square (I am using a new baby square), big sieve & bowl, jam thermometer or a few chilled saucers, 6-7 x 500g jars with lids & waxed paper to seal.
Method:
  1. Wash the oranges and scrub with a bit of washing up liquid if they are coated in a shiny layer of wax.
  2. Place in the large pan and fill up with water
  3. Bring to a boil, and reduce heat to a simmer. Seal the top of the pan with a piece of foil and then place the lid over.
  4. Simmer at a very low temperature until the oranges are softened by a combination of the steam and hot, hot water - this took about 2 hours for me.
  5. Whilst the oranges simmer, de-seed the green cardamom pods by toasting the whole pods gently in a frying pan until they swelled up in  the heat, open the pods with your finger nail or the tip of a sharp knife and scrape out the seeds.  There is no denying this is tedious work so if you can find good quality ready-seeded black cardamom seeds, I suggest you use them!
  6. Leave the oranges to sit in the water until cool enough to handle (retain the water afterwards).
  7. Place the sieve over a big bowl.  Slice each orange in half, using a spoon scrape out the pith, pips and inners of each orange half into the sieve.
  8. Add all the orange inners to the water your cooked your oranges in and bring this to a rolling boil to reduce by half in about 20 minutes.
  9. Whilst this is boiling, warm your sugar either by placing the sealed bags on your radiator (my lazy method) or sprinkling the sugar into a couple of baking trays and placing in a low oven at about 100°C for 10-15 minutes.
  10. Slice your orange skins into thick or thin strips - depending on what you prefer in your marmalade.  For me this is short thick chunks (though thin slivers are much more photogenic of course!).
  11. Once the twenty minutes is up and the orange liquid is reduced by half, place the sieve over your second pan and drain the cooked orange liquid into the clean pan.  Scrape through the sieve with a big spoon to extract as much of the juices and goodness into the pan below.
  12. Add the orange peel to the pan of juices along with the cardamom seeds.  Bring this to the boil and slowly add the sugar stirring constantly to ensure it dissolves quickly.
  13. Once the sugar has dissolved turn up the heat and boil rapidly for 10-15 minutes.Whilst this is happening, wash your jars and lids then sterilise in the oven at 150°C for 15 minutes.
  14. Check the setting point of the marmalade - if you have a sugar thermometer you are looking for the temperature to reach 106°C (220°F).  If you don't have a sugar thermometer grab a chilled saucer and scoop out a spoonful of the syrupy dark juices onto the saucer.  Leave to sit for a minute or two then tilt the saucer from side to side.  If the liquid is set, the skin will stop the marmalade running across the saucer as you tilt.  If not, the liquid will run and needs to boil for another 10 minutes or so.
  15. Repeat the test until the marmalade is ready and once setting point has been reached, take the pan off the heat and leave to sit for half an hour to cool a little.
  16. Ladle the cooled marmalade into your cooled sterilised jars and place a piece of waxed paper over the top before placing a lid on each jar.
Notes - I found that the oranges were a bit over cooked - when I came to remove the pith and inners the skin fell apart making the whole process very messy.  This also made it harder to cut the skin into even shreds so I ended up using a pair of scissors and sandwiching several pieces together to cut..  In future I would only boil for an hour, then leave to cool for a maximum of 2 hours and hopefully this will do the trick.