Thursday, 31 December 2009

home-made cured salmon recipe


dill cured salmon filletI find myself, happily, with a whole salmon sitting in my fridge.  My usual, more frugal, self would fillet, portion and freeze the fish for quick mid week meals probably making a few gluten-free salmon fish fingers too.   Today though, I am going to buck the trend and cure the fillet to serve on Christmas Day with buckwheat blini and rose champagne (that is the only way to start Christmas Day in our house).  This dish takes around 48 hours to cure and during that time you do need to turn the fish over morning and evening to get an even cure.  But apart from that it is one of the easiest and most impressive 'home-made' dishes that you can serve, so have a go and lap up the praise when you serve this.  And, if you area really sensible, you will buy your salmon already filleted!
simply cured salmon
I have used 2 different cures, one for each fillet.  The first was a very simple sugar/salt mix (using the quantities listed in the recipe but omitting the other flavourings).  I rubbed this fillet with gin to help the cure to penetrate, this gave the salmon a faint hint of juniper which is just delicious.  The intention with the second fillet was to cure it with dill in the style of gravad-lax but I couldn't find a single sprig in my local stores.  The gods of invention have obviously been looking after me so I have substituted dill for slivers of fresh fennel and some strongly-flavoured fennel vodka which has been sitting in my cupboard infusing.  In case that sounds weird, 3 months ago I stuck handfuls of several different spices and flowers in sterilised jam jars of vodka.  There is quite a random selection, as well as fennel there is coriander seed, hibiscus flower, lavender and several others.  I wasn't quite sure what I was doing at the time - but obviously I was being foresighted and planning for Christmas!
You will get messy filleting and pin-boning the salmon before annointing it with the curing mixture, but that is all part of the fun. I prefer a slightly sweet cure so have used a little more sugar than some recipes suggest.  You can freeze the salmon after it has been cured and rinsed off.  I did this and layered some fresh dill in between the fillets before freezing.  It is much easier to slice thinly from frozen and you get a thin vivid green layer in the middle which is pretty too. 
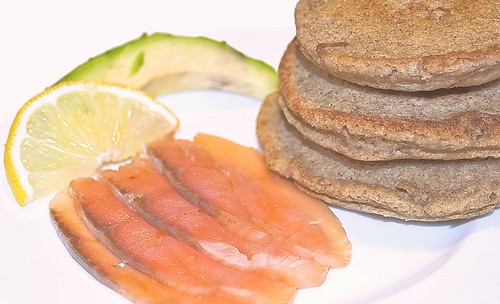
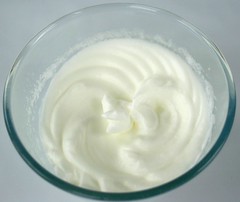
Serve the salmon on homemade buckwheat blini (recipe here) with some soured cream or sliced avocado, delicious!

Ingredients
  • 1 x 650g skin-on salmon fillet, pin-boned, rinsed and dried
  • 20g finely shredded fennel plus any fronds that are attached, finely shredded
  • (or 1 bunch dill)
  • 40g dark brown muscavado sugar
  • 60g coarse sea salt
  • 1 dsp fennel seeds
  • 1 dsp white peppercorns
  • 1 tsp coriander seeds
  • 20ml fennel vodka (or gin)
Method
  • Cut the salmon fillet in half widthways
  • Lay the pieces of salmon fillet skin-side down on a piece of cling film (at least 3 times the length of the filet)
  • Grind the aromatics with the coarse sea salt in a coffee grinder, liquidiser or pestle & mortar
  • Add the sugar to the salt mix and mix again till combined
  • Spread the mixture over the flesh and press onto the fish
  • Drizzle over the vodka or gin
  • Lay the shredded fennel or dill over 1 half fillet
  • Sandwich the 2 fillets together and wrap the cling film tightly around the fish
  • Put the wrapped fillet into a ziplock bag and lay that onto a deep-lipped plate or serving dish
  • Put a plate on top and weight the plate down with a heavy object (a couple of tins of beans)
  • Put the weighted dish into the fridge
  • Turn the salmon pieces every 12 hours and refridgerate again
  • After 48 hrs, remove the salmon from the fridge and unwrap.
  • Wipe each fillet to remove the cure and rinse thoroughly to remove the last traces of any salt.
  • Sandwich the fillets together again and wrap tightly in clingfilm.  
  • If you have time, freeze this until an hour before you want to serve this, otherwise chill it.
  • Remove from the freezer or fridge an hour before you are serving it, unwrap and slice finely across the grain to create thin slices.
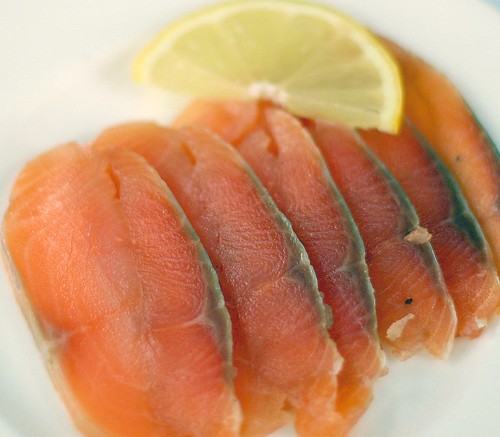
Serve with blini and chilled vodka or champagne.

Wednesday, 30 December 2009

buckwheat blini, gluten free


Our Christmas at home is not complete without blini and smoked salmon at least once during the holiday.  Having splurged on Christmas Day I thought that we wouldn't be re-visiting this recipe until next year but fate decided otherwise when I woke up to yet another grey rainy cold day this week.  There seemed only one way to bring some sunshine into the day, so a late breakfast of strong black coffee, blini and home-cured salmon seemed the perfect recipe to put a smile on our faces. Judging by the speed these were devoured I am definitely going to serve round 3 on New Years Day - this time with champagne to welcome in 2010.

home cured salmon & gluten-free blini

This recipe makes enough to serve 4-5 for breakfast, and up to 8 for a starter or canapes before a meal.
Blini are naturally gluten free as they are traditionally made with buckwheat flour. Buckwheat does have a distinctive flavour, so if it is too strong for you substitute half the flour with a gluten free blend, rice flour or plain wheat flour if you are not following a glutenfree diet.

I fried these blini in a 50/50 mix of unsalted butter and lard, the lard is a fantastic addition, making them crispier and far more flavoursome then if simply fried in butter.  The lard suggestion came from GlutenFreeDay, you can find an alternative recipe and method on Emilia's great blog here, she also has suggestions for dairy free substitutions if you need them.

Blini are delicious served with cured or smoked salmon, you can find a recipe for easy home-cured salmon on my blog

Ingredients
  • 100g creme fraiche or sour cream
  • 125g milk
  • 165g buckwheat flour
  • 3g salt
  • 7g (1 pk) easy-blend dried yeast
  • 2 eggs, separated
  • 25g butter
  • 25g lard


    Method

    • sieve the flour and salt into a large bowl 
    • sprinkle the fast-acting yeast over the flour and set aside
    • weight the milk and cream into a small saucepan and put on a very low heat to warm
    • separate the eggs, putting the whites into a medium size bowl 
    • tips the yolks into the warming milk and whisk in.
    • dip your fingers into the milk and, when the mixture is blood temperature, pour this onto the flour
    • whisk the batter together until it is smooth, cover with a tea towel and put the bowl in a warm place to allow the yeast to develop (approx 1 hour)
    • once the batter is bubbly and rising (see picture) whisk the egg white to a stiff peak
    • pour the egg whites into the batter mix and gently stir in till fully combined (the batter will become a bit slippery)
    • heat a heavy frying pan or skillet and add half the butter and lard
    • once the fats are foaming, spoon in 4 dollops of batter.  You can use muffin rings for a perfect shape but I don't bother - as long as the butter is hot the batter doesn't run too much
    • the batter will rise and bubbles will form in the topside of the blini
    • turn over whilst the top is still runny and cook the underside until it is lightly brown and the edges are crispy
    • remove to a warm oven dish lined with a tea towel and continue to cook the remaining batter, using the rest of the fat when necessary
    Serve warm with cured or smoked salmon (see my recipe here) and a slice of creamy avocado.

    Sunday, 27 December 2009

    gluten free short-crust pastry


    A few years back we used to buy our butter from a local cheesemaker for whom butter was a tasty by-product of their cheese.  I was curious when one day I saw a big commercial hobart mixer in the dairy and asked why it was there.
    "That is to grate the butter" came the reply.
    Ok, so why would you grate butter?  Well, you could put that another way by thinking about the process of making pastry which is all about the rubbing in or distribution of the fats in the flour.  You take chilled butter, chop it into chunks and then, using your fingertips you rub the butter combining it with the flour until the little pieces of butter have completely disintegrated into the flour creating a sandy yellow, slightly gritty texture.  My Home Ec teacher at school drilled it into us that we should never, ever have floury palms whilst making pastry as that would make for a heavy pastry - definitely fingertips only (and don't moan about cramp in your hands!).

    The other day when the weather decided that Mum would be spending Christmas with us, I realised I would need to make some mince pies.  I had been intrigued by the idea of grating butter for bakery purposes but since it has never really matched the processes that we used in our bakery, I haven't thought much more about it, until I read a post in November on the Gluten Free Girl & the Chef blog  (a great source of inspiration and entertainment which you can find here).  I amalgamated that recipe with my own existing recipe, which was in need of a bit of an upgrade as I had to lose the potato flour which I can't tolerate at present.   Instead I added teff as suggested by Shauna.  I am a fan of using glutinous rice flour as an addition to pastry and doughs, especially when used with cornflour as you get a silky smoothness and an easy to handle dough.  Kuzu is a gum / gelling agent with it's roots in Japanese cooking, it is great for adding flexibility to pasta doughs, the addition here is a bit of a test but I thought that, in combination with almond flour, I might get a smooth and manageable dough which still has a shortness of traditional wheat pastry.  This combination of flours is necessary for me as I can't tolerate either oats or potato starch which are commonly used in other flour blends and thankfully it looks as though it is working well.
    Grating the fat makes it a lot easier to get an even distribution without getting cramp in your hands rubbing in.
    The dough came together beautifully, rolled out to 2.5mm with no handling problems and has made the most beautiful light crisp pastry no doubt improved by the combination of lard and butter together.


    You can make this into a proper flakey pastry by rolling out portioning the dough into quarters and rolling each piece in turn into a 3mm sheet.  Spread half the dough with a sparse scraping of butter and fold the dough sheet in half over the butter.  Do the same again on this new layer and fold again.  If you have patience do this once more, now re-roll the pastry out to it's original size and shape and use as normal.  When you bake you will get light flakey pastry which flakes and crumbs luxuriously.
    I made the sausage rolls pictured with the flakey pastry and mince pies with the regular version, the sausage rolls were devoured before they had cooled, all my guests were wheat eaters and not one of them noticed a difference!

    Ingredients:
    • 200g rice flour
    • 150g tapioca starch
    • 80g ground blanched almonds
    • 80g teff flour
    • 80g glutinous rice flour
    • 80g cornstarch
    • 25g arrowroot flour
    • 10g kuzu
    • 1.5tsp xanthan gum
    • 150g grated butter
    • 120g grated lard
    • 2 medium eggs
    • 90-120 ml very cold water
    Method:
    • grate the lard and butter and store in the fridge whilst you prep the flours
    • grind the kuzu with the almonds in a coffe grinder
    • weigh and sieve the rest of the flours together
    • sieve in the xanthan gum and salt
    • stir in the ground almonds and kuzu so all the flours are combined in a large bowl
    • whisk 2 eggs with 100ml very cold water and set aside
    • grab the grated fats out of the fridge and take 1 smallish handful of the mixed butter and lard
    • rub this in to the flour using your finger tips, until the fat diasappears into the sandy mix
    • continue this until all the fats are used up - if you find this difficult get all the fat into the mix and broken down into little pieces
    • transfer the flour and fat mix to a food processor or mixer and mix at low speed until you have a consistently sandy mix
    • whilst the mixer is still running, drizzle in the egg mix slowly and let the mixer do the work, bringing the dough together
    • once the dough looks like a crumble mix stop the mixer and squeeze a couple of chunks of the dough to see how moist it is.  If the dough sticks together without too much moisture then stop the mixer and tip the dough onto a work surface.  If the dough is too dry, drizzle in another 10-15ml water whilst the mixer is running and try again, if the mixture is too wet, add a handful of tapioca starch and mix again before testing.
    • Knead the dough 4-5 times to bring the chunks together then shape into a slab, wrap in cling film and put it in the fridge to rest for at least 30 minutes before using.
    • Baking, for small tarts or pies, you can roll the pastry thinly and bake filled from raw.  If you are making a bigger tart or pie then I suggest you bake the pastry blind before filling.  I baked  mince pies at 170°C for 25 minutes turning the tins half way through, but I do suggest you follow the instructions for the pie you are going to make, simply substituting this pastry for the one in the recipe.
    This volume of dough has made 36 mince pies and 18 x 4" sausage rolls.

    Friday, 25 December 2009

    Chocolate roulade, Yule log, Buche de Noel, gluten free naturally

    A couple of days ago, the teen popped outside to wait for a pizza delivery, which gave me a couple of minutes to write whilst she was not reading over my shoulder.  Apparently, according to her,  I am failing as a mother - again!  We went to the supermarket to do a pre-Christmas essentials shop, she picked up one festive food stuff after another from a shelves,  and each time I replied "Oh you don't need to buy that, I can make it".  And so on, ad infinitum.
    She was trying it on a bit, she knew we had already made home-cured salmon and sloe vodka, that the gluten free pastry for the mince pies was mixed and waiting to be rolled from the fridge.  However the cry went up when I saw her reach into a chiller cabinet for a huge premium-priced (but not delicious-looking) yule log.  She knew she was pushing her luck, so we read the ingredients list together, and she put it back of her own accord.  But did she moan!

    Chocolate logs are, I presume, historically an import from France where you find beautifully presented 'buche de noel'  with marshmallow mushrooms in patisseries just before Christmas.  When we were kids, making a chocolate log was the only reason that we could persuade Mum to buy a supermarket Swiss roll, though we thought that they were the height of sophistication Mum was not convinced - imagine how excited we were when we later discovered Wall's Artic Rolls!  So I can really understand the desire for a delicate rolled chocolate sponge filled with chocolatey buttercream with a bark-styled buttercream dusted in icing sugar snow.
    Anyway, whilst she is outside I will whisper to you that I've made this recipe, a gluten-free chocolate roulade and decorated it as a Chocolate Yule Log for our Christmas dinner.  I want this to be a suprise for her as the teen is not a fan of Christmas pudding.  For her, the main event will be a forerib roast with yorkshire puddings and all (yes, all!) the trimmings especially creamy horseradish.  I am already looking forward to the look on her face when she sees it, even though she will probably be too stuffed to eat any till later in the day!

    I've used a Mary Berry recipe for the ingredients which is naturally gluten free.  I am a great fan of Mary Berry and found that her foolproof recipes were a great way to build my confidence and learn the basics when I first starting baking cakes.  Roulades look impressive but are not that tricky as long as you have a good recipe to start. For the yule log, I have used a different techinique from Mary Berry, in that I prefer to roll the sponge before it cools and unroll to fill before re-rolling.  The key to making this is confidence.  Believe that the sponge will be cooked enough even though it is only in the oven for 20 minutes.  Be confident in rolling your sponge, and do it quickly before it can cool down and break.  And gently unroll the cooled sponge to fill it before re-rolling.  Knowing that I am going to cover the outside of the roll with buttercream icing means that I can patch up any cracks that I create as I roll, unroll and roll again.
    The Mary Berry method here suggests rolling the sponge once it is cold and filled.  This is great if you don't want to make the roulade as soon as you have baked the sponge and especially good for summer roulades when you are decorating the dessert with little more than a sprinkling of sugar. 
    Once you have made one and discovered just how straightforward they are, don't forget that this roulade recipe is a fantastic dessert for any time of year.  Filled with cream or chocolate, cherries in summer or blackberries in the autumn (preferably without the chocolate buttercream 'bark') this is a lovely dessert for anytime of year!


    Sponge ingredients:
    • 175g 70% cocoa solid chocolate in 1cm sq pieces
    • 175g caster sugar
    • 6 medium free range eggs, separated
    • A pinch of salt
    • 2 level tbsp cocoa, sieved
    Method
    • Set the chocolate to melt either in the microwave or in a bain marie, remove from the heat as soon as it is melted and allow to cool slightly 
    • Lightly grease a 13"x9" (33x23cm) swiss roll tin
    • Line with non-stick baking paper 
    • Pre-heat the oven to 180°C / Gas Mk4
    • Whisk the egg whites with a pinch of salt until stiff peaks are formed (but before they become dry)
    • Add half the castor sugar and beat until combined
    • Transfer the egg whites into another clean mixing bowl 
    • Now whisk the egg yolks and the rest of the sugar together until they are light and creamy and trebled in volume (at least 5 minutes, so use an electric mixer)
    • Add the melted chocolate to the egg yolk mix and mix gently to combine
    • Add one spoon of the egg white mix to the chocolate mix and fold in.
    • Continue adding the egg whites, until fully combined
    • Then add the cocoa powder and stir till combined
    • Pour the mixture into the prepared tin, spread to the corners and level the top
    • Bake in the oven for 20 minutes until just firm to the touch (the top of my sponge puffed right up whilst in the oven, so I stuck a skewer in a few places to let the steam out and the skin deflated)
    • Whilst the sponge is baking lay a second sheet of baking paper on the counter and sprinkle with a little castor sugar
    • Remove the baked sponge from the oven and flip the baked sponge over onto the sugared baking paper
    • Peel off the backing paper from the sponge and roll up the warm sponge using the base sheet of baking paper, starting on one long side and working quickly but gently to create a roll - folding a long edge of paper over the sponge and then using the long edges of the paper to guide the roll, a bit as though you are rolling up a christmas cracker.
    • Tuck the edges of the paper in around the finished roll and leave to cool
    Filling & icing
    • 100g plain (70%) chocolate, melted with
    • 150g milk chocolate
    • 100g double cream (nearer room temperature than very chilled)
    • 100g icing sugar, sifted
    Melt the chocolate
    Add the cream to the chocolate and stir till combined
    Add the icing sugar to the cream mix and beat till creamy
    Add a little more icing sugar to thicken or cream if the mix is too thick to spread
    Unroll the sponge and trim the edges to get a neat even finish
    Spread one third to one half of the chocolate cream filling on the sponge and re-roll quickly, don't worry if it breaks use the filling as glue to hold the bits together - you can cover up the damage afterwards with the chocolate cream coating!
    Spread the remainder of the chocolate cream over the outside of the roll and leave to set for 15 minutes.
    Using a fork, drag the prongs across the surface of the iced log to create the effect of tree bark, cover and chill in the fridge until you are ready to serve.
    Dust with icing sugar before serving.

    Thursday, 24 December 2009

    Christmas Eve, the big day is almost here

    Almost all the presents are wrapped and under the tree (a few didn't make it through the snow and ice, but no worries).  The vegetables are prepped for tomorrow and we are really looking forward to tucking into the biggest and most beautiful piece of beef I have ever bought (from Paganum in Yorkshire).  Before the festivities take over,  I wanted to wish you happy Christmas and hope that you all enjoy tomorrow with friends and family or in peace and quiet with your feet up! 
    If you are going to be entertaining between Christmas and New Year, I'll be posting a few recipes to help you including  properly flakey gluten-free pastry, sausage rolls, mince pies and a yummy chocolate yule log.
    So, enjoy the cooking but don't forget to sit down and enjoy yourselves but most of all have a happy Christmas!

    Sunday, 20 December 2009

    piping or pouring/dipping icing for cookies, cupcakes and gingerbread decorations


    Here are just a quick few lines to give you a recipe for pipe-able icing for last week's gingerbread tree decorations.
    I couldn't find my icing nozzles anywhere in the house so have decorated some of my biscuits simply using a thick plastic freezer bag with a tiny hole cut in one corner instead of a piping bag & nozzles.
    As with all icing recipes, the exact amounts vary depending on your environment.  Little things like the moisture in the atmosphere (is it raining or very humid?) and the temperature affect the exact amount amount of icing sugar you will need to get the perfect piping consistency.
    You can get a really good piping mixture by following the technique below, and don't hestitate to repeat the process of adding a little more liquid or icing sugar to get the balance just right, it is far easier to get it right now rather than discovering the mix is too thick once it is in the piping bag.

    Ingredients
    • 260g sieved icing sugar
    • 1 medium egg white or 1 tbsp powered meringue mix with 2 tsp water
    • Food colourings of your choice
    Method
    • Simply add both ingredients to the mixer and beat until smooth.  
    • Stop the mixer and scrape down the bowl before re-starting and beating on high until you get stiff peaks like meringues.
    • You are looking for the icing to be dry when you are mixing with peaks formed by the beater, but it will look glossy immediately you stop and themix will slump very slightly into the bowl.  If you get this effect then the icing will flow when you pipe it but will set quickly so it won't run.  If you have dry icing with matt peaks and no movement then start beating and add cold water 1 tsp at a time, turning the mixer off to check consistency after each addition.
    • You can add food colouring once the icing is well-mixed.
    • Add a little at a time, you may find you need to balance the extra moisture by adding a little more icing sugar but it shouldn't effect the colour of the icing.
    • Transfer the icing into piping bag and use immediately.

    To make a smooth dipping or pouring icing
    • Dilute the icing made above with 2 tbsp water
    • Beat thoroughly to to make a smooth loose paste
    • Transfer the paste into a small shallow bowl wide enough to fit your biscuits in
    • Dip each biscuit face down into the icing and shake to allow the excess to drip off
    • Put each dipped biscuits face up on a cooling tray over a lined baking tray to dry
    • If your biscuits have hanging holes in, re-pierce these with a skewer before the icing is fully dry.

    Friday, 18 December 2009

    gluten free gingerbread for Christmas biscuits and decorations


    The Autumnal rain has finally given way to clear skies and the temperature is dropping with every day that passes.  I had originally written this saying I was half hoping for a mythical white Christmas, and right this second my dreams have been fulfilled (though slightly early!) as I gaze out of the window onto dark street enrobed in the first snows of this winter down here on the south coast.
    Christmas is just around the corner and we are finally getting ourselves ready for the holidays.  One of last year's Christmas cakes is unwrapped and ready to be decorated with marzipan and candied fruits, rum-mince pies made with fruits that have marinaded all year, and gingerbread for decorating the tree as well as eating, of course.
    The gingerbread recipe that I use is less sweet and far more fragrant than traditional crunchy English gingerbread.  My daughter & her friends were not that keen on bought gingerbread when she was little so I tried to create something more suited to their tastes.  She still likes this now so I haven't changed the recipe or spice blend in years.  The biscuits are subtly fragrant with a blend of spices which conjure up, in our household, the start of Christmas.  Whilst these baked we put the tree up and the smell of spices mingling with the rich pine tree confirmed that Christmas had definitely arrived in our house.  Then, every year, we would snuggle down in fleecy blankets under the light of our advent candle and read a chapter of Jostein Gardner's Christmas Story.  I love this Christmas ritual that still continues today, especially as my daughter is no longer the toddler enraptured by a fairy story, but a philosophy-studying young adult who cites this an enjoyable influence on her path to adulthood (I am so glad I didn't choose Rudolf, the Red-Nosed Reindeer!).

    Adding the spices to the sugar & butter mix and gently cooking them together creates a more rich and fragrant dough than you get by adding spices directly to the dry ingredients, in much the same way that you would cook off the whole spices before making a masala for an Indian dish.  You can adjust these spices to suit your tastes, dropping the cloves (maybe) and increasing the ginger if you prefer.
    This recipe can make thick soft biscuits or crisp thin ones.  If you are making decorations for the tree then crispier ones are better so roll the dough out to 5mm, bake the cut biscuits for 18 minutes, then allow to cool.  Once they are cool, pop them back onto trays and put them back into the re-heated oven for a further 6 minutes, then leave them to cool in the oven.  These biscuits will be crispy and robust enough to hang from the tree.  If you want soft gingerbread roll the dough out to 8mm and bake for 16-8 minutes until the biscuits are cooked through but still soft.  Let these biscuits cool on the baking tray for five minutes before removing to a cooling tray.

    These biscuits look great decorated but as the moisture will make the biscuits a little softer it is better to ice them closer to Christmas or when you are going to eat them.  My icing nozzles are still tucked away somewhere in the loft so decorating these will happen later this week and I will add some photos later on.

    Gingerbread recipe
    • 70g dairy free margarine or butter
    • 125g light muscavado sugar
    • 100g golden syrup
    • 35g treacle / molasses
    • 60 ml rice milk 
    • 3/4 tsp ground ginger
    • 1/2 tsp ground cinnamon
    • 1/2 tsp ground fennel seeds
    • 1/2 tsp ground coriander seeds 
    • 1/4 tsp ground cloves
    • 1/4 tsp ground nutmeg
    • 300g rice flour
    • 100g millet flour
    • 100g tapioca flour
    • 60g sweet (glutinous) rice flour
    • 1 tsp xanthan gum
    • 2.5 tsp gluten free baking powder
    • a pinch of salt
    • 3 medium freerange eggs (150g)
    • 1 tsp vanilla extract
    Method
    • measure the spices directly into a small saucepan.
    • if your scales have a tare function you can weigh the sugar, syrup, treacle and butter directly into the pan
    • add the milk and warm the pan on a very gentle heat, keep the temperature low enough to be able to dip your finger in comfortably (not that you need to do this as part of the recipe!)
    • sift all the flours together with the baking power and xanthan gum
    • beat the eggs and vanilla extract together in a mixer or food processor
    • add all the flour and then the sugar mix and beat on the mixer
    • once the dough has come together stop the mixer and scrape onto a plate
    • cover and chill (either in fridge or outside depending on your weather) until the dough is between 8-14°C
    • pre-heat the oven to 150° C
    • dust the work surface with a little rice flour and tip out the dough
    • divide the dough into 4 sections
    • working 1 section at a time, roll out as per instructions in the introduction and cut out using decorative cutters
    • if you are making these to hang on the tree, use a straw to punch out a little hole so that you can thread a ribbon through
    • place the biscuits on a lined baking sheet and continue with the rest of the dough
    • roll and re-cut the trimmings until all the dough is used
    • bake as per introduction
    • allow to cool completely then pack into airtight containers to store for icing.

    Tuesday, 15 December 2009

    last minute christmas presents for the food-lovers in your life


    As it is getting close to Christmas, I thought I would offer a helping hand to anyone who has forgotten to buy a present for their favourite foodie friend or relative.  Matt who blogs with Carla at Food for Friends Yeah published a "christmas list for foodie fellas" in November which got me thinking on several counts.  The first thought was about sexism and I did complain (!) then Matt published a list for foodie girls so I've shut up!  However I loved the idea of his Christmas present tips.  To be honest I think that presents for foodies are the most fun to buy, but that is probably because I love everything I buy as gifts but have the dilemma of wanting to keep the presents for myself. 

    So bearing in mind it is now so close to Christmas, I thought that it might be useful to add some easy-to-order presents for those of you who are not keen to venture onto the high street in these final few days before Christmas. Some of my favourite items which are still available for this year are:

    Magazines subscriptions are actually a very good gift as the anticipation of each delivery is like a new present every quarter. Fire & Knives is a fantastic literate exploration of food as it relates to life.  Bearing in mind that food, and our need for it, is one of the things that bind all humans together, we usually manage to marginalise the wider subject focusing instead on chemicals, packets, recipes and trends.  If you want to explore food and eating without a recipe in sight then Fire & Knives is a great place to start, and this first issue has the most quirky short story which is worth the cover price alone. Fire & Knives quarterly costs £20 p.a. to subscribe.

    The next on my list has already made an appearance on
    my blog earlier this year here and that is the Kenwood Cooking Chef.  This is the sophisticated great grand-daughter of the original Kenwood Chef that my Mum passed down to me. Available from John Lewis (though hurry, there are only 3 left on their website) this machine cooks as well as mixes so taking the hardwork out of tricky staples like hollandaise or bechamel sauces. You can make soup or stew, steam vegetables or even make a chocolate mousse - a whole meal in one machine but you will really have to love the person you give this to as they cost £995 each.

    Alternatively, if you are making food the old fashioned way, these enamelled individual casserole dishes are really cute and practical.
    Unlike the Le Creuset versions with their stoneware lids, these are all-cast iron and are priced at just £13.99 each.  Of course, if you want to be invited round to dinner by your recipient, you definitely need to give 2,  if not 4!  Available from Denny'sin grey and several other colours, they are still in stock as I write with delivery within 7 days.  (By the way, family - I would definitely be happy to find 2+ of these in my stocking!)


    No regular cook should be without a good mandolin, and after I managed to break the slicer blade earlier this year, I have been looking around for a replacement.  I have settled upon this as being the best balance of size and cost efficiency.  Made by Microplane who have an unparalleled reputation for their graters and zesters, you can be sure that this will be yet another good buy. This also comes with a finger-friendly food holder which will save your finger ends.
    Available from Lakeland, the last order date for standard delivery is Monday 21st December. 

    Another Lakeland item which are especially good for bigger hands and maybe for the barbecue too, are these silicon mitts.  They are flexible, lined and have good insulation capabilities as well as being machine washable.  These are sold singly so you would be more popular if you bought two!.  They cost £12.79 each and again, are available from Lakeland.  The last order date for standard delivery is Monday 21st December.

    Of course, they say that the best gift to give is something home made. When we used to sell on farmers markets I would to hold back a few handmade chocolates, flavoured nuts and gingerbreads to use as little stocking fillers and gifts for friends and family. I still like to gift people things that I have made myself but I'm aware that sometimes I might be emptying my cupboards to make some space for christmas food - and that isn't such a altruistic notion! This year I have made some sweet dill pickles and ginger carrot pickles to give as gifts.  Both recipes mature quickly so even if you make them now they will be ready to eat by Boxing Day with leftover turkey or ham.   For chilli lovers, I will be making candied chillis.   Once they are made, they are stored in the syrup they are cooked in which is hot, spicy and sweet.  The chillis are perfect added to brownies or cookies, and the syrup is delicious drizzled over fresh mango with lime juice.

    Sunday, 13 December 2009

    candied chillies with sweet chilli syrup


    This was inspired by a twitter comment that Clotilde from Chocolate & Zuccini recently.  The French, like the Italians, have a history of creating and eating candied fruits in a way that the Brits seems to have missed. Yes, we have glacé cherries and chopped mixed peel but that is about it. In France in the run up to Christmas you will find platters of individually candied fruits - figs, mandarin oranges, melons, pears and pineapple as well as chestnuts, greengage plums, peaches, apricots and clementines. Beautifully presented, glowing translucent fruits.

    The link Clotilde gave is to a company called La Fabrique de Douceur here. Their chillies, along with the other fresh fruits they make are lucious and beautiful to look at but I think they are only available in France.
    Reading through their website reminded me that I have quite a few chillies at home which I can't eat due to allergies. Rather than simply throw them away I thought I would have a go at candying them, just to see what would happen. So here is a simplified version of candied chillies.   The sweet and spicy syrup would make a delicious drizzle over ice cream or a fruity tart, whilst the chillies themselves could be used in biscuits or ice cream, or served as they come with cheese.

    As you can see this quick version gives you the flavour but not the texture of french-style candied fruit.
    These are very quick and easy to prepare and if you have any chilli-heads as friends, they would make great easy foodie presents too.

    Candied Chillies in sweet chilli syrup


    Ingredients:
    • 8-12 fresh mild to medium red chillies
    • 450g white sugar
    • 450ml water
    • boiling water
    • sterilised jar & lid big enough to contain the chillies
    method

    • pour about 1L freshly boiled water into pan and add the chillies.
    • bring the pan to the boil and blanch the chillies for 1 minute.
    • drain the chillies and refresh in cold water.
    • add the equal volumes of sugar and water to the pan and bring to the boil
    • add the chillies and cook at a gently boil for 30-40 minutes.
    • during this cooking, sterilise the jar in the oven or in boiling water for 15 minutes.
    • when the chillies are cooked, lift them out gently and place in the jar
    • pour the syrup over and screw the lid on
    • allow the jar to cool before storing in the fridge.
    To be honest, I don't know how long these will last after cooking, but since the chillies are blanched and so sweet, I am sure that 2-3 months is quite reasonable as long as they are completely submerged in the sugar syrup.  I have a couple of ideas for recipes to use these in which I will add in the near future.  Enjoy!

    Thursday, 10 December 2009

    gluten free wontons skins & prawn shao mai dumplings


    I miss Chinese take-aways: browsing the long menus, taking time to pick from the myriad of choices, imagining the flavours and anticipating the delivery.  Vicariously I share these activities with the teen and her friends but have to find something "very important" to do once the food is delivered, or else I find myself questioning them over every mouthful.
    I've always cooked my own mock-Chinese stir-frys with the constant trio of flavours: ginger, garlic and chilli, but precisely because I used the same flavours, everything ended up tasting the same.  Since I stopped eating chillies I have augmented my flavours with star anise, szechuan pepper and other spices which have vastly improved the results, but you can't get away from the fact that they are just vegetable stir-fries.  Fuschia Dunlop's books are on my Christmas list but I am too impatient right now to wait: I want Chinese and I want it now!


    I have just discovered Mary Moh's blog here, Mary cooks Malaysian food and it all looks scrumptious.   I was drawn to her blog by the sweets and desserts, especially because Malay cuisine features lots of gluten free ingredients, and therefore lots of gluten free desserts.  Whilst browsing, I came across Mary's recipe for Wantan dumplings in turkey soup.  I think that wonton soup was the first dish I ever ate at a Chinese restaurant, I remember being captivated by the silky smooth wonton skins floating in the savoury broth.
    Wontons have been out of reach to me for ages but, remembering that I saw Lye Water (kan sui) in our local oriental store by the station, I decided that wonton skins and soup are the next gluten free step for me.  With gluten free wontons,  you open up a whole range of new recipes and dishes.  Beyond wonton soup, you can also make all manner of dimsum which are otherwise out-of-reach to gluten-free eaters. Even crispy wonton skins make a pleasant change to prawn crackers.
    However, as you can see from the picture above, I got distracted from my task and decided to make shao mai as I figured they would be on my plate even quicker than wonton soup (making stock from scratch would take just too long today!).  Shao Mai are delicious little steamed open dumpling stuffed with a quick and easy filling.  I've made a prawn & salmon filling, but there are plenty of meat versions around on the internet.  Make sure that 50% of the protein in the dumpling is naturally fatty - like the salmon in this recipe - this will help keep the filling juicy and soft whilst they steam.  Mine are so messy (here is what they should look like!) but they taste great.  I was geniunely so hungry and so impatient whilst I was making the dumplings that I just dolloped a teaspoon of filling in the centre of the freshly rolled square skins and squidged up the corners.   Luckily they cooked well and tasted great which goes to show that free-style dumplings work too!
    The basic pasta dough, made with egg and lye water, can be used for traditional style Chinese egg noodles too - adding a little more authenticity for a gluten free Chinese meal.  I am not quite sure how these would turn out without lye water.  Even a little touch in the recipe adds an authentic smell and chewy texture so do try to find it if you can.

    Gluten free wonton skins
    Ingredients
    • flour blend (or 300g gluten free flour):
    • 140g rice flour
    • 50g tapioca starch
    • 50g corn starch
    • 50g glutinous rice flour
    • 10g kuzu starch
    • 1 tsp xanthan gum
    • 1/2 tsp psyllium husks
    • 2 eggs
    • 1/2 tsp lye water (kan sui)
    • 80-120ml (approximately) water

    method
    • sieve all the flour ingredients together
    • put all the dry ingredients into a mixer or food processor bowl
    • add the eggs and lye water, start the mixer running
    • gradually drizzle the water in till the mix ressembles chunky breadcrumbs
    • tip the dough out onto a work surface dusted with tapioca starch
    • knead together to make a smooth dry dough
    • cut the dough into 5 pieces
    • process each piece in turn through a pasta machine reducing the thickness each time to create a thin silky sheet.  I found the dough become brittle at roller #8 so stopped there.
    • cut each piece into 6cm squares or rounds
    • dust each sheet with more tapioca starch to ensure they don't stick together
    • stack to one side under a damp cloth until all the dough is processed

    If you are not using these immediately store them in a ziplock bag in the fridge.  If you are freezing the wonton, store them flat in a box before freezing.  The dough sheets will be brittle and will shatter easily if they are knocked or squashed whilst in the freezer.

    Prawn Shao Mai dumplings
    • 1 large egg white
    • 1 tablespoon Chinese wine (or dry sherry)
    • 2 teaspoons tamari sauce (gluten free soy)
    • 2 teaspoons sesame oil
    • 2 tablespoons cornstarch, plus more for dusting
    • 1/2 teaspoon sugar
    • 1 teaspoon salt
    • 1/4 teaspoon freshly ground black pepper
    • 225g raw prawns, roughly chopped
    • 225g salmon, skinned and roughly chopped
    • 2 finely chopped spring onions
    • 1” fresh ginger, peeled & finely chopped
    • 8 sprigs coriander, finely chopped 
    • 1 carrot, peeled & grated
    • 2 leaves Chinese cabbage, finely shredded
    • 1 recipe gluten free wonton skins,rolled & cut into 3” squares or circles

    method
    • whisk the first 8 ingredients together in a small bowl
    • put the rest of the ingredients in a food processor bowl
    • chop for 30 seconds then pour in the liquid ingredients.
    • let process for another minute then stop
    • that's the filling made - I said it was quick!
    • grease a dinner plate with a couple of teaspoons of sesame oil
    • take 1 wonton skin at a time and lay on the palm of your opposing hand (not the one you write with)
    • spoon a heaped teaspoon full of mix onto the centre of the skin and push the corners together so they stick to the mix.
    • flatten the bottom of the dumpling by tapping it on the work surface
    • put onto the greased plate and continue till all the mixture is used

    To cook:

    place a greased plate inside a bamboo steamer
    set dumplings on plate, don't squash too may in, it took me 4 batches to cook all the dumplings
    steam for 15 minutes and serve hot with a dipping sauce of tamari and chilli oil

    I really hope that you have a go at making these.  They are fun to make and delicious to eat.  This recipe made enough to serve 6 people, so I have portions made up in the freezer, ready for the moment the teen orders her next Chinese take-away.
    Let me know what you think!

    Wednesday, 9 December 2009

    a trip down memory lane: food co-operatives, bulk buying & the good life.


    I recently made the trip across to a wholefoods co-operative about 50 miles away to collect some ingredients for work.  For several years, this was a regular jaunt across the Sussex countryside for me, loading 25kg sacks of flour and case after case of dried figs, prunes, raisins, sultanas and apricots into my groaning car and bouncing back along the foothills of the Downs.  Now these ingredients come into the bakery in whole pallet loads.  Where once there was 25kg, or even - if we were really busy - 37.5kg in 3 cases, now we have 1 ton pallets, wow!
    For all that it is exciting to grow up, I have missed the regular visits to the warehouse.  They reminded me of being a kid, back in the 70s in north London.  We lived a very suburban childhood, but my parents were quite unique in their outlook.  As my own daughter tells me regularly now,  'unique' and 'parent' are not two words that most children ever wish hear describing their own Mum & Dad.  I wanted my parents to be normal - evenings out, buying ready meals, taking us to Spain on holiday and driving shiny new (& fast) cars.  But that just wasn't my parent's style, and I really appreciate their outlook now.
    My parents didn't wholly embrace "The Good Life" , we didn't get as far as chickens or sheep, though I know Dad would have appreciated their gardening skills - eating bugs, keeping the grass down.  Once the vegetable garden was established and we had learned to process the gluts of beans, tomatoes and apples at their peak, Dad looked around for other ways to keep Mum busy.  Plenty of home baking, jam making and bottling fruit led onto making home made ginger cordial and a wonderful exploding bottle in the kitchen which still left traces on the ceiling 15 years later.  Then in the late 70s Dad discovered Community Foods and a new venture was born.
    Before I go any further, I must point out that my Dad wasn't an entrepreneur.  In fact he leaned towards a Quaker lifestyle.  He had a big heart, and a great belief that we only needed enough in life to survive - not too much, just enough.  He wasn't a natural consumer and he wasn't out to make a quick buck.  And through Community Foods, he simply saw a way to make life better and cheaper for his family & friends around him.
    Four times a year, we three kids and mum would pile into our old second hand Ital (buy British!) estate, and drive over to New Southgate.   We made this same journey far more regularly to visit a favourite family friend, but these trips were different.  With Aunty we were rewarded with crunchy biscuits with wrappers (you mean you can buy biscuits?) and glasses of vivid orange squash, treats untold to our young minds.  But instead of turning right to Aunty's we would pull left off the steep hill onto a little industrial estate and there, tucked in the corner, was a warehouse with big sliding shutter doors.
    The air smelled sweet & very slightly yeasty and the huge space was dark, cool & calm.  There was pallet racking piled high with boxes of dried fruit, huge sticky sultanas, dark plump raisins, chewy sweet dark apricots.  Whilst the guys sorted out our order, we used to sneak off and climb up the piles of boxes on the pallet racks.  Of course we knew we weren't supposed to do this, so at least that made us clamber around  quietly, whispering instead of shouting and trying to swallow our giggles.  But it was so much better than a playground.  You climb up the stacks of boxes using the spaces where boxes had been sold as perfect foot holes so it was a bit like a warm indoor play centre.  But at the top of each pile were untold spoils.  Prising a cardboard lid up with 2 hands you could slide your fingers under the lip of the lid and scrape a few nuggets of fruit from the side of a box. And if no-one noticed, and the fruit tasted good, we would move onto another box and another handful.
    I apologise now to anyone who did notice the missing fruit, or grubby finger marks on the side of their boxes, but this place was such fun, we were like squirrels collecting nuts for a long cold winter, and always left with sticky fingers and full tummies.
    We were usually caught at some point and scurried down heads hung low in embarrassment whilst wiping our sticky fingers on the back of our jeans.  If not caught, we would emerge from the dark warehouse to find the back seat folded flat and the whole car laden with boxes.  We would crawl in through the boot door and make ourselves comfortable in amongst the boxes for the journey home.  Inevitably our high spirits would start to fail us on the return and 3 tetchy kids would snap, bicker & snipe at each other.  There were 2 big hills on the way back to our house and we would crawl up both at no more than 15 miles an hour with us hiding our heads (though bodies of course still visible) in embarrassment of our old over-laden car.
    The point of this journey was not, of course, the journey itself.  Our next job was to load up the wheel barrow with boxes of fruit at the bottom, sacks of wholemeal flour on the top and transport this into the old summer house in the back garden.  This in itself was a feat, with a narrow sideway, 2 steps and an overloaded barrow pushed by a 9 year old, rarely did everything arrive intact!  The haul unloaded, we would happily crowd round the kitchen table for some of Mum's crunchy baked jam sandwich (recipe to follow) and glasses of milk.
    Over the course of the next few weeks, we would have a stream of visitors to the house, buying a few ounces of raisin, a couple of pounds of sultanas, half a sack of flour for homemade bread-making.  Our costs, petrol & plastics bags - if you didn't bring your own - were factored in and the sales were carefully noted to make sure that the books balanced.  And this, I think, was the real point of the exercise.  No-one profited - the books had to balance, our costs were covered and in return we, and our families and friends, were able to share in a haul of great quality and cheap ingredients.
    I don't remember buying dried fruit from a store for years, until my daughter was a toddler and my parents had left London, and once again dried fruit was back in my shopping basket.  It didn't take long for a seed of an idea to grow, and soon I was searching out a warehouse and cases of juicy dried fruits.  With great ingredients, it seemed only natural to create recipes to showcase them, and I suppose that links me directly to where I am today.  Thanks, Mum & Dad.

    Thursday, 3 December 2009

    daifuku mochi , recipe and method


    Being gluten free as well as unable to eat fat limits the sweet treats that I can indulge in.  Whilst this is wonderfully healthy, I do crave the occasional sugary bite.  I was entranced by these soft pillowy chewy treats called daifuku mochi when I first saw them and I was delighted to discover that they are naturally gluten free.
    I have found them in long life packs at our local Oriental ingredients store and whilst they taste delicious and are immediate, but that hasn't stopped me wanting to try to make them for myself.
    Handling the dough is a joy to anyone used to baking gluten free.  The warm translucent paste is stretchy and pliable in a way that most gluten free doughs never are.  Stretching and pressing gently will allow you to create a thin sheet of dough which can then be cut to form the sweets, though I was very tempted to roll it up and start again, just for fun!
    These daifuku are filled with anko, which is a thick sweetened puree of aduki beans.  The teen loves them filled with sweetened peanut butter paste but my favourite is a thick spicy squash or pumpkin puree.   I didn't have any pumpkin around, so went for the more traditional filling of aduki beans.

    This recipe makes 12-15 sweets.  Making the sweets themselves took about 1 hour from beginning to washing up (using pre-cooked bean paste).  The sweets can be stored covered for 24 hours before serving or frozen, so they could be made in advance to serve as desserts or sweets.  I had wanted to take photos of the method but the whole process is both dusty and sticky that action photos were not possible, sorry!

    Anko (sweet red pean paste)
    • 175g aduki beans
    • 85g white sugar
    • 1/2 tsp salt
      method:
      1. put the aduki beans in 1.5L of cold water and bring to the boil.
      2. let boil at a rolling boil for 10 minutes, then take off the heat.
      3. put a lid on the pan, and set aside for 6-8 hours or overnight.
      4. drain the beans and return to the pan with 1.5L fresh water
      5. bring to the boil again and turn down to a simmer
      6. continue to cook, topping up with boiling water as necessary.
      7. cook the beans until soft for 45 mins to 1 hour
      8. drain the beans thoroughly, rinse the pan then put the beans back in
      9. add 175g sugar (or more to taste) and 1 tsp salt
      10. return pan to the heat and stir to dissolve sugar and salt
      11. mash beans: you can do this using a potato masher, a stick blender or a food processor
      12. if you want very smooth puree, you can sieve the mashed beans to remove the skins (I didn't)
        1. set aside to let the puree cool whilst you make the daifuku dough

        Daifuku dough
        • 100g glutinous rice flour
        • 50g white sugar
        • 165ml water
        method:
        1. line a lipped baking tray with baking parchment and dust thickly with corn or potato starch
        2. sieve the glutinous rice flour into a rice cooker or saucepan
        3. stir in 50g sugar then pour on the water, stirring continuously
        4. stir thoroughly to ensure there are no lumps
        5. turn the rice cooker on or set the pan over a low heat for 10 minutes
        6. allow the mixture to cook, stirring once or twice until it is thick and sticky (you may find you need to add a little more water to ensue the paste cooks to a translucent mass without a hint of powder remaining). 
        7. scrape up the hot paste - it will look like a lump of gluey mashed potato, and completely un-usable, but don't worry, it's fine!
        8. tip the hot paste out onto the lined baking tray
        9. dust your hands and the top of the dough with more starch
        10. press the dough out using your fingers / knuckles to create an even sheet about 4-5mm thick, this takes a little while but isn't that much different from pressing out a wheat dough for a pizza base.
        11. when you have created an even(ish) layer, cut out one piece at a time using a knife, pastry cutter or glass 6-7cm wide.  If you use a knife and cut triangles you will have no wastage at all, otherwise there will be some trimmings.
        12. place 1 tsp of cold bean paste in the centre of  the cut dough
        13. bring opposite sticky edges of the dough together and squeeze to seal, then squeeze all the seals together to create a join underneath,
        14. dust the bottom of the sweet with a little more starch to seal
        15. set each sweet in turn on serving plate
        16. if you are left with some trimmings from the dough, you can re-roll and make some more.  you will have to knead the dough a bit harder to bring it all together before you can press it out again and cut into pieces.  these last few daifuku mochi will have thicker sken and be a bit chewier - I actually preferred these to the rest I made!
            When you are clearing up, don't throw away the starch, pass it through a clean sieve to remove any pieces of dough then store for future use.  And finally, don't throw any pieces of dough down the sink as it will solidify as it dries and block the drain.  Put your utensils to soak then scrape the wet dough off into the bin instead.

            Wednesday, 2 December 2009

            my recipe for apricot & almond snack bars (gluten free, sugar free, high protein)


            I posted a recipe for honey and apricot flapjack the other day, but mentioned that I don't eat them as I can't digest oats.  I have been playing around with my own recipes for gluten free bars but I haven't been really satisfied with anything I had made until now!

            As a bar goes, these are light, cake-y in texture yet really filling and so very useful as snacks during the day, or to put in lunchboxes.  They are naturally gluten free and sugar free as well as containing no added fat and really high protein levels which will also make them good for pre- or post gym snacks.  They are vegan as long as you use pea or soy protein isolate.  You can find pea protein isolate from Pulsin' in the UK here with superfast delivery, alternatively stores like Holland & Barrett in the UK should stock it.  In the states you buy a non-GMO version here (I haven't ever bought from this company so I can't recommend them).
            To some people's tastes these will not be sweet enough without adding some sweetener.  I didn't but it's up to you.  One 45g bar contains 139kcal without using any sweetener in the recipe, that statistic might persuade you to omit it!  Did I mention how filling they are? I ate one for breakfast 4 hours ago and I am still not at all hungry and even better, there is no sugar high or low as this contains protein and slow release carbs instead of sugar.
            This recipe is a useful one for people who can't eat xanthan gum.  You can make these using ready-ground seeds and nuts if you have them which will save you time.  I haven't found any sources of freshly ground seeds, so as seed flours turn rancid quickly I still grind my own. 
            I have found that buying a coffee grinder has soon paid for itself as seed flour is so much more expensive than raw seeds. Even if you are grinding your own seeds these are still quick to make and you can have these in the oven inside 15 minutes.  The bars will freeze fine and can be popped into a lunch box straight from the freezer.  Not only will they defrost by lunchtime, the chill will keep the rest of your lunch cool!

            Apricot and Almond snack bars

            Ingredients:
            • 200g chopped apricots
            • 175g chopped dates or figs (or a mix)
            • 175g boiling water
            • 150g blanched almonds
            • 70g pumpkin seeds
            • 60g hemp seeds (de-hulled) or sunflower seeds
            • 60g linseeds (flax)
            • 50g dried pineapple or mango (or other slightly acidic fruit)
            • 30g whey / soy or pea protein isolate
            • *honey, agave nectar or sweet freedom (if required)
            Equipment:
            12" x 9" x 1" baking tray, lined with non-stick paper + coffee grinder or mini chopper + food mixer/processor (or strong arm!) + oven

            Method:
            • soak the chopped dates in the boiling water in the bowl of your mixer or food processor (if you have one)
            • grind the almonds in the coffee grinder to make a fine fluffy flour (do small batches of about 50g at a time to get a fine grind)
            • repeat the process with each of the seeds in turn
            • finely chop the pineapple or mango
            • beat the date and water mixture for 2 mins until you have a thick and slightly aerated paste
            • add the vanilla extract & the apricots and mix briefly to combine
            • add all the nut & seed flours and protein isolate
            • mix to make a thick paste and taste, sweeten if desired (I didn't sweetened mine at all)
            • tip into lined baking tin and spread evenly across tin
            • bake at 160° C for 30 minutes
            • remove from oven, let rest in tin for 10 minutes before lifting out on baking paper and placing on cooling tray
            • cut once cold, mine made 20 bars
            To store: wrap and store in fridge or freezer (since they are unsweetened they will grow mould if left in a warm environment).  If storing in fridge eat within 7 days.  For frozen bars, wrap well & eat within 3 months.