Thursday, 27 May 2010

gluten free pièce montée (Daring Bakers May 2010)


The May 2010 Daring Bakers’ challenge was hosted by Cat of Little Miss Cupcake. Cat challenged everyone to make a piece montée, or croquembouche, based on recipes from Peter Kump’s Baking School in Manhattan and Nick Malgieri.

So, this month's Daring Baker challenge was to make a pièce montée or croquembouche.  This is an epic 3-D dessert of French and Italian origin and are served as wedding and baptism cakes in France.
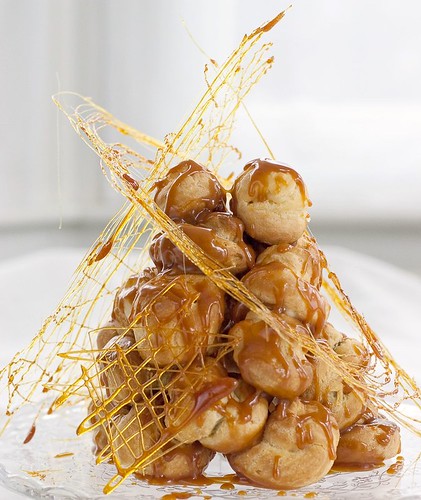
A proper croquembouche (and mine is not quite) is a gravity defying pyramid of choux pastry puffs filled with sweet pastry cream and drizzled in caramel or maybe chocolate to provide some glue for construction purposes.  When I first figured out that the puffs were constructed around an inedible cone I was a bit disappointed, much the same as I when I (finally) realised that the 'celebration' cakes that languish in the windows of some bakeries are actually foam-filled moulds - Pah, humbug!
I decided that I wanted my version to be all edible though as a result, it is slightly less impressive than the architectural cone or cocktail stick versions.

piece montee full SM

The challenge recipe did not provide a gluten free alternative recipe so I used a recipe that I have been working on.

unfilled choux puffs SM

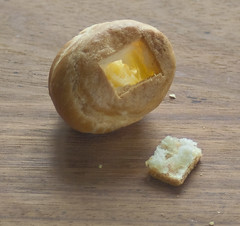
It isn't quite perfect or foolproof yet, so whilst the piped shapes puff up beautifully, they are not completely hollow inside.  Since I need to be able to fill the puffs with pastry cream, I cut a little hole out of the bottom of each puff and picked out the filling (which tends to sit on the bottom of the puff) then piped the filling in and replaced the bottom.


I used the suggested recipes for the sweet pastry cream which were chocolate and vanilla so filled half the choux pastry balls with each variety.  I like the element of surprise with different fillings, though last time I made this dessert with a raspberry mousse filling which was lovely too.

The most fun however, was in the decoration: spun sugar.  It was a damp day when I made the decoration which is not the best weather to be working with this delicate confection, you really need a dry tim environment, not Spring time (or any other time) in England.  I had to work fairly quickly to make the shapes then build the dessert and photograph it before the sugar softened.  I had no more than a couple of hours before the sugar began to soften and warp and the dessert began to gently collapse.  I got a bit carried away with the sugar spinning and made loads more than I needed.  Luckily the teen feels a need for empty calories (her definition) today so is crunching her way through it now!


And there we have it, a really fun daring baker challenge. I will publish the recipe once I have put the finishing touches to this gluten-free choux pastry recipe, then you should have a go at making one too.

Monday, 24 May 2010

gluten free ginger bread spread (speculoos a tartiner)


I love speculoos biscuits. I mean, I really really love them! I used to get excited every time I discovered one of those slim, delicately spiced and caramelised biscuits nestled on the saucer almost hidden by my coffee cup. Until quite recently, though, I could only experience that thrill in Europe, not at home in the UK. Now times have changed and I could, if I wanted, buy bulk packs of speculoos in my local cash and carry (though in the UK they are just called caramelised biscuits, or some such). And now of course, even if I wanted to eat them, I couldn't, because they contain wheat.
So, when food blogger and writer David Lebovitz wrote a post on speculoos spread I was envious and intrigued in equal measure. I read the post a couple of times and then carried on as normal ignoring the faint pangs of jealousy growing in the pit of my stomach. Ignoring, that is, until one morning a few days later when the sun was shining, my kitchen was quiet and I, for once in a very long time, actually felt like cooking.
I searched around the internet until I found an ingredients list for the Lotus brand of 'Speculoos a Tartiner'. It made me laugh to read it - 57% crushed biscuits, sugar and vegetable oil to make a sweet smooth spread.  Duh, how obvious!


Somewhere in the depths of my freezer I had a gluten free half batch of David Lebovitz's Chez Panisse Ginger Snap dough which needed to be eaten. I figured that I could mix up some speculoos spices, sprinkle over the dough, knead it in and bake the revised version. This might on be an unorthodox way to make Speculoos but in this case, imperfections don't matter as I am going to grind up them up anyway!
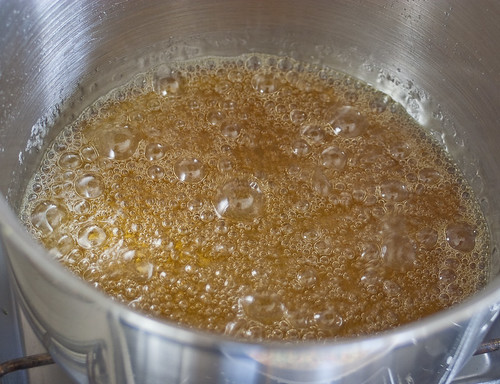
One of my favourite memories of speculoos is the blend of spices mingling with the rich caramel flavour, so I decided that since I was already going to use my food processor to grind the biscuits, I might as well also make some caramel and grind that up to make caramel powder to use instead of sugar. So by 8.10 in the morning I was pouring a cup and a half of nut brown caramel onto my lined baking sheet to cool and preparing my spices to add to the defrosting log of ginger biscuit dough. One day, I may come back to this recipe again and create a proper gluten-free speculoos biscuit from scratch, but for now the buttery spicy dough of David's Chez Panisse ginger snap recipe is definitely delicious enough to satiate my immediate desire for this sweet creamy spicy spread.
I added extra spices to the dough to give a touch of speculoos fragrance to the ginger and cinnamon of the cookie dough.  My mix contained white pepper, coriander, nutmeg, clove, cardamom seeds and anise but you can add or remove spices to suit your palate (or dig out your favourite speculoos recipe and bake those, of course!).   You can of course use shop-bought speculoos biscuits instead but if you do you might need to reduce the caramel powder to 90g as speculoos are a bit sweeter than the ginger biscuits I used.
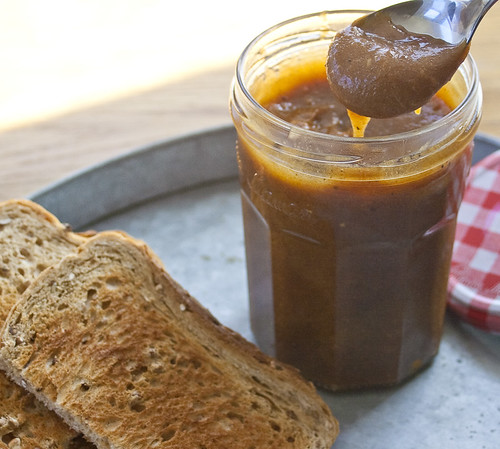
The spread will go through a strange "Oops, I've failed" phase as you mix it together.  In fact, it looked so odd that I didn't even bother taking photos of the method as I was so sure that it had gone wrong!  But I persevered and I was very glad I did as the crumbly lumpy mess slowly transformed into a smooth creamy spread. 
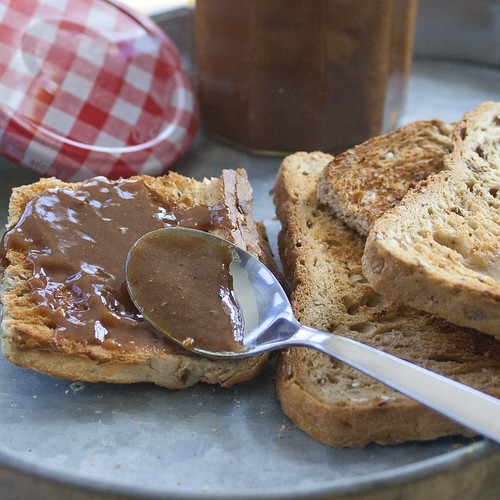
There is, of course, a flaw in my plan: I have absolutely no idea what the original 'speculoos a tartiner' tastes like so I have nothing to compare my own version to.  I can however confirm that it is delicious: gently spicy, sweet and smooth but with a few crumbs for texture.  If you can resist tasting this for a day or two, you will be rewarded with an even richer, more rounded flavour.
At the end of the day when the teen appeared, I mentioned that I had been messing around the kitchen but got no reaction (that's teenagers for you!) so I was amazed to discover the contents of the jar had almost disappeared the next morning ... I am now mixing up the next batch of cookies, I'll be making two jars this time!


ginger bread spread recipe (to make 1 jar)

ingredients:
  • 160g speculoos cookies or ginger snaps (as per details below) 
  • 120g ground caramel powder
  • 90g sunflower oil (or other neutral oil)
  • 60ml water
  • 15g nutritional soya lecithin (this will stop the spread separating once mixed & stored in the jar, it is great if you happen to have some but it is by no means essential)
  • 15ml lemon juice 
  • 1/4 tsp sea salt
method - spread
  1. weigh 160g cookies into a food processor and process to a fine-ish powder, make sure there are no chunks left.
  2. add 120g powdered caramel (or 90g depending on your taste) and process again to combine.
  3. sprinkle in the lecithin (if using) and process again till fully combined.
  4. leave the processor mixing and add 1/4 tsp sea salt through the feeder tube.
  5. now pour in 90g oil and let the mix process to a rough puree
  6. pour in the lemon juice and don't panic when the mix turns into thick pasty lumps, it is OK (promise!)
  7. gradually tip in the water watching the mix as it becomes smooth and homogenous. stop adding water when you think you have the consistency you want - if you are using wheat-flour biscuits you may find you need slightly less water than with gluten free.
  8. stop the processor and taste the spread, add a little more lemon juice if you like.
  9. decant into a sterilised jar and store in the fridge for up to 2 weeks.
speculoos biscuits:
  • a half batch (with extra spices) of David Lebovitz's chez panisse ginger snaps*
  • extra spices ground in coffee grinder: 3 white peppercorn, 1 black peppercorn 1 cardamom pod, 2 clove, a good grating of nutmeg, 1/2 star anise.
  • if you are making your own biscuits, add the extra spices at the same time as those in the recipe and follow the method as shown.
  • * to make the recipe gluten free replace the flour in the recipe with 260g rice flour PLUS 1/2 tsp xanthan gum or use your favourite gluten free mix.
ingredients: caramel powder
  • 200g white sugar
  • 135g water
method: caramel
  1. line a large heavy baking sheet with non-stick baking paper and set aside.
  2. take a large heavy based saucepan, sprinkle the sugar and water into the pan and it on a gentle heat without stirring.
  3. leave the pan on the heat allowing the sugar to dissolve and the syrup to boil gently.
  4. keep an eye on the gently boiling syrup as it begins to colour, leaving it until it is a rich middling brown colour.
  5. pour the syrup onto a lined baking sheet and leave it to set.
  6. once the caramel is cold and set, break it up into small pieces and place them in a food processor.
  7. whizz until the caramel becomes a fine yellow powder, then tip out of the processor and store in an airtight jar.

Tuesday, 27 April 2010

gluten free jam roly-poly, Daring Bakers April 2010

The April 2010 Daring Bakers’ challenge was hosted by Esther of The Lilac Kitchen. She challenged everyone to make a traditional British pudding using, if possible, a very traditional British ingredient: suet. 

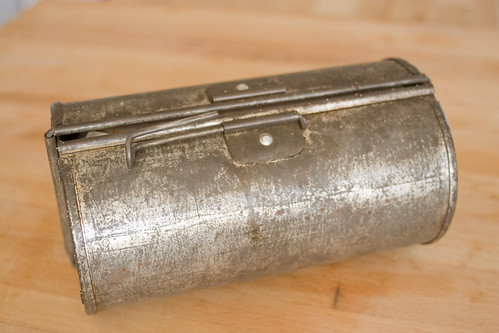
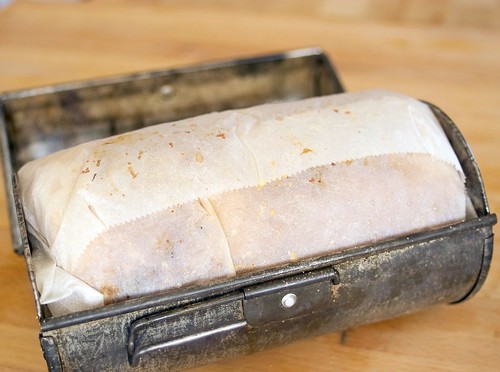
It is unseasonably warm and blue outside so making such a traditional winter pudding seems a little anachronistic as I watch my courgette seedlings stretch up towards the sunlight, growing at least a centimetre a day.  The Daring Baker challenge for this month was to make a pudding of suet pastry, suet was the only required ingredient, so this could have been anything from steamed treacle pudding to a wintery steak and kidney savoury pudding.  I was at a loss for an idea of what to make until I found this, in a local junk/kitchenalia shop and when I found the original instructions inside, then my mind was made up - a jam roly poly in its' own proper tin.

jam roly-poly -2

Jam roly-poly is the epitome of proper English puddings, a suet pastry roll filled with sweet jam and cooked by a combination of steaming and baking, this pudding would be a familiar item to any school pupil educated in both state and private schools in the UK last century (and yes, of course that includes me!).
I compared the recipe supplied with the tin to the version that appears in the 1923 copy of Mrs Beeton's Cookery that was given to my Grandmother in that year and they were almost identical, Mrs B suggested less baking powder and more salt so I tweaked the recipe a little to find some middle ground.
A quick glance at more modern recipes revealed that very little else had changed, so I was ready to roll!  Apparently jam roly-poly is also known as Dead Man's Leg, which is slightly less appetising I think.  From that nick-name, the pudding then became known as Dead Man's Arm as house-wive's used the sleeves of their husband's old shirts to contain the pudding for baking, personally I think I will stick with roly-poly!

jam roly-poly in tin

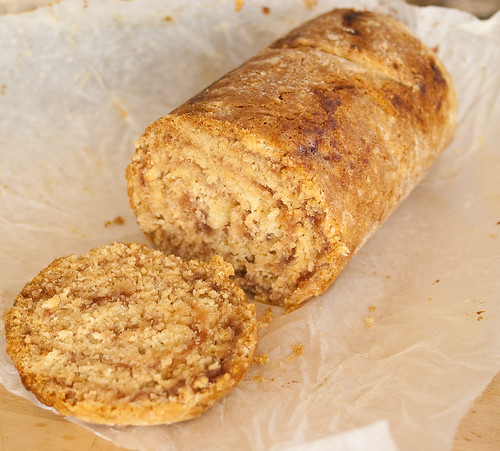
Creating a gluten free version took a little thought.  I think that if I was really keen on this type of pudding, I would spend a little more time developing the pastry recipe.  In an ideal world, the pastry would be more flakey and layered than my version, which is slightly softer in crumb than I would aspire to.  The pastry for the pudding is not sweet, there is a touch of sugar to hint at the direction of the filling but the sweetness is supplied by the jam filling.

whole jam roly-poly

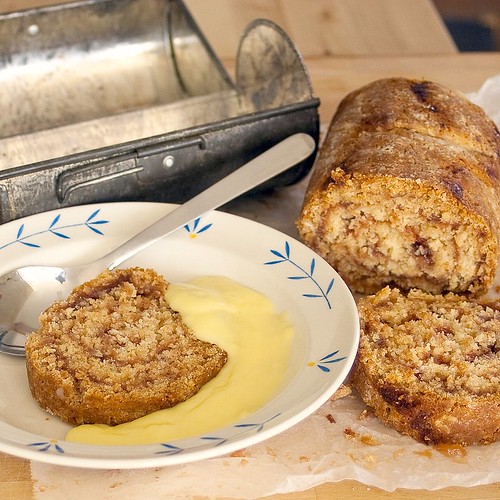
I used, quite literally, the first jar of jam I could find in my store cupboard.  Now I have to own up that I have 3 batches of jam made last year, all of which were stashed in a cupboard quickly and label-less.  I know, big sin!  So when I grabbed the first jar, I was hoping for a thick strawberry jam with lots of fruit (and possibly a tad to much pectin) which would have remained in a thick layer between the rolls of the pudding.  Unfortunately I grasped a jar of quince jelly, sweet yet gently acidic but soft rather than sticky in texture.  The jam, as you can see in the picture, has soaked into the pastry a little, so the roll effect of the pastry is slightly less defined than I would like.  This doesn't detract from the taste at all, and with a slick of home made custard, this makes a delicious and filling winter pudding.  The pudding only takes about 15 minutes to put together, and an hour or so to cook, so it is not a difficult recipe to try (once the weather is cooler!).

jam roly-poly, gluten-free pudding

Jam Roly-Poly

Ingredients
  • 95g rice flour
  • 50g corn flour
  • 50g tapioca starch
  • 1dsp arrowroot flour
  • 1dsp psyllium husks
  • 2 tsp baking powder
  • 1/2 tsp salt
  • 40g castor sugar
  • 100g gluten free (or butcher's) suet
  • 120ml milk
  • 150g jam
Equipment
  • Mixing bowl
  • baking paper
  • foil, 
  • baking or roasting rack that fits inside a roasting tray
Method
  1. Cut and grease a piece of baking paper approx 30cm square.
  2. Cut a piece of foil of a similar size (not needed if you have a roly poly tin).
  3. Preheat the oven to 200°C.
  4. Mix together all the ingredients except the jam to create a firm pastry.
  5. Tip the pastry out onto a floured surface and roll out to create a rectangle of pastry approx 15cm x 30cm (with the short side nearest you).
  6. Spread the surface of the pastry with all the jam.
  7. Roll up the pastry from the short end facing you, to create a roll 15cm by about 8cm deep.
  8. Using a couple of spatulas, lift the roll onto the greased baking paper and roll the baking paper loosely around the pudding (the pudding needs room to expand as it cooks).
  9. Fold the ends to create a tight seal, if you have a proper tin then pop the wrapped pudding into the tin and close.  If not then wrap the pudding loosely in a piece of foil, again sealing the ends tightly but leaving room for the pudding to expand.
  10. Place the wrapped pudding on a roasting rack in a roasting pan filled with water to a level just below the roasting rack, loosely cover the pan with foil and place in the pre-heated oven for 1 hour.
  11. When the pudding is cooked remove the pan from the oven, and unwrap the pudding carefully, beware of any build up of steam.
  12. Cut the pudding into slices about 2cm wide and serve each slice with custard, cream or ice cream.
gluten-free jam roly-poly & custard

Saturday, 27 March 2010

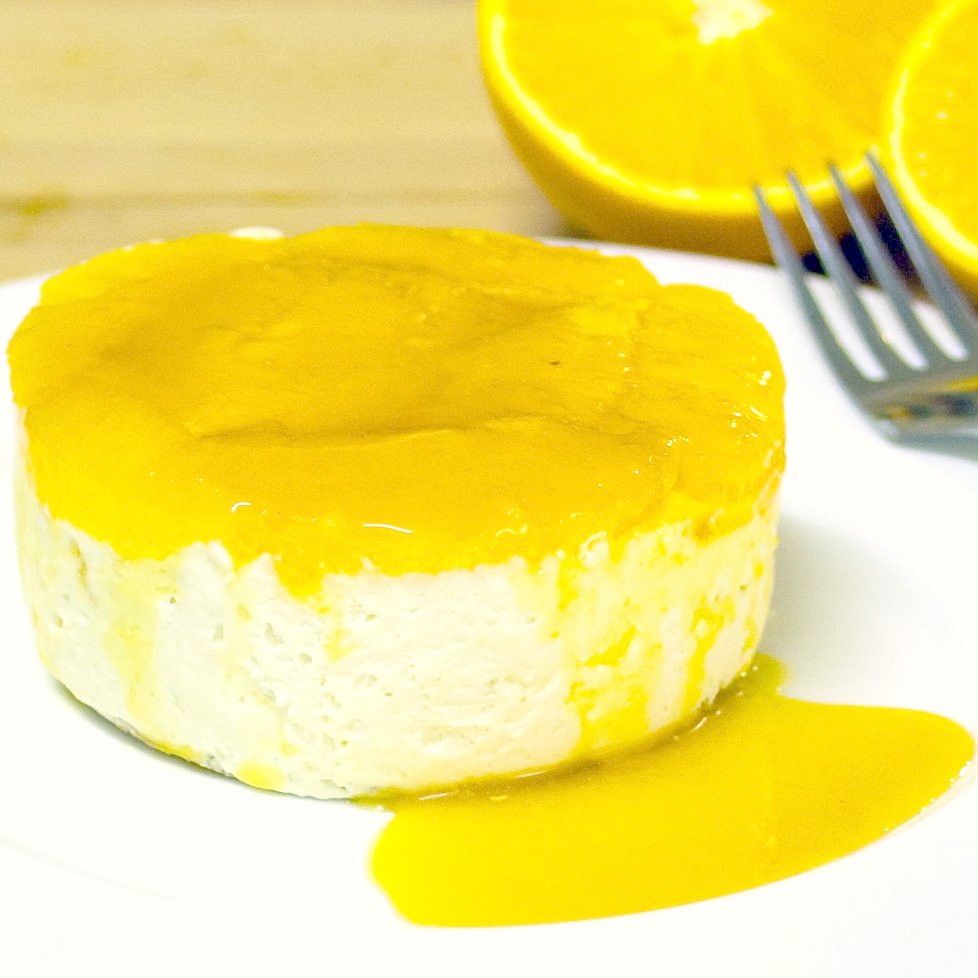
Daring Bakers March 2010 Orange Tian


The 2010 March Daring Baker’s challenge was hosted by Jennifer of Chocolate Shavings. She chose Orange Tian as the challenge for this month, a dessert based on a recipe from Alain Ducasse’s Cooking School in Paris.

 This is my third challenge and I feel as though I have got the hang of the concept. I have read enviously as other daring bakers amended recipes and thought up interesting flavour combinations as variations on the published recipes. Whilst I had some wild ideas and great ambitions for variations on this month's theme, I have a bad back at present which means I can only stand for a few minutes at a time. So instead of being an opportunity to get creative, simply the act of making this was the challenge this month!
I live gluten free I also adapted the pastry recipe to create a gluten free version. I based this recipe on a version that I found here and was delighted to discover, at the same time, another gluten free blog to read (thanks Natascha!) and another reason to brush up my French. To make my life a bit easier, I substituted the marmalade for the orange and cardamom marmalade that I made recently.


Preparation time:
- Pate Sablee: 20 minutes to make, 30 minutes to rest, 15 minutes to roll out, 20 minutes to bake
- Orange segments: 20 minutes, overnight to sit
- Caramel: 15 minutes, overnight to sit
- Whipped Cream: 15 minutes
- Assembling: 20 minutes
- Freezer to Set: 10 minutes

Equipment required:
• Cookie cutters . Ideally, you should have about 6 cookie cutters to build the desserts in and cut the circles of dough (see photo). The cookie cutters will be the size of your final dessert, so they should be the size of an individually-sized tart mold. If you don’t have round cookie cutters you could use an individually-sized cheesecake mold without its base.
• A food processor (although the dough could be made by hand too)
• A stand-up or hand mixer
• Parchment paper or a silicone sheet
• A baking sheet
• A rolling pin

For the gluten free pate sable - my recipe is here

For the Marmalade:

* 100g freshly pressed orange juice
* 1 large orange used to make orange slices
* cold water to cook the orange slices
* 5g pectin
* granulated sugar: use the same weight as the weight of orange slices once they are cooked

1. Finely slice the orange and place in a medium-sized pot filled with cold water.
2. Simmer for about 10 minutes, discard the water, re-fill with cold water and blanch the oranges for another 10 minutes.
3. Blanch the orange slices 3 times. This process removes the bitterness from the orange peel, so it is essential to use a new batch of cold water every time when you blanch the slices.
4. Once blanched 3 times, drain the slices and let them cool.
5. Once they are cool enough to handle, finely mince them (using a knife or a food processor).
6. Weigh the slices and use the same amount of granulated sugar.
7. In a pot over medium heat, add the minced orange slices, the sugar you just weighed, the orange juice and the pectin.
8. Cook until the mixture reaches a jam consistency (10-15 minutes).
9. Transfer to a bowl, cover with plastic wrap and put in the fridge.

For the Orange Segments:

* 8 oranges

1. Cut the oranges into segments over a shallow bowl and make sure to keep the juice.
2. Add the segments to the bowl with the juice.

For the Caramel:

* 200g granulated sugar
* 400g orange juice

1. Place the sugar in a pan on medium heat and begin heating it.
2. Once the sugar starts to bubble and foam, slowly add the orange juice.
3. As soon as the mixture starts boiling, remove from the heat and pour half of the mixture over the orange segments.
4. Reserve the other half of the caramel mixture in a small bowl — you will use this later to spoon over the finished dessert.
5. When the dessert is assembled and setting in the freezer, heat the kept caramel sauce in a small saucepan over low heat until it thickens and just coats the back of a spoon (about 10 minutes). You can then spoon it over the orange tians.

[Tip: Be very careful when making the caramel — if you have never made caramel before, I would suggest making this step while you don’t have to worry about anything else. Bubbling sugar is extremely, extremely hot, so make sure you have a bowl of ice cold water in the kitchen in case anyone gets burnt!]

Set cream

* 200g heavy whipping cream
* 3 tbsp hot water
* 1 tsp Gelatine
* 1.5tbsp orange marmalade (see recipe above)

1. In a small bowl, add the gelatine and hot water, stirring well until the gelatine dissolves. Let the gelatine cool to room temperature while you make the whipped cream.
2. Combine the cream in a chilled mixing bowl. Whip the cream using a hand mixer on low speed until the cream starts to thicken for about one minute. Increase the speed to medium-high.
3. Whip the cream until the beaters leave visible (but not lasting) trails in the cream, then add the cooled gelatine slowly (discarding the water) and beating continuously.
4. Continue whipping until the cream is light and fluffy and forms soft peaks. Transfer the whipped cream to a bowl and fold in the orange marmalade.

Assembling the Dessert:
Make sure you have some room in your freezer. Ideally, you should be able to fit a small baking sheet or tray of desserts to set in the freezer.
Line a small tray or baking sheet with parchment paper or a silicone sheet. Lay out 6 cookie cutters onto the parchment paper/silicone.
Drain the orange segments on a kitchen towel.
Have the marmalade, whipped cream and baked circles of dough ready to use.
Arrange the orange segments at the bottom of each cookie cutter. Make sure the segments all touch either and that there are no gaps. Make sure they fit snuggly and look pretty as they will end up being the top of the dessert. Arrange them as you would sliced apples when making an apple tart.
Once you have neatly arranged one layer of orange segments at the bottom of each cookie cutter, add a couple spoonfuls of whipped cream and gently spread it so that it fills the cookie cutter in an even layer. Leave about 1/4 inch at the top so there is room for dough circle.
Using a butter knife or small spoon, spread a small even layer of orange marmalade on each circle of dough.
Carefully place a circle of dough over each ring (the side of dough covered in marmalade should be the side touching the whipping cream). Gently press on the circle of dough to make sure the dessert is compact.
Place the desserts to set in the freezer to set for 10 minutes.
Using a small knife, gently go around the edges of the cookie cutter to make sure the dessert will be easy to unmold. Gently place your serving plate on top of a dessert (on top of the circle of dough) and turn the plate over. Gently remove the cookie cutter, add a spoonful of caramel sauce and serve immediately.
Resources:
http://www.wisegeek.com/what-is-a-tian.htm (An article about the dessert known as tian.)
YouTube link on how to segment an orange: http://www.youtube.com/watch?v=ZG5mcEEBlcI
To learn more about Pectin: http://en.wikipedia.org/wiki/Pectin
What to substitute for Pectin: http://www.gourmetsleuth.com/Dictionary/P/Pectin-6222.aspx
Friday, 26 March 2010

gluten free sablé pastry recipe (sweet pastry for desserts)


Here is the gluten free sablé pastry that I created for a Daring Baker's challenge.
This is a simple sweet pastry which is great for making sweet tart cases or even simple biscuits to serve with rich desserts.  It is based on a combination of recipes - a gluten free sable recipe that I found here along with my shortcrust pastry recipe here.  This volume of pastry made 8 x 10cm tart cases.
Don't skip the chilling step, it really helps to firm up the dough and makes it much easier to handle.  You can freeze the dough either unbaked, at the chilling stage or once the tart case(s) have been baked blind.

gluten free sablé pastry
  • 125g rice flour
  • 1/4 tsp xanthan gum
  • 25g glutinous rice flour
  • 25g cornstarch
  • 5g arrowroot flour
  • 60g cold cubed salted butter (if unsalted, add a pinch of salt to the dough)
  • 60g icing (confectioners) sugar
  • 60g ground almonds
  • 1 whole egg
method:
  1.  sieve the flours together with the xanthan gum
  2. beat the butter and sugar together with the ground almonds and rice flour until you have fine bread crumbs.
  3. add the whole egg and beat again to bring together.  if the pastry doesn't naturally form into a ball, give it a squeeze and see if that holds it together - if so then take it out of the mixer and gently knead together to form a ball.  If it is still too dry, add a little cold water if the pastry dough and beat a little longer before testing again and kneading in to a ball.
  4. form the kneaded dough into a rectangular slab (more surface area will chill more quickly), wrap in cling film and chill for 30 minutes or until you are ready to use it.
Roll out and use as per your recipe, dusting the work surface and pastry with a little rice flour if it is sticky.

You will need to bake this pastry blind before you fill it.  To do this:
  • roll the pastry out and line your tart tin.  
  • cut a piece of baking parchment to fit the flat base inside  your filled tin.  
  • place the paper onto the pastry base.  
  • cover the baking parchment with a layer of dried beans, rice, lentils or baking beans if you have them (ensure that the beans remain on the parchment otherwise they will bake into the pastry base)
  • bake the tart case for 20 minutes or so until the edges are lightly brown and the base of the pastry case is firm.
If rolled to 1/4" thickness, bake at approx 175°C for 15-20 minutes until golden.  If the centre is a little undercooked, you can remove the beans and the paper and return the case to the oven for 5 minutes.

    Monday, 15 March 2010

    a quick apology


    I am frustratedly absent from blogging at present, and am very sorry for this. I have been on great painkillers that have made back pain and arthritis completely manageable for the last year or so, but my body has decided that it no longer likes the drugs.  So until I can get the painkillers right, or jump the queue for back surgery, I am taking a quiet break.  It hopefully will only be another week or so until I have this cracked but until then, under warning from the teen (who will verify that I talk drug-induced jibberish all day), I am banned from blogging!  (By the way, I would like to point out that I consider myself far too young to have arthritis or need back surgery ... since my bio pic of a brownie will not reveal this!) 


    In the meantime, check out this food photography and cooking course that I hope to do later in the year with one of my favourite photographers, an amazing cook and one of my favourite parts of France - what could be better!

    Monday, 1 March 2010

    vanilla ice cream recipe


    I hesitate to say it, but I think that we may be slowly emerging from this long cold winter. Down here on the south coast, we have been taken aback by the volume and frequency of the snow, and I know even now it is too early to say it is past, merely that we may be over the worst!

    gervais - j'en veux logo


    The last burst of snow was heralded by the most rapid freeze I have ever experienced, it reminded me of a favourite film, The Ice Storm, and the creeping cracking ice grasping and enrobing everything in its' path. That Wednesday evening, wet rainy roads turned to sheet ice in a matter of minutes and our simple journey from one part of town to another became an epic adventure - sliding backwards down a hill, slipping off the road, into a wall and failing even to get over speed bump due to the lack of momentum and the severity of the ice. Having said all that you might think that our car was written off and we both ended up in neck braces, but no, all these manoeuvres were carried out gracefully at no more than 5 miles per hour, thankfully! The following day delivered an epic walk up iced hills to get to work, I fell over so many times on the way there, far too many times to count during a mere couple of miles walk!

    I don't recollect ever spending a full winter sleeping in climbing socks, pj's, thermals and a fleece under a thick wool blanket and a down duvet. Crazy cold, or crazy susceptibility, at least. Whilst I haven't enjoyed the piercing cold it has, for some reason, awakened an interest in icecream. I have found myself thinking often about methods of making, ingredients and flavours. I have a list of recipes to try, but before I do, I thought that I would indulge in a flavour that I hope will be well received at home.

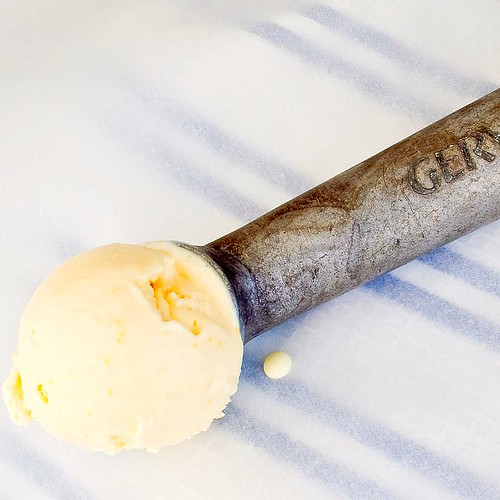
    vanilla ice cream scoop 4

    There seems to be a sudden fashion in our house for all things peanut butter related. My husband has always snacked on wholemeal toast with peanut butter and the teen could demolish boxes full of Reese's peanut butter cups given the chance, and I have recently become very fond of a bastardisation (or should I say adaptation?) of the Indonesian salad Gado Gado. This recipe isn't actually that far from the real mccoy, but most closely ressembles the gado gado salad that I remember feasting on at Rasa Sayang in Soho more than twenty years ago.  I am not sure how authentic that meal really was though it was definitely a great meal in wonderful company.  Isn't it funny how the memory of a good meal sticks with you, even down the years?

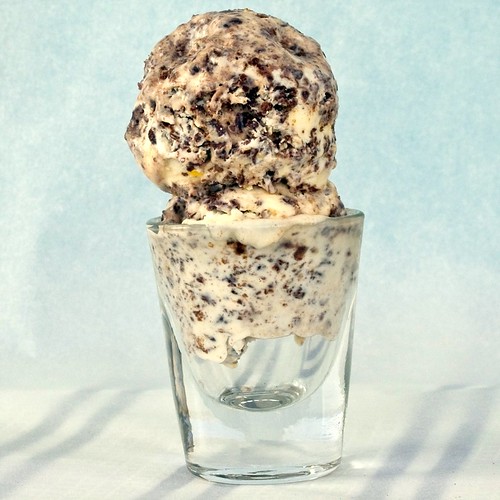
    Anyway, back to peanuts. They have most recently made an appearance in a chocolate peanut ganache made to fill some not-too-good macarons I made. We decided not to fill them as, although tasty, they were not up to much visually. So with the choc peanut butter ganache on the worktop, I was at a loss for something to do with it. Not for long though, as my ice cream ponderings came flooding back.  I mixed up and churned a batch of vanilla ice cream, which in its' naked form is often ignored in our freezer.  However I split the mix in half and stirred half a batch of chocolate peanut ganache into half the ice cream before freezing.  I have managed to salvage a scraping to photograph whilst the plain vanilla has lingered untouched, so far.  I will crunch up the failed batch of chocolate macarons and stir them into this half batch, along with some crushed salted peanuts and grated Galaxy chocolate.  I know it won't be hanging round for long after that!


    Vanilla ice cream
    • 5 egg yolks
    • 500g double cream
    • 150g castor sugar
    • 250g whole milk
    • 1 tsp vanilla extract (*please see foot note)
    • a pinch of sea salt.
    For a proper recipe and method, can I suggest that I have a look at David Lebovitz's blog and his vanilla ice cream recipe here.  My method is not ideal, indeed frankly, it is just lazy and it can easily go wrong!
    Still, if you haven't heeded my warning, here is my method:
    1. mix the egg yolks together with the vanilla extract in a 1 pint pyrex jug.
    2. pour the cream, milk and sugar into a thick bottomed pan
    3. heat the pan gently, stirring constantly until the sugar has dissolved, this will happen whilst the milk is finger-hot if you use castor sugar.
    4. pour about 1/4 pint of the just-warm cream mixture into the jug whilst stirring the egg yolks briskly with a fork,  as long as the cream is cool the eggs should mix into the cream without cooking
    5. whilst stirring the pan, pour the egg yolk mix back into the pan.
    6. put the pan back on to the heat and continue to warm the cream mix over a low heat whilst stirring constantly but gently.
    7. keep stirring gently as the cream heats up slowly towards boiling, spluttering a little.
    8. let the cream simmer and continue to stir gently.  You should notice the cream thickening gradually,  don't stir too vigorously or else the mix can separate.
    9. after 5 minutes take the pan off the heat.  now you want to stop the pan cooking and start cooling the custard down as soon as possible.  you can do this by putting the pan in a bowl filled with iced water, unless you are like me and never have enough room in your freezer for the quantities of ice required to do this efficiently.
    10. the alternative is to fill your washing up bowl about 1/3 full with some cold water and place your pan into the cold water - don't let go of the handle until you are certain that the pan is not floating & make sure that tap is turned off.
    11. the cold water will begin to cool the ice cream down, change the cold water periodically to speed up the cooling proces.  stir periodically to ensure a skin doesn't form (and to help it cool quicker).
    12. on a cold-ish winter's day it took about 40 minutes for my custard to cool down.
    If you summarise that, you warm your milk, cream and sugar, chuck a bit in your egg yolks and stir, pour the yolks into the main pan and stir constantly until the custard is thick.  Then cool by putting the pan in water.  Top tip - don't be an idiot and leave the tap running whilst the pan is in the water as you might end up with watery custard!
    1. set up your icecream machine and pour the mixture in to churn as per the machine's instructions.
    2. if you don't have an ice cream machine you can pour the cream mixture into a 1L freezer box and place in the freezer.  Take the ice cream out every 60 minutes, stir thoroughly then replace in the freezer.
    3. whilst the ice cream is churning, take half a recipe of chocolate peanut ganache and warm very gently in a microwave or bain marie until just melted.
    4. pour in 50g double cream to thin, then add this sauce to the ice cream in the last 5 minutes of churning (if you making this manually, pour the sauce in when the ice cream is quite thick, give a good stir to distribute it like a raspberry ripple icecream, then freeze for a final hour).
    5. store the churned icecream in the freezer until ready for use.  take it out of the freezer 10-15 minutes before serving to allow it to soften up before serving.
    I forget how easy it is to make a really top quality ice cream at home, most often because I don't have much room in the freezer to store it.  Admittedly our freezer is getting a little bit full now, 2 flavours of ice creams, 2 sorbets and tiramisu - the dessert bug has really bittten me, so watch out for more recipes soon!

    *using vanilla extract - I don't want to be controversial, by all means use a vanilla pod but it does add an extra stage infusing the milk/cream before adding the sugar.  I use Nielsen Massey Madagascan vanilla extract and find it excellent in most desserts, especially in sweet cooked/baked products.