Friday, 15 January 2010

home-made marshmallow recipe

 I can take not credit whatsoever for this recipe.  I was reading David Lebovitz's facebook feed and there it was, a link to the most beautifully indulgent winter-warming concept.  The original post is here written by Rebecca & Val at 'Foodie with Family' which is a lovely blog and well worth a look.

The post is for hot chocolate blocks with marshmallows, a beautiful idea and the subject of some debate in our house.  The b contain condensed milk and plenty of chocolate yet you use them by plunging them into hot milk.  Far enough, but since they contain milk, why can't you just put them in hot water?  We debated whether my husband would notice us using up the last of his milk in a mug of hot chocolate.  The teen hates milk (except in hot chocolate) and I don't use it so it is only my husband who would miss the last of the milk in the fridge.  But the snow was falling, the temperatures were sub zero outside and frozen snow & ice was sending cars clumsily ice-skating across roads and pavements.  The shops had already been stripped of milk (both fresh and powered) and the length of our conversation proved how guilty we felt about the thought of using the last of 'his' milk on a treat.  We spent far longer than is healthy talking about hot chocolate before deciding not to go ahead.  Instead we said that would look at the recipe in future to see if we could make the blocks milky enough to dunk straight into hot water with a dash of cream.
So, maybe it wasn't the moment to create the hot choc but I was raring to have a go with the marshmallows.  I have been collecting marshmallow recipes for a while now, daring myself to have a go, but not quite brave enough!  This recipe finally has the weight of the gelatin required, so comforted by the knowledge that weight rather than 'sheets' will give a consistent result, I was ready to go.
The original recipe suggests using an 8"x8" tin - don't, it is too small, and the marshmallow will overflow so use a 9" square or equivalent volume.  I had to throw a little bit away as I didn't have any more room to pile any more on top in my 8" tin and so my marshmallows were nearly 2 inches high!  Sugar syrup is very hot, so pour carefully and remember that the utensils will be hot and sticky too unless you grease them ...do follow the instructions about greasing.  The mix is incredibly sticky so greasing the utensils as well is essential to make the whole process manageable.

Having made them, I don't think that I quite 'get' marshmallows.  I am now faced with 86 pieces of white fluffy sticky air-filled sugariness, possibly the most pointless foodstuff I have ever made.  I would like to confirm though, that they are not difficult to make, just sticky, messy and completely superfluous to normal human existence. 
Have fun!

Ingredients:
  • 21 grams gelatine
  • 125ml cold water
  • 400g granulated sugar
  • 225g glucose syrup
  • 65ml water
  • 1/4 teaspoon salt
  • 15ml vanilla extract (or other flavor extract)
  • icing sugar
Method
  1.  Line 9 x 9-inch with cling film and lightly oil it using your fingers or non-stick cooking spray.
  2. In the bowl of an electric mixer, sprinkle the gelatin over 125ml cold water.
  3. Leave to soak for about 10 minutes whilst following the next stages.
  4. Combine sugar, glucose syrup and 65ml water in a saucepan.
  5. Bring the mixture to the boil quickly, as soon as it is boiling, allow to boil hard for 1 minute.
  6. Pour the boiling syrup over the soaked gelatin, attach the whisk and turn the mixer on low.
  7. Gradually speed up the mixer until it is running at full speed.
  8. Add the salt and beat for between 10 and 12 minutes, or until fluffy and mostly cooled to almost room temperature.
  9. After it reaches that stage, add in the extract and beat to incorporate.
  10. Grease your hands and a rubber or silicone scraper with neutral oil and transfer marshmallow into the prepared pan.
  11. Use your greased hands or the spatula to press the marshmallow into the pan evenly.
  12. Take another piece of lightly oiled plastic wrap and press lightly on top of the marshmallow, creating a seal. Let mixture sit for a few hours, or overnight, until cooled and firmly set.
  13. Sprinkle a cutting surface very generously with icing sugar.
  14. Remove marshmallow from pan and lay on top of the sugar.
  15. Dust the top generously with sugar as well.
  16. Use a large, sharp knife to cut into squares.
  17. Separate pieces and toss to coat all surfaces with the sugar.
  18. Store in an airtight container.

Wednesday, 13 January 2010

leek tart recipe, gluten free


The wintery weather across the UK has caused panic-buying in the supermarkets.  In our local shops, the shelves were first stripped bare of milk, bread, eggs, bacon and sausages before shoppers moved on to toilet rolls, cheese and fresh meats.  I didn't look but am guessing that there must have been a gap in the tomato ketchup and brown sauce stocks too because it looks as though everyone has become fried breakfast addicts in the south east!  In our household, panic-buying consisted of stocking up on vegetables and oranges, so far, we haven't gone hungry!  As I am writing this, I can hear the dulcet tones of rear-wheel drive car wheels spinning on the freshly fallen snow and failing to get a grip on the slippery tarmac hill outside our house.  I have no desire to leave the house right now, and I am guessing that the drivers outside are wishing they had made the same decision.

A sudden craving for a satifying smooth savoury custard lead me to making a quick leek tart last night.  I hesitate to call this a quiche, as there seems to be so much negativity towards that particular nomenclature.  I love quiche, the teen loves quiche, and as a kid this was one of her favourite meals.  To be fair, by 'this' I mean that "quiche-lorraine out of a box" (preferably from Marks and Spencers) was her favourite!  And as you might expect, my home-made version was looked upon as something of a low-brow affair comparatively.  I have no idea whether this was thoroughly justified or just another attempt by the under 8 year olds to besmirch my cooking!  Looking back ten years, I recognise that there has been a complete about-turn in the style and quality of my cooking as I have become more and more obsessed by this strangest of art forms.  I have cooked since I was a kid but only in these past few years have I gained a real understanding of flavours and structure.  I suppose I have only now started to think about food and ingredients, as opposed to eating! So, in reality, the nipper was probably right to reject my quiche of ten years ago!


I found lots of variations on the theme of this recipe on the internet.  Most of these contain cheese which, for me, makes the creamy filling too rich and masks the gentle flavour of the leeks, but then, I am a purist!  If you are not a fan of nutmeg, this is equally delicious with a touch of thyme.  Add a couple of sprigs to the pan whilst you cook the leeks and pick out the stems before you mix the leeks and the custard.  If you want to make this more of a gourmet delight, you can also infuse the cream with a bay leaf (warm the cream with the bay leaf to just below boiling point, then allow to cool before removing the bay leaf & using the cream in the recipe as instructed).  Alternatively you could also soak a few saffron stems in a little water and add that to the custard instead.
I was a bit impatient to get this into the oven so didn't leave the pastry to rest for thirty minutes before rolling.  I thought I had got away with it until I went to move the smoothly rolled sheet over the pastry case, at which point it fell apart completely!  So, whilst I waited for the pastry to rest properly, I prepped the leeks -  which is, of course, what I should have planned to do in the first place.  This recipe is very easy to make and delicious to eat, so my impatience was quite justified.  I had promised myself a chiled glass of manzanilla with the tart (and not before) so that was the real reason for rushing the pastry. 

Whilst sitting down to eat this together, the teen declared her new passion for a vegan diet (forget the eggs and cream in the tart, th enext bit is even better).  On tasting this, she followed this statement up without so much as a pause for breath, by suggesting that this tart would be even more delicious with nuggets of crispy smoked bacon or salmon fillet included.  Fickle?  A teenager's prerogative!
This recipe is just as good served as a summer lunch as a winter supper or snack.  Do enjoy it!

Ingredients
  • 1/3 recipe gluten free shortcrust pastry
  • 600g leeks (or onions)
  • 2 tbsp butter, olive oil or rapeseeed oil
  • 250g double cream
  • 5 freerange eggs (medium to large)
  • nutmeg, salt & pepper
Method
  1. preheat oven to 180°C 
  2. roll out pastry and line a 10" tart plate or loose bottomed tin (or individual tins)
  3. lay baking paper over the base of each tart, cover with baking beans or pulses
  4. bake blind for 20 minutes until the pastry base is cooked through and crisp, but not coloured
  5. whilst the tart case is baking, wash and finely slice the leeks
  6. fry gently with a sprinkling of salt until softened into a thick mass
  7. in a large bowl, whisk the eggs and cream together, season with salt and pepper and a good grating of nutmeg
  8. remove the cooked tart shells from the oven, carefully tip the hot beans off the tart into a heat proof bowl and leave to cool, remove the baking paper too.
  9. once the leeks are cooked, stir them into the cream mix, stirring until the leeks are evenly mixed through the custard
  10. carefully pour the custard into the tart shell and replace in the oven
  11. bake at 180°C for 25 minutes, turning half way through to ensure an even bake
  12. remove from the oven checking the custard is cooked through (just firm to the touch) and allow to rest for five minutes before serving

Friday, 8 January 2010

Orange and apricot cake


I am not used to long breaks or holidays, especially not ones that involve extended stays at home.  But the Christmas break just passed saw me at home for the best part of two weeks.  It was less than twenty-four hours before I started getting cabin fever desperately trying to find things to occupy me.  I was further hampered by the need to rest my back after minor surgery so the few days running up to Christmas saw me mostly on the sofa surrounded by cook books with my laptop and a notebook for researching recipes.  I found lots and lots though I don't suppose that is any surprise, food-enthusiastics have grasped new technologies with both hands and share recipes and experiences around the world.  I did get very distracted trying to find out how to make vietnamese spring roll pancakes (I've not sussed that out yet) which then lead on to glutinous rice dumplings and then ... well, you know how it is.  Suddenly you have encircled the globe three times and completely forgotten what you started out looking for.
orange apricot cake, gluten free and sugar free
I have been thinking about the ultimate orange cake for some time.  I want to capture the zingy essential flavour of orange zest in a gluten free cake, with a light texture without any icing.  Of course, it also needs to be low fat and preferably sugar free too.  I am still working on this holy-grail of cakes but I thought I would share this recipe with you as it has definitely grown on me over the past couple of weeks.
The recipe is originally found here, on the Big Hospitality website and was created by Christine Bailey who was the joint winner of the Gluten-free Chef of the Year.  This is a variation of the theme of "take a whole orange, puree it and fold puree into polenta-based recipe".  I like this recipe because Christine has addressed a couple of points that I always see as negatives with this style of recipe.  By zesting the orange and then peeling it, discarding the white pith, you omit those bitter notes which can overpower the zesty flavour.  Then by adding a gluten-free flour blend to the polenta she has also lightening the consistency of the cake which is great.
This is a sugar-free recipe and that is worth bearing in mind before you take your first bite, even with the added honey, this cake is not sweet.  You can address that with the type of apricots you buy.  I used run-of-the-mill sulphured supermarket ones which added texture but no real sweetness to the recipe.  If you can choose unsulphured, organic apricots, those dark brown, unattractive fruits that tend to get ignored for their bright orange, less flavoursome counterparts  (squeeze the pack and make sure they are really squidgy if you can) then you will get a far richer sweeter flavour that will compliment this recipe perfectly.
I have copied the recipe just as Christine has written it though I made mine with dairy free margarine. My mixture curdled completely in the food processor but this makes no difference to the finished cake though, so don't be concerned if it happens to you too.  Instead of making one cake I split the mix into 2 x 5" round tins and 3 greased and flour dusted dariole molds.  The little ones took 15 minutes to bake and the 5" ones took 21 minutes.  I glazed one of the 5" cakes with a fresh orange juice and icing sugar (5 tsp icing sugar to 1 tbsp orange juice, I think) to serve for tea and have eaten the other, unglazed cakes for breakfast and they have been lovely!
I hope you enjoy them too.

Ingredients:
  • Zest of two oranges
  • 2 oranges peeled, cut into half
  • 200g dried ready to eat apricots
  • 125g unsalted butter (dairy free margarine*)
  • 3 eggs
  • 3tbsp honey or agave nectar
  • 100g GF flour (75g rice flour + 25g millet flour*)
  • 150g quick cook polenta (fine corn meal*)
  • 2tsp gluten-free baking powder
Method
  1. Preheat the oven to 180°C, gas mark 4
  2. Grease and line a spring form 18-20cm cake tin
  3. Place the orange zest and oranges in a food processor and process to form a thick puree. Add the apricots, butter, eggs and honey and process again until smooth.
  4. Place the flour, polenta and baking powder in a bowl. 
  5. Add the puree and beat well. 
  6. Place in the cake tin and bake in the oven for 30 minutes until a skewer placed in the centre comes out clean. Leave to cool in the tin for 5 minutes then transfer to a wire rack. 
* these are my annotations but otherwise the recipe and method are exactly as Christine's original recipe.

Thursday, 7 January 2010

beetroot soup recipe (borscht)


I am not sure that I can get away with calling this Borscht as there are so many variations of recipe, by geography, nationality or personal choice.  This is really just beetroot soup, a lovely one that is easy to make. 
beetroot soup
The most difficult aspect appears to be getting hold of decent quality raw beetroot.  If you don't have a farmers market locally, please pass by the hugely expensive bunches at the supermarket and head instead for your local greengrocer.  In my local area, you have to get up early to get fresh beetroot.  This isn't due to its' sell-out popularity, sadly, but because they all sell beetroot pre-boiled but for this recipe, that isn't really what we want.  I try to pop in before 9 and can generally lay my hands on a few fresh purple nuggets, otherwise it is just a case of asking nicely and then collecting the following day.
I am a big beetroot fan and do tend to eat a lot in stir fries, vivid pink sushi rolls and beetroot hummous.  It strikes me that beetroot should be the favourite vegetable of almost every girl from 2 - 12 as they dart in and out of their 'pink' phase, yet my daughter spent years hating beetroot, so much so that we took to hiding it in tomato pasta sauces and stews as well as in chocolate cake.  I  have only just discovered that I like lightly vinegared beetroot, which I have avoided due to memories of sharp squidgy chunks as part of a 1970's Sunday tea at my aunty's house. I was obviously just too young then!  It feels as though we used to visit aunty for tea almost every week, though I am sure that is not the case, as they had pretty busy lives.  Tea was a proper high tea.  Lettuce, tomatoes, salad cream (decanted), sliced bread (yippee!), slices of ham, pickled onions and a really good cup of tea.  I really miss Aunty's tea, it was strong but not bitter, dark yet not full of tannins and I loved the way the spoon clinked the china tea cup as I stirred in the sugar.  Delicious!  It is funny how memories stick in your mind.  At one stage the road collapsed outside their house, leaving a stonking great hole and no vehicle access.  In my head, this huge and slightly ominous hole was there for years ... though I am sure that the council must have filled it in quite quickly. 
snowy bike
Anyway, this recipe starts with my favourite cooking smell: the gently stewing of finely chopped onions, garlic, carrot and celery until soft and scented.   It is an easy soup to make, so jump in, have a go and enjoy the pink!

Ingredients
  • 750g raw beetroot - peel and chop
  • 1 tbsp rapeseed oil
  • 1 carrot, peeled & finely chopped
  • 1 stick celery, peeled & finely chopped
  • 1 medium onion, peeled & finely chopped
  • 1 clove garlic, peeled & finely chopped
  • 1L chicken stock + additional water if required
  • 1 bay leaf
  • 1/2 lemon, juice only
  • salt & pepper 
  • soured cream, horseradish & dill to serve
Gently fry the finely chopped onion, garlic, celery & garlic in the rapeseed oil over a very low heat until soft and aromatic.
Add the heap of peeled and chopped beetroot
Cover with stock and add extra water if required until you have 4cm above the level of the beetroot.
Add a bay leaf if you have one and leave to simmer with a lid semi-covering until the beetroot is soft, around 45 minutes.
Puree the soup then allow to simmer for another 10-15 minutes to thicken and concentrate the flavours.   Season with fresh lemon juice, salt and pepper before serving.
This is delicious served with a horseradish cream and fresh dill.

Enjoy.

Wednesday, 6 January 2010

french onion soup recipe


On days like today, soup is one of the few things that can really warm you and get right to the heart of the cold.  We are lucky to all be sitting indoors, warm and dry whilst watching the "oh my goodness, there is snow in the south" drama unfolds on television.
french onion soup, kate the bake, gluten free
My mum is from Lancashire, my father from London.  We were brought up in London but spent many of our holidays under the age of 11 in Lancashire at my grandpa's house, the house my mum grew up in.  Not being a Coronation Street viewer as a kid, this type of house, street and town were completely alien to me: row after row of 2-up, 2-downs with a lean-to kitchen, outside loo and coal store.  The dark-roofed terraces clung tightly to the steep hills running down to the mills in the town at the bottom of the valley.  I was far more familiar with a landscape of wide suburban street with tidy front gardens, pampas grass and polished cars in the drives of red-brick semis and bungalows, or ostentatious faux-georgian detached houses with white marble fountains & statuettes on their ludicrously tiny attempts at "sweeping drives".
There was never enough snow in the outer London suburbs when I was a kid.  Mum used to commiserate with us (whilst thanking God that she didn't have to stay home from work with us too often!) and tell us stories of heavy snow, woollen stockings and long walks to school.  We didn't have much truck with the long walks bit as we walked a mile and a half to school albeit in waterproof coats and poly-bag lined shoes.  The snow though, we envied.  As head of science at a girl's school across the Pennines, she would drive her Morris 1000 over the hills, behind the snow plough and says that she doesn't recollect a day when she didn't make it in to school eventually. 
For most of this winter's cold spell, she has managed fine, living alone in Derbyshire.  We managed to persuade her to come to us for Christmas after her own Christmas plans fell through.  Unsuprisingly, we had to rescue her from Tonbridge station as they didn't even bother to run trains south on the day of her arrival.  Right now, she is at home looking out onto about 15 inches of snow.  She has gritted her paths, shovelled snow away from her garage doors and her neighbours have cleared tyre tracks down to the main road.  They have gone to work at the county offices some ten miles across the moors, scarcely batting an eye-lid at the snow. 
Down here on the south coast, we have had to close the bakery because the industrial estate hasn't seen a gritting truck for, well, I am not sure how long.  Getting in this morning was difficult and as the snow continued to fall the tyre-tracks on the road disappeared into the soft white velvet layer.  After watching a 4-wheel drive and a quad bike almost come to blows outside, we decided it was sensible to beat a hasty retreat.  As the snow continues to fall this afternoon, I think of Mum and her sensible matter-of-fact attitude to the weather and think that we could use a whole lot of people like her down here, preferably running our councils!

To the matter in hand - soup!  There was always a pan of soup on the go when I was a kid, but I could never get a recipe from mum, that wasn't the way she worked so that is how soups have developed with me.  What is in the fridge?  what needs to be used up?  OK, celery & stilton soup, bacon and green pea - see how it works?  I don't really get the idea of a recipe for a soup as I don't think that there are any hard and fast rules to soup-making, unlike baking, where technique and volumes matter enormously. I made this on yet another cold day and let it sit on the hob on a super low temperature (lower than a simmer) until it was wanted.  By the time we got to it the flavours were rich and concentrated which balanced perfectly with the others cheesy croutons, yet still worked for my un-adorned bowl.

ingredients, use this volume of ingredients per person, making a minimum of 2 servings:
  • 1 large onion
  • 1 knob butter or 1 dsp olive / rapeseed oil
  • 1/2 clove garlic (roasted or confit if possible)
  • 1 tsp rice flour
  • 1/2 pint beef stock (cubes are ok, home made even better, if you have it)
  • 1/2 glass white wine
  • 1/2 bay leaf
  • 1 dsp (10ml) cognac
  • small sprig of thyme
  • salt & pepper
method
  • caramelise the onions by adding them to a hot frying pan with the butter or oil melted.
  • stir rapidly so that the onions take on a dark rich brown colour but don't let them stick or burn
  • after 5 minutes, turn the heat down and add the garlic
  • allow the onions to cook through until they are a soft, sweet, stringy mass (this should take about 20-30 minutes)
  • sprinkle over the rice flour and stir into the onions trying to pick up as much of the caramelised goo (technical term, sorry!) from the pan
  • add the stock and wine, and bring to the boil

  • add the herbs and turn the heat down to it's lowest setting, without a lid, for 45 minutes or so
to serve
  • gluten free bread for croutons
  • olive oil or butter
  • cheese
croutons method*
  • whilst the soup is cooking for that last 45 minutes, preheat oven to 180° & cut one thick slice of gluten free bread per serving
  • brush each side of the bread with oil or spread with butter
  • cube into 3/4" chunks
  • place chunks onto a lined or greased baking tray and bake in the oven for 15-20 minutes, give them a quick shake if you remember about half way through.
  • once they are golden brown and crispy take the tray from the oven and leave to cool (don't forget that gluten free bread browns more quickly and suddenly than wheat bread)
  • pre heat the grill just before the soup is ready, and find some heat proof bowls to serve the soup in
  • when the soup is ready, bring it back up to the boil, add the cognac
  • put a serving in each bowl, sprinkle some croutons over then follow with a good thick grating of cheese
  • pop under the grill for a few minutes until the cheese is brown and bubbly (keep a close eye)
  • remove and serve immediately
*when i can't be bothered with the grill method, we make the croutons in a non-stick (important) frying pan by dry frying and then just chuck some cheese over and allow this to melt on the croutons and the pan before tipping the whole lot over the soup.  it tastes the same but without the aggravation ... and sometimes that is all that counts!

Sunday, 3 January 2010

gluten free pasta recipe


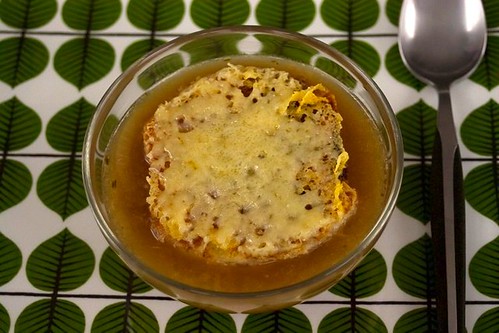
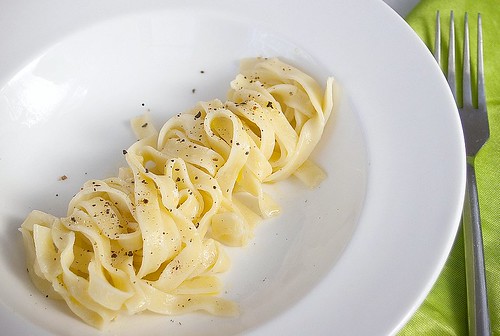
I have been craving pasta and not just any pasta, but slippery gratifying ribbons of tagliatelle, a pasta style that I am yet to find as a commercial gluten free variety.  There has been a fair amount of pasta slurping going on around me at home recently.  I usually ignore the temptation and prep myself some more Vietnamese spring rolls or a quick stir fry.  But there is something about freezing temperatures which make it difficult to enjoy overdosing on raw veg.  This is definitely the time of year for something a little more substantial, so besides cooking up another batch of Nomato sauce & soup I am drawn towards a bowl of pasta.
bowl of gluten free tagliatelle with garlic oil & sussex charmer cheese
I was pondering on the merits of different types of pasta and the differing attitudes to fresh egg as opposed to dried pasta.  It dawned on me that cooking pasta al dente must vary according to the type of pasta you start with.  I am a bit British in my pasta tastes and tend to like my pasta cooked through.  The one exception to this is Spaghetti Vongole where I expect my spaghetti to have a little bit of bite.   So, if you are making and cooking pasta from scratch, how do you achieve that bite? as fresh pasta in my experience is chewy rather than brittle?  And if you can't get that al dente bite with fresh pasta, is the 'al dente' concept traditionally Italian? It is all a bit meaningless I know, but that is a small and possibly scary insight into the workings of my mind!
gluten free tagliatelle with garlic oil & sussex charmer cheese
Making pasta is not hard work as long as you are well equipped but it is, like all recipes that require special equipment, a leap of faith to invest in the first instance.  You can use this recipe for making spaghetti or tagliatelle, as well as hand shaping traditional Italian pasta.  One of my favourites is orechiette (little ears) which are easy to make from tiny chunks of dough - you can even make these without a roller, which might be worth a go before taking the plunge.
I bought my pasta machine yonks ago, from Ikea.  It sat for ages in its' box quite literally gathering dust (and grease) on a top shelf above the hob for ages.  I used to gaze on the box proudly "look, I've got a pasta machine" but it was rarely used.  Since I started a gluten free diet, this has all changed.  A new place in the cupboard with the mixer and my food processor means it is easy to reach for and my diet has vastly improved with the addition of 
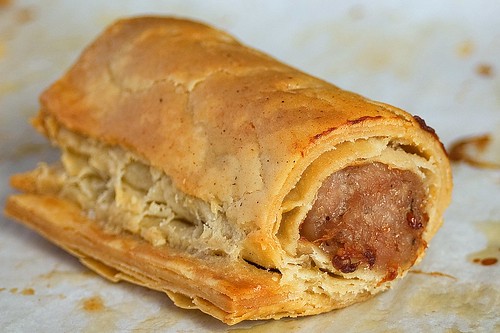
egg noodles, wonton wrappers & potsticker dumplings - all products of my beloved pasta roller. It is difficult to know whether a pasta machine is a good investment for you, but have a think about this.  Try to make this recipe, by hand, rolling out the dough.  If you like the taste, are not put off by the effort and find yourself thinking about making it again (having forgotten your aching arms and tired hands) then buy a pasta machine!  By the way, the ikea machine has fixed tagliatelle and noodle rollers on the same machine, so it was a versatile investment.  I haven't seen one in Ikea since but I know that they crop up on ebay intermitattantly selling for around a fiver under the brand / model name Ampia 150, worth the investment I think!

I wanted to retain the yellow hue of traditional egg pasta, so besides the eggs I have included some yellow cornmeal in the dough.  If you can't eat corn, then substitute this with millet (for the yellow look) and potato starch for the corn starch (I can't eat potato starch so don't usually include it).  Egg pasta doesn't need to be rolled as thinly as noodles and wrappers which will be a bonus if you are doing this by hand, on the pasta roller I rolled from settings 1 - 5 before passing each sheet through the tagliatelle cutter.

Ingredients
  • 150g rice flour
  • 50g fine corn meal (masa - yellow corn)
  • 100g tapioca starch
  • 100g corn starch
  • 100g glutinous rice flour
  • 10g kuzu starch
  • 1.5 tsp xanthan gum
  • 1 tsp psyllium husks
  • 4 eggs
  • 120-180ml (approximately) water

method
  • sieve all the flour ingredients together
  • put all the dry ingredients into a mixer or food processor bowl
  • add the eggs with the mixer running
  • gradually drizzle the water in till the mix ressembles chunky breadcrumbs (you may not need all the water in the recipe)
  • tip the dough out onto a work surface dusted with tapioca starch
  • knead together to make a smooth dry dough and form the dough into even cube
  • wrap in a plastic bag and leave to rest for 20 minutes
  • cut a slice off the dough
  • roll two or three times (turning dough each time by 90 degrees) with a rolling pin till it is thin enough to pass through the machine without cracking
  • process the sheet through a pasta machine reducing the thickness each time to create a thin silky sheet, 5 passes worked well for me  (or keep rolling manually, turning and dusting with tapioca starch frequently)
  • if you have a cutter-attachment for your roller, use it now or slice the sheets into noodles or shapes of your choice (if you have the correct attachment you can pass the sheet through your machine to create the pasta shape of your choice)
  • set each finished batch to one side under a damp cloth until all the dough is processed
Rolling tips:
Keep the rest of the dough in a plastic bag whilst not rolling it.
If the outer skin of the dough is dry when you start, wet your hands slightly and squeeze the dough until it is just moist (not sticky) and pliable again.

You can dry the finished pasta fully if you like, simply by leaving it in the open air, turning each pile of noodles to ensure they are open to the air, then store in an air tight box.  Alternatively you can drape noodles or spaghetti over a drying rack (I have used a clean clothes airer).   If you don't want to dry them you can put them straight into an airtight box and freeze until you need them.  When I have room in the freezer, I also freeze the 'dried' ones in case I haven't managed to dry them completely.

Whilst I was taking the photos I was snacking on the left over cooked pasta with remnants from my fridge.   I discovered that this pasta tastes great with tuna, cooked green beans, toasted hazelnuts and garlic oil  topped off with a grating of Sussex Charmer cheese (more on this later).
Hope you enjoy this!

Friday, 1 January 2010

welcome to 2010

In the spirit of the New Year, I have decided that it is time to open up to the world a little.
hastings pier on New Year 2010
It was with this thought in mind that I found myself standing in the snow at my front door with a drill at 9.30am on New Year's Day.  Now we have a shiny new working doorbell which is great, in so many ways!
Our lovely postman will be happy that he doesn't have to hammer on the door and yell, not knowing whether we are in or out.  The teen's boyfriend will not be shut out in the rain for twenty minutes because no-one can hear him knocking and friends who pop round on the off-chance, will finally find the door opened and a welcoming cup of coffee instead of sore knuckles and the echoing silence of their un-answered thumps (sorry!).
Following the same theory, I will start to mention to friends and family that I write a blog.  It has been just 4 months and 46 posts since I started writing this so this is a real baby in the world of food-blogs.  I doubted my abilities to post regularly so I have not, so far, spread word of my blog beyond my closest colleagues and family members.  Those with whom I live could not have failed to notice my new obsession but, in case it was just that, a fad that I would tire of in 5 minutes, I have kept the blog under wraps.
Blogging takes real commitment and a dedication that can be hard to sustain when work and life in the wider world gets busier and more demanding of time & energy.  I know that I am going to experience lapses and gaps, and that when life intrudes, my passion for food and writing will have to take a back seat.  But I know that I will come back, because a lapse doesn't mean failure, it just means that life got in the way, and that happens to all of us.
gluten-free sausage roll with flakey pastry by kate the bake
When I found myself yesterday taking photo after photo of a gluten free sausage roll because we finally had an hour of sunshine, I realised that blogging completes a circle for me.  The circle starts with the constant thoughts and dreams of foods & ingredients, continues past the pile of cookbooks by my bed, the 24 tabs currently open on my browser with different recipes and cooking techniques, and embraces the fact that, for me, food is not just fuel but a means of expression and creativity.  By photographing and writing about the foods that I make, I am able to document my progress, and also retain a record of techniques and ideas that I have.  And that takes me back to the beginning, completing the circle.  I wish I had started blogging years ago.  This blog gives me an outlet for all my thoughts and recipes, a reason to try out new recipes & techniques and a place I can share my ideas with anyone who might appreciate the recipes and find them useful in their lives too.  It also removes a whole heap of pressure for my family and makes our family life a lot easier.  This is not just because there is food always on the table, but because they no longer have to listen to me endlessly hypothesising about grinding buckwheat groats to make my own soba noodles, or whether grains of ground kudzu have smooth or sticky edges, and feign interest.
Truly, you, as a reader, are keeping my family sane and I am extremely grateful to you!  I would love to hear your thoughts about the blog and especially any gluten-free recipes that would be particularly useful for you.  I am happy to give anything a go, so let me know what you miss the most and would love to eat again, in a gluten free version.  I am not promising that I will be able to turn my hand to everything, but I will happily try!
So, with that said, I want to get back to the mission in hand.  I have ingredients in the kitchen and 2 recipes to try before supper.  Thank you for reading, I hope that 2010 lives up to your hopes and dreams.
Happy New Year!