Showing posts with label gluten free. Show all posts

Sunday, 13 October 2013

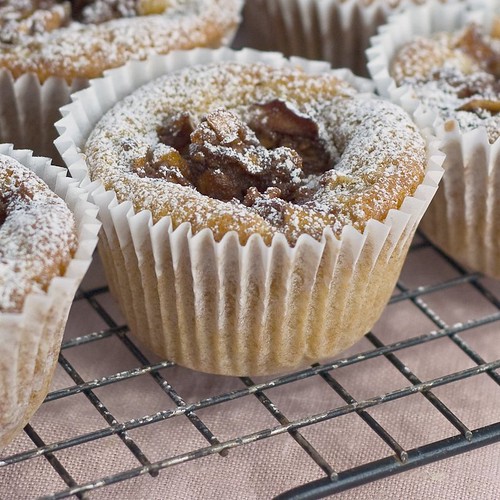
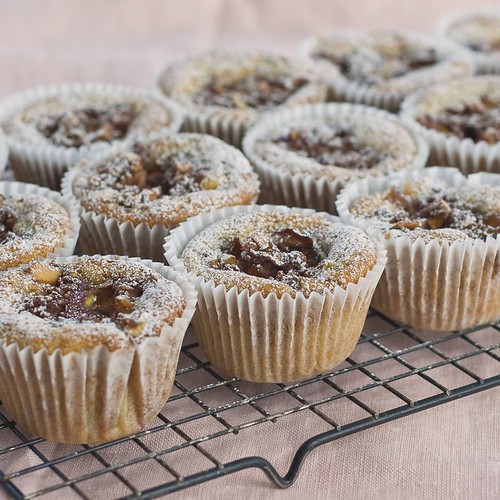
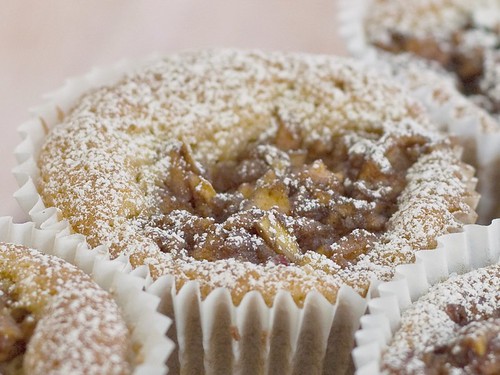
apple cinnamon cup cakes, gluten free

I have just upped sticks and moved north away from family and friends to study.  In doing so, I have left behind the family home and swapped my shiny new (and almost perfect) kitchen for a rented and shared 2 bed back-to-back terrace with a 9'x5' kitchen.  Gone too are almost all my cookbooks, baking equipment and ingredients.  I have kept what I hoped was the right few bits, the bare minimum of working. multi-purpose items.  So far, I am not impressed with my selection!
On this damp, grey, very autumnal day I have just been exploring the 7 miles of walking tracks and trails that pass my front door. In one direction, a woodland trail to the city centre, my daily walk to uni. In the other, parkland and trails head north out of the city to the moors and farmland beyond.  Perfect for walking, running and lazing (come next summer).
Basking in a warm glow of self-congratulatory praise on this choice of location, I pulled out my baking kit with an urge to bake apple cake.   My pleasure at my selection of 'essential' items is not so warm.  But I have managed to knock these up after a quick trip to Waitrose (finally, one of those within walking distance too!).
apple cinnamon cupcakes

These are super easy to make.  I used the blend of flour in the recipe simply because I have run out of rice flour, this blend does taste very nice but can equally be made with 110g each of rice flour + 110g buckwheat flour or 110g sorghum flour or 110g millet flour, or even another 110g rice flour - though this may be slightly gritty.  If you want to make these with wheat flour, use 220g Self Raising wheat flour with an additional 1.5tsp baking powder, and omit the xanthan gum.
The recipe made 18 cupcakes.

apple cinnamon cupcake 1

Ingredients
  • 300g apples (either dessert or cooking apples are fine)
  • 1.5 tsp ground cinnamon
  • 80g dark muscavado sugar
  • 120g rice flour
  • 35g millet flour
  • 35g sorghum flour
  • 35g buckwheat flour
  • 4.5 tsp baking powder
  • 0.5 tsp xanthan gum
  • 180g soft butter
  • 180g light muscavado sugar
  • 3 large eggs 
  • 1 tsp vanilla extract
  1. Line muffin tins with cup cake liners and preheat the oven (fan) to 165°C.
  2. Core and grate the apples (don't bother to peel them unless you really want to).
  3. Mix the sugar and cinnamon together in a medium sized bowl then add the apple and combine thoroughly, before setting aside.
  4. Sieve all the dry flour ingredients together and set aside.
  5. Beat the butter and sugar together using a hand or stand mixer until they are soft, pale and creamy.
  6. Add the vanilla extract and beat to blend thoroughly.
  7. Add the eggs, one at a time, beating thoroughly before adding the next one.  If the mix begins to curdle add a tablespoon of the flour mix and beat again.
  8. Now add the flour mix to the creamed mix and beat again until just combined.
  9. Put a spoonful of cake batter into each cupcake liner spread and levelling the mix across the base of each liner, which should be just less than half full (I found a heaped dessertspoon worked for me).
  10. Give the apple and sugar mix a good stir to mix the juices back in, then grab a teaspoon and put a heaped spoonful of mix on top of the cake batter in each liner.
  11. Bake in the preheated oven for 15 mins, then rotate the tray(s) and bake for a further 5 minutes before removing from the oven.
  12. Leave the cupcakes to cool for 5-10 minutes before removing from the trays and placing on a cooling rack until cold.
  13. Dust with icing sugar once cold.
  14. These cupcakes can be stored in the fridge for up to 3 days but can't be frozen (due to the fresh fruit).
apple cinnamon cupcake 2

    Monday, 24 May 2010

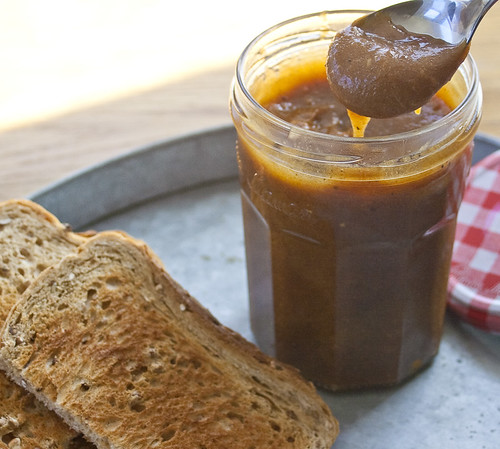
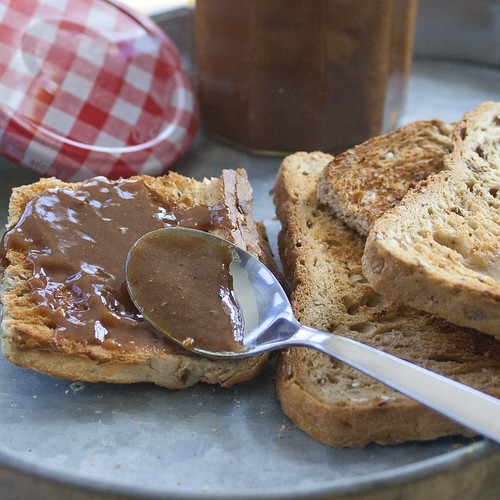
    gluten free ginger bread spread (speculoos a tartiner)


    I love speculoos biscuits. I mean, I really really love them! I used to get excited every time I discovered one of those slim, delicately spiced and caramelised biscuits nestled on the saucer almost hidden by my coffee cup. Until quite recently, though, I could only experience that thrill in Europe, not at home in the UK. Now times have changed and I could, if I wanted, buy bulk packs of speculoos in my local cash and carry (though in the UK they are just called caramelised biscuits, or some such). And now of course, even if I wanted to eat them, I couldn't, because they contain wheat.
    So, when food blogger and writer David Lebovitz wrote a post on speculoos spread I was envious and intrigued in equal measure. I read the post a couple of times and then carried on as normal ignoring the faint pangs of jealousy growing in the pit of my stomach. Ignoring, that is, until one morning a few days later when the sun was shining, my kitchen was quiet and I, for once in a very long time, actually felt like cooking.
    I searched around the internet until I found an ingredients list for the Lotus brand of 'Speculoos a Tartiner'. It made me laugh to read it - 57% crushed biscuits, sugar and vegetable oil to make a sweet smooth spread.  Duh, how obvious!


    Somewhere in the depths of my freezer I had a gluten free half batch of David Lebovitz's Chez Panisse Ginger Snap dough which needed to be eaten. I figured that I could mix up some speculoos spices, sprinkle over the dough, knead it in and bake the revised version. This might on be an unorthodox way to make Speculoos but in this case, imperfections don't matter as I am going to grind up them up anyway!
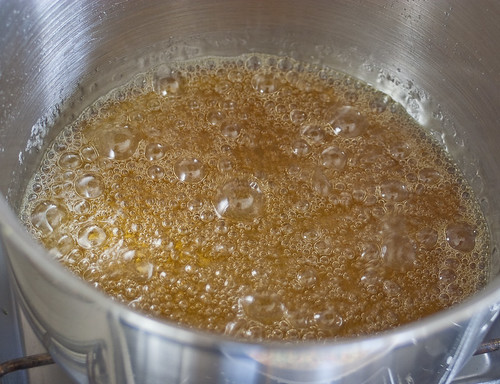
    One of my favourite memories of speculoos is the blend of spices mingling with the rich caramel flavour, so I decided that since I was already going to use my food processor to grind the biscuits, I might as well also make some caramel and grind that up to make caramel powder to use instead of sugar. So by 8.10 in the morning I was pouring a cup and a half of nut brown caramel onto my lined baking sheet to cool and preparing my spices to add to the defrosting log of ginger biscuit dough. One day, I may come back to this recipe again and create a proper gluten-free speculoos biscuit from scratch, but for now the buttery spicy dough of David's Chez Panisse ginger snap recipe is definitely delicious enough to satiate my immediate desire for this sweet creamy spicy spread.
    I added extra spices to the dough to give a touch of speculoos fragrance to the ginger and cinnamon of the cookie dough.  My mix contained white pepper, coriander, nutmeg, clove, cardamom seeds and anise but you can add or remove spices to suit your palate (or dig out your favourite speculoos recipe and bake those, of course!).   You can of course use shop-bought speculoos biscuits instead but if you do you might need to reduce the caramel powder to 90g as speculoos are a bit sweeter than the ginger biscuits I used.
    The spread will go through a strange "Oops, I've failed" phase as you mix it together.  In fact, it looked so odd that I didn't even bother taking photos of the method as I was so sure that it had gone wrong!  But I persevered and I was very glad I did as the crumbly lumpy mess slowly transformed into a smooth creamy spread. 
    There is, of course, a flaw in my plan: I have absolutely no idea what the original 'speculoos a tartiner' tastes like so I have nothing to compare my own version to.  I can however confirm that it is delicious: gently spicy, sweet and smooth but with a few crumbs for texture.  If you can resist tasting this for a day or two, you will be rewarded with an even richer, more rounded flavour.
    At the end of the day when the teen appeared, I mentioned that I had been messing around the kitchen but got no reaction (that's teenagers for you!) so I was amazed to discover the contents of the jar had almost disappeared the next morning ... I am now mixing up the next batch of cookies, I'll be making two jars this time!


    ginger bread spread recipe (to make 1 jar)

    ingredients:
    • 160g speculoos cookies or ginger snaps (as per details below) 
    • 120g ground caramel powder
    • 90g sunflower oil (or other neutral oil)
    • 60ml water
    • 15g nutritional soya lecithin (this will stop the spread separating once mixed & stored in the jar, it is great if you happen to have some but it is by no means essential)
    • 15ml lemon juice 
    • 1/4 tsp sea salt
    method - spread
    1. weigh 160g cookies into a food processor and process to a fine-ish powder, make sure there are no chunks left.
    2. add 120g powdered caramel (or 90g depending on your taste) and process again to combine.
    3. sprinkle in the lecithin (if using) and process again till fully combined.
    4. leave the processor mixing and add 1/4 tsp sea salt through the feeder tube.
    5. now pour in 90g oil and let the mix process to a rough puree
    6. pour in the lemon juice and don't panic when the mix turns into thick pasty lumps, it is OK (promise!)
    7. gradually tip in the water watching the mix as it becomes smooth and homogenous. stop adding water when you think you have the consistency you want - if you are using wheat-flour biscuits you may find you need slightly less water than with gluten free.
    8. stop the processor and taste the spread, add a little more lemon juice if you like.
    9. decant into a sterilised jar and store in the fridge for up to 2 weeks.
    speculoos biscuits:
    • a half batch (with extra spices) of David Lebovitz's chez panisse ginger snaps*
    • extra spices ground in coffee grinder: 3 white peppercorn, 1 black peppercorn 1 cardamom pod, 2 clove, a good grating of nutmeg, 1/2 star anise.
    • if you are making your own biscuits, add the extra spices at the same time as those in the recipe and follow the method as shown.
    • * to make the recipe gluten free replace the flour in the recipe with 260g rice flour PLUS 1/2 tsp xanthan gum or use your favourite gluten free mix.
    ingredients: caramel powder
    • 200g white sugar
    • 135g water
    method: caramel
    1. line a large heavy baking sheet with non-stick baking paper and set aside.
    2. take a large heavy based saucepan, sprinkle the sugar and water into the pan and it on a gentle heat without stirring.
    3. leave the pan on the heat allowing the sugar to dissolve and the syrup to boil gently.
    4. keep an eye on the gently boiling syrup as it begins to colour, leaving it until it is a rich middling brown colour.
    5. pour the syrup onto a lined baking sheet and leave it to set.
    6. once the caramel is cold and set, break it up into small pieces and place them in a food processor.
    7. whizz until the caramel becomes a fine yellow powder, then tip out of the processor and store in an airtight jar.
    Saturday, 27 February 2010

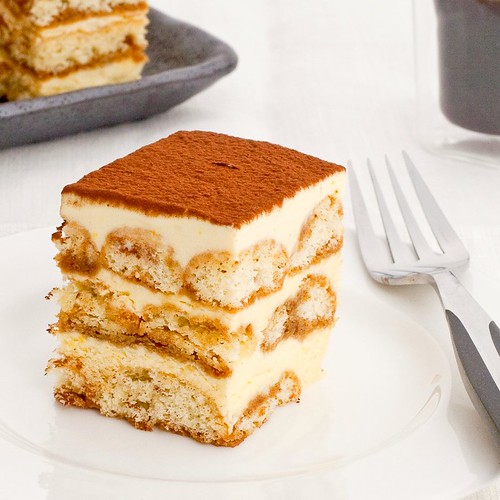
    gluten free tiramisu, daring bakers feb'10


    The February 2010 Daring Bakers’ challenge was hosted by Aparna of My Diverse Kitchen and Deeba of Passionate About Baking. They chose Tiramisu as the challenge for the month. Their challenge recipe is based on recipes from The Washington Post, Cordon Bleu at Home and Baking Obsession.

    I greeted this Daring Baker's challenge with some degree of trepidation as tiramisu is not a dessert that I have chosen to eat very often over the years.  I have never seen a gluten free version which means my memories are even more vague and I am dredging back a long way for a point of reference.

    According to the Daring Baker hosts, Aparna of My Diverse Kitchen and Deeba of Passionate About Baking, this is the story behind this rich dessert:

    "The perfect Tiramisu is a balance of flavors of a sweet zabaglione, strong coffee, marsala wine, creamy mascarpone cheese and the dusting of unsweetened cocoa.  
    Tiramisu is said to have its origins in Treviso (Italy), and there are quite a few stories about how it came to be created.  One story traces the tiramisu as far back as the Renaissance claiming that it was first made in honour of the visit of Grand Duke Cosimo di Medici to Tuscany. Yet another one points to the tiramisu being an adaptation of the "Zuppa Inglese" referring to the sponge cake and cream layered English Trifle.  However, experts in this area generally agree that the tiramisu as we know it today, was born in the ‘70s.  Some believe that the Tiramisu was created in the the Le Beccherie (a restaurant in Treviso). Others suggest that Tiramisu was first made in 1971 by an Italian baker named Carminantonio Iannaccone in a small bakery in Treviso, Italy."

    I love the fact that two passionate bakers from India are encouraging us to create a multi-faceted dessert from Italy in our many kitchens all around the world.  That is the Daring Bakers for you!

    For any-one who cares (and that includes me!) tiramisu, or rather tirami su literally means "pick me up" or "pull me up" in reference to the effects of the sugar and espresso in the dessert.

    There were no shortcuts in this recipe and method, the challenge was made up of 4 technical components, all of which had to be followed in order to successfully complete the challenge.  The whole process took me 5 sessions to complete, baking the biscuits and making the cheese in evenings during the week, then starting the zabaglioni and the pastry cream early on a weekend morning before constructing and chilling the dessert later the same afternoon.  Of course, as all bloggers know, the dish isn't completed until photographed and written up so that accounts for the final session today.  I am very glad that I chose to complete this challenge very early in the month as I think I would have panicked if I had left this to the last minute!


    As this dish is quite complex, I am going to break down the elements into separate posts which I will add in the next few days:
    • savoiardi biscuits
    • home-made marscapone cheese
    • cooked zabaglioni
    • pastry cream 
    Each component is a valuable technique in its' own right and very useful in a baker's repetoire.  Compiling the dish seems a touch bizarre after all the effort that goes into making the elements.  Fundamentally, you just mix all the sauce elements together until they are creamy, then layer the cream with the savoiardi biscuits.  Ta-daa!! Tiramisu :)

    tiramisu

    Monday, 15 February 2010

    gluten free pot sticker dumplings (metric)


    I posted the original recipe and method for these a few months ago, but never quite got round to converting the recipe from cups into metric measures.
    The teen and I made these as part of our spurious Chinese New Year's Eve feast dinner this weekend so I have finally got round to writing up the metric measures.  This time we made the filling with minced chicken thighs (including the fat & a bit of finely chopped skin) replacing the pork, as we were having pork belly elsewhere in the meal, it made a great substitution with a dash of chinese rice wine & an extra pinch of salt.

    Please refer back to the original post for the original filling and method here.


    Pot sticker wrappers:
    • 175g rice flour
    • 40g tapioca starch
    • 40g corn starch
    • 46g sweet rice flour
    • 1 tsp xanthan gum
    • 1/2 tsp psyllium husks
    • 1/2 tsp kuzu
    • 1/4 tsp salt
    • 1 large egg
    • 120g cold water
    Method:
    1. Sieve all the dry ingredients together.
    2. Beat the egg into the cold water.
    3. Whilst stirring your flour, gradually pour in the water making sure the flour absorbs the water as you go.
    4. Bring the lumps of flour together in the bowl by hand.
    5. If the dough is too wet or sticky add more sweet rice flour, if it is too dry add water 1 tablespoon at a time.
    6. Knead this for a couple of minutes on a work surfaced sprinkled with a little corn starch
    7. Divide the dough into 4 equal pieces.  Leave all but 1 piece in a bowl under a damp tea towel.
    8. Dust your work surface with corn starch and roll out the small piece of dough until it is between 1/16th" & 1/8th" thick.  
    9. Using a 3-3.5 inch round cutter, cut out as many shapes as you can, put the circles to one side under a damp cloth and carry on with each piece of dough in turn.  I found that if you collected up the trimmings and sprinkled a couple of drops of water on them, you could combine them into the next piece of dough without any problems.
    10. Carry on until all the pot stickers are cut out.  This recipe makes 50 dumpling skins.
    click here for a filling recipe and cooking method

    Sunday, 14 February 2010

    oxtail stew recipe

    It's still winter, it's still cold and there is even more snow forecast.  On top of that, it is February, credit card bills from Christmas are overdue and there still isn't enough sun or daylight to keep everyone in good cheer.  At this time of year I find myself turning to slow-cooked stews, vegetable soups and casseroles for the family. 
    Last week, I spotted oxtail on the butchers counter and bought a few pieces to try it on the family. 
    The teen grew into a phase of really fussy eating between about 5 and 13,  she has slowly eased out of it trying first mussels, then meat with bones in (that was a big one!) but I am yet to persuade her of the flavour and enjoyment to be found in offal and other trimming cuts.  But she does love beef, so since it is less than a pace from a rump steak to the tail, I thought I would risk the minimal cost and make an oxtail stew.
    oxtail stew
    This is a very easy and lazy recipe making best use of a slow cooker or aga to gently heat the stew for hours at a time. Early one morning this week, whilst waiting my eyes to focus in the grey dawn and the coffee to brew, I roughly chopped up some celery, carrots & onions and slowly fried them off in a touch of olive oil with a clove or 2 of garlic added. This was piled into the slow cooker with herbs, a few pieces of oxtail, some left over red wine and beef stock.  And that was it, slow cooking for 10 hours to create a rich and unctous stew with delicious gravy. 
    Serve with good crusty bread or mashed potato, a touch of mustard and a glass of red wine or proper beer.

    oxtail stew (per person)
    • 2-3 pieces oxtail
    • 1/2 medium onion
    • 1/2 clove garlic, finely chopped
    • 1 carrot, sliced
    • 1/2 stick celery, sliced
    • 1 tsp rice flour
    • 1/2 sprig thyme
    • 1/2 bay leaf
    • 1/4 pt beef stock
    • 1 glass red wine (or more beef stock)
    1. dry fry the oxtail in a hot pan to caramelise all over then take out
    2. add a dash of olive oil, the chopped onion and garlic to the hot pan, fry over low heat for 5 minutes
    3. add the carrot and celery, fry for another 5 minutes
    4. sprinkle over flour, and fry for a couple more minutes
    5. transfer the contents of the frying pan to a casserole or slow cooker
    6. add the oxtail and herbs
    7. pour over the stock and wine, and stir 
    8. if using slow cooker, close lid and turn onto low heat for 10 hours
    9. for casserole, bring to the boil on a hob then transfer to a low oven (140°C) for 3-4 hours
    10. to serve, remove herbs, serve with a green salad and crusty bread or mashed potatoes and mustard.

    Monday, 8 February 2010

    Puy Lentils recipe


    The teen has just burnt a pan of lentils.  She was making some for her to take to college for lunch tomorrow and she used the last of the puy lentils we have in the house.  She is currently trying very hard not to slam the cupboard doors as she clears up the mess and the burnt pan.  She is not a happy kid as she is faced with having to eat a canteen lunch tomorrow.  I was going to suggest making an alternative version but decided to bite my tongue and beat a hasty retreat instead.

    In the kitchen cupboard we have a good selection of  pulses : brown lentils, yellow split peas, chana dahl, chickpeas, kidney beans, black eye peas, cannelini and haricot, just off the top of my head.  But I know that not one of these will make an acceptable substitute for her, not today.  So the teen thinks she is going hungry and the world is a dark dank place.

    When I was her age, doing A-levels, I attended a college with tertiary and sixth form classes on the same site.  The subsidised canteen was run by the City & Guilds catering students, and the food was good (most of the time!).  That didn't stop me though, on a quest to save my allowance and part-time wages for the weekends.  I would walk the mile and a half each way and eat the cheapest food I could buy there.  The canteen sold breakfast sandwiches, 3 course lunches and proper puddings but it didn't take long to work out the cheapest foods on offer.  On the average day, it was a heaped plate of plain white rice with beansprouts,which off the top of my head (and we are going back a few years)  cost 26p, 15p for the rice, 11p for the beansprouts.  I know it sounds as though I was being really tight, and I probably was, but I really enjoyed the food.  It was simple, fresh and filling.  They had soy sauce behind the counter and with a beg and a smile, a dash of dark rich soy and a bit of fresh salad, this was a fine meal.  There was one dark shadow that could spoil the meal though, and I have never, ever understood this.  The beansprouts were baked "au gratin".  Yes, really.  A deep gastronorm tray of beansprouts seasoned then pushed under a grill with a thick layer of sharp catering cheddar-style cheese.  You had to avoid the cheese and there was a knack to doing it.  The dinner ladies thought that the cheesey topping was the best part of the dish, so they would bestow it with a smile and a heavy hand to favoured students and wouldn't take no for an answer.  The only way to solve the problem was to arrive about 5 minutes after the canteen opened.  This would ensure that you weren't first in the queue, the staff were fairly busy and would already have bestowed their gift of cheese on earlier visitors meaning you would likely as not get a scoop of slightly softened sprouts missing the dreaded cheese.  I have no idea why they made beansprouts au gratin though I am glad to say that I have never seen it on a menu since.  If you have, you may well have been eating the food created by one of my north London college alumni (sorry!).

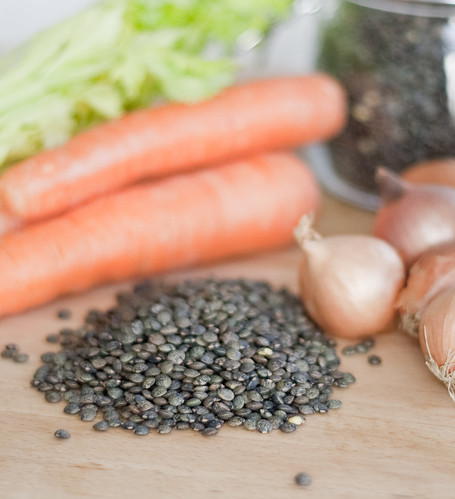
    So back to the task in hand.  This is the recipe that the teen was making.  These lentils can be served as a side or a vegetarian main, or tossed in a vinaigrette, they can be served as a salad.  They are really popular in our house and were eaten with glee by our kids when other vegetables were shunned.  The lentils will stay firm if you leave them to stand after they have boiled but if you are pushed for time, you can simmer them a little more (adding a little extra water) for around 15 minutes instead.

    Puy Lentils

    250g puy (small green french) lentils
    2 sticks celery
    1 carrrot
    1 clove garlic
    1 bay leaves
    1 lemon, zested and juiced
    2 sprigs thyme
    salt and pepper
    2 dsp (2 x 10ml) olive oil

    Method:
    • Dice the celery and carrots and finely chop the garlic.
    • Rinse the lentils.
    • Pour 1 dsp olive oil into a heavy bottomed saucepan with a lid.
    • Heat gently then add the garlic and vegetables and stir, allowing to soften in the oil, about 10 mins.
    • Add the lentils and turn in the oil until covered.
    • Pour on cold water until the lentils are covered, about 2 cm above the surface of the lentils.
    • Add the bay leaves and thyme, cover with a lid.
    • Bring to the boil and turn down to a gentle boil for 10 mins.
    • Turn the heat off after 10 minutes and leave to stand for 30 minutes.  
    • The lentils should cook through but will still have some bite (ie not mushy).
    To serve hot (rather than use in salad):
    • Remove the bay leaves and thyme stems. 
    • Bring to the boil again with the lid off.
    • Add the zest and juice of the lemon and season to taste.
    • Pour over the 2nd dsp of olive oil and stir through, serve.
    If you are going to use these as a salad:
    • Drain once cool
    • Remove the bay leaves and thyme stems.  
    • Add the lemon zest and juice along with the 2nd dsp olive oil.
    • Season to taste and serve with chopped parsley.

    Saturday, 6 February 2010

    orange & cardamom marmalade recipe


    During our mammoth kitchen clear-out, I felt it my duty to venture right to the back of (nearly) every cupboard and the fridges to investigate the contents.  Right at the very back of the little fridge snuggled a jar with the merest scrapings of its' contents remaining inside.  This is a really bad habit of mine.  When I am totally in love with a food, I can never bring myself to finish it, in case I forget it, or I am craving the flavour one day.  I am not entirely sure of the reason but I know that it reflects an element of my personality that a psych would probably make a mountain out of!

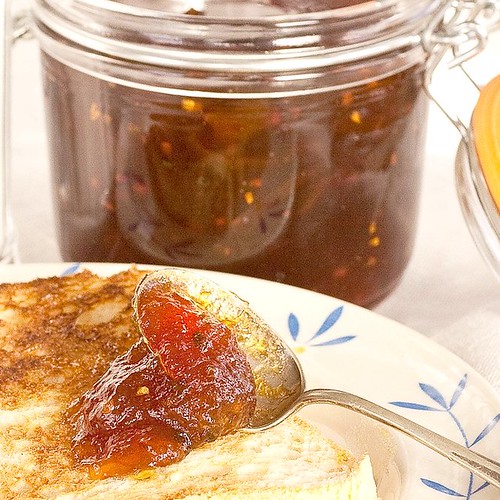
    orange & cardamom marmalade on toast 2a
    The jar concerned bears a black lid and label with contents almost as dark, and is the remnants of our last jar of Kush Cuisine's Orange & Mango Marmalade with Cardamom.  When we used to sell at farmers markets in London we would see them at the Blackheath market.  I say we, but in fact my alternate Sundays never coincided with them, and it was my husband who attended on those days whilst I was working back in the bakery.  And so it was him who came home with this delicious thick marmalade studded with deeply perfumed crunchy cardamom seeds.  I love it, and having given up the markets, have had to ration myself to the occassional serving in order to make the jar last longer.  And then one day there was one last serving left in the jar and it was pushed further to the back of the fridge to save rather than actually finishing it.

    Today though, I made rice flour drop scones for breakfast and feasted on them with the last of this delicious marmalade, safe in the knowledge that the citrussy smell wafting through our kitchen was heralding the creation of my first ever batch of marmalade, flavoured with cardamom in deference to Kush's masterpiece.

    If you ever find yourself at a farmers market in London, do check out Kush and grab a jar of their delicious marmalade ... alternatively, of course you could have a go at this recipe and see how your own version matches up!

    cardamom seeds, pods & seville orange 1a
    I have based my recipe and method on a combination of this recipe on Delia's site here and a recipe from The Times here, have a look (and you will be able to see how my impatience changed the methods!)  This can be  a bit time-consuming to make and you need to plan in advance.  Obviously getting your Seville oranges is the first mission as they are only in season in January and February.  If you can lay your hands on some, but don't have time to use them, stick them in the freezer and you will be able to make the marmalade whenever you fancy.


    Seville bitter orange marmalade infused with cardamom

    Ingredients:

    • 1.5kg seville oranges
    • 10g black cardamom seeds (after podding)
    • 2kg granulated sugar
    • 2.2l water

    Equipment:
    • 2 large pans with a lid & some foil, 1 x muslin square (I am using a new baby square), big sieve & bowl, jam thermometer or a few chilled saucers, 6-7 x 500g jars with lids & waxed paper to seal.
    Method:
    1. Wash the oranges and scrub with a bit of washing up liquid if they are coated in a shiny layer of wax.
    2. Place in the large pan and fill up with water
    3. Bring to a boil, and reduce heat to a simmer. Seal the top of the pan with a piece of foil and then place the lid over.
    4. Simmer at a very low temperature until the oranges are softened by a combination of the steam and hot, hot water - this took about 2 hours for me.
    5. Whilst the oranges simmer, de-seed the green cardamom pods by toasting the whole pods gently in a frying pan until they swelled up in  the heat, open the pods with your finger nail or the tip of a sharp knife and scrape out the seeds.  There is no denying this is tedious work so if you can find good quality ready-seeded black cardamom seeds, I suggest you use them!
    6. Leave the oranges to sit in the water until cool enough to handle (retain the water afterwards).
    7. Place the sieve over a big bowl.  Slice each orange in half, using a spoon scrape out the pith, pips and inners of each orange half into the sieve.
    8. Add all the orange inners to the water your cooked your oranges in and bring this to a rolling boil to reduce by half in about 20 minutes.
    9. Whilst this is boiling, warm your sugar either by placing the sealed bags on your radiator (my lazy method) or sprinkling the sugar into a couple of baking trays and placing in a low oven at about 100°C for 10-15 minutes.
    10. Slice your orange skins into thick or thin strips - depending on what you prefer in your marmalade.  For me this is short thick chunks (though thin slivers are much more photogenic of course!).
    11. Once the twenty minutes is up and the orange liquid is reduced by half, place the sieve over your second pan and drain the cooked orange liquid into the clean pan.  Scrape through the sieve with a big spoon to extract as much of the juices and goodness into the pan below.
    12. Add the orange peel to the pan of juices along with the cardamom seeds.  Bring this to the boil and slowly add the sugar stirring constantly to ensure it dissolves quickly.
    13. Once the sugar has dissolved turn up the heat and boil rapidly for 10-15 minutes.Whilst this is happening, wash your jars and lids then sterilise in the oven at 150°C for 15 minutes.
    14. Check the setting point of the marmalade - if you have a sugar thermometer you are looking for the temperature to reach 106°C (220°F).  If you don't have a sugar thermometer grab a chilled saucer and scoop out a spoonful of the syrupy dark juices onto the saucer.  Leave to sit for a minute or two then tilt the saucer from side to side.  If the liquid is set, the skin will stop the marmalade running across the saucer as you tilt.  If not, the liquid will run and needs to boil for another 10 minutes or so.
    15. Repeat the test until the marmalade is ready and once setting point has been reached, take the pan off the heat and leave to sit for half an hour to cool a little.
    16. Ladle the cooled marmalade into your cooled sterilised jars and place a piece of waxed paper over the top before placing a lid on each jar.
    Notes - I found that the oranges were a bit over cooked - when I came to remove the pith and inners the skin fell apart making the whole process very messy.  This also made it harder to cut the skin into even shreds so I ended up using a pair of scissors and sandwiching several pieces together to cut..  In future I would only boil for an hour, then leave to cool for a maximum of 2 hours and hopefully this will do the trick.

    Sunday, 31 January 2010

    gluten free macaroni cheese


    This recipe is a homage to the macaroni cheese created recently by Helen Graves for Fiona Beckett's bloggers Mac & Cheese competition here and is, to my mind, the most genius adaptation of a recipe familiar to most of us.  You can find Helen's recipe and the story behind it here.

    I love macaroni, the slightly denser hollow pasta tubes with it's satisfying bite but am yet to find a gluten free version in the UK.  In fact, on the day I went to buy pasta for this, I could only find corn & rice fusilli which is certainly not a combination I would choose naturally.  But since it was the only pasta on the shelf, it is now the pasta which is enveloped in the most cheesy sauce awaiting baking for tonight's supper (and probably tomorrow night's too).

    The genius behind Helen's mac & cheese is that she cooked her pasta in a ham stock, this was the bit that really grabbed me.  So yesterday morning I found myself in a queue ten deep at our local butcher crossing my fingers that no-one else in front of me had read Helen's blog and was also queueing for one of the 3 remaining ham hocks on the platter in the window.  I watched a couple of young women in front of me buy the best part of half a pig cut to their requirements: joints, chops, boned belly, mince all packed into big clear plastic sacks and pay the most ludicrously low price for the lot ... all freerange and locally farmed, and all such amazing value.  It was also great to watch that their order didn't phase the butchers or annoy anyone else in the queue, in fact it didn't actually seem to slow up the queue very much at all, two butchers diverted to process their order and the other 3 carried on serving the rest of us.  I spotted a pack of oxtail which I couldn't leave without buying, along with some lamb steaks for the teen who made marinated shish kebabs, tabbouleh with quinoa, hummous and pitta for supper for us all last night (it was lovely!).

    The ham hocked simmered during the afternoon as we cleaned up around the on-going building works.  I left it to cool in the stock over night and  today converted it into the most unctuous pasta & cheese bake.  The pasta was cooked in the stock for 2/3 of the packet cooking time before draining into a second pan.  As I was leaving the pasta al dente (gluten free pasta gets soggy so quickly), it seemed sensible to try to squeeze even more of that flavoursome stock into the dish.  So veering away from Helen's recipe I made the cheese sauce with half soya milk and half stock (using the pasta cooking stock).  I was trying to capture as much of the flavour of the stock as possible whilst at the same time reducing the dairy content - quite difficult when the recipe calls for 500g cheese!  I used a mixture of cheeses, very  much what we had in the fridge at the time, which was Sussex High Weald's Ashdown Forrester, Bookham's Sussex Charmer, the tail end of a Wensleydale and also a hunk of artisan Red Leicester.  This has made a very rich quite complex flavour though lacking a little bite which 100g of really good cheddar would have added.  Next time I will use the same combination but with the cheddar, 100g of each.

    So here we are, I know it taste's great (chef's perks!) even though it hasn't yet been baked in the oven.  There is enough pasta and cheese to feed a small army ... or our family for today, and possibly tomorrow!


    Ham hock stock:
    • 1 ham hock 
    • 1 celery stick
    • 1 carrot
    • 1 onion
    • 1 bay leaf
    • 6 peppercorns
    1. Cover all of these with water in a large pan, bring to a boil.  
    2. Once boiling turn heat down to a simmer, cover with a lid and leave to cook for 2-3 hours.  
    3. When meat is tender and flakey, turn heat off and leave the hock to cool in the stock.
    4. Once cold, drain the stock and pick the meat off the ham hock.  Chop the meat finely and chill until needed.
    Pasta
    • 1 x 500g gluten free pasta (macaroni if you can get it)
    • ham stock
    1. Bring the stock to a rolling boil (don't salt).  
    2. Add the pasta and cook for just over half the time stated on the pack.  
    3. Drain the pasta into a sieve placed over a second pan.
    Cheese sauce
    • 50g butter
    • 30g rice flour
    • 350g soya milk
    • 350g ham stock
    • 500g grated cheese
    1. In a heavy bottomed saucepan, make the bechamel by melting the butter, then adding the flour.  
    2. Stir or whisk the two together over a gently heat and keep stirring for 3-4 minutes allowing the flour to cook through.  The flour will come together into a thick mass which will then break down again as you continue to cook.
    3. Take the pan off the heat, pour in the soya milk whilst whisking constantly and keep whisking whilst the sauce thickens.  Add the hot stock and simmer the sauce gently for a few minutes.  
    4. Remove from the heat and stir in the cheeses, stir gently until fully melted.  
    5. Sprinkle over the ham reserved from the hock.  Taste and season with nutmeg, pepper and / or mustard to taste.


    Assemble the mac by adding the pasta to the cheese sauce and mixing together.  Pour into a large baking dish.  Bake at 200°C until hot throughout and browned on the tip.  Before baking, if you want to, you can top this as per Helen's suggestion with more cheese mixed with breadcrumbs.  However by this stage I was beginning to worry that we might all die of heart attacks whilst eating this (!) so I omitted this crunchy cheesy topping and opted instead to serve with a crunchy chicory & little gem lettuce salad with a mustardy vinaigrette.

    Friday, 8 January 2010

    Orange and apricot cake


    I am not used to long breaks or holidays, especially not ones that involve extended stays at home.  But the Christmas break just passed saw me at home for the best part of two weeks.  It was less than twenty-four hours before I started getting cabin fever desperately trying to find things to occupy me.  I was further hampered by the need to rest my back after minor surgery so the few days running up to Christmas saw me mostly on the sofa surrounded by cook books with my laptop and a notebook for researching recipes.  I found lots and lots though I don't suppose that is any surprise, food-enthusiastics have grasped new technologies with both hands and share recipes and experiences around the world.  I did get very distracted trying to find out how to make vietnamese spring roll pancakes (I've not sussed that out yet) which then lead on to glutinous rice dumplings and then ... well, you know how it is.  Suddenly you have encircled the globe three times and completely forgotten what you started out looking for.
    orange apricot cake, gluten free and sugar free
    I have been thinking about the ultimate orange cake for some time.  I want to capture the zingy essential flavour of orange zest in a gluten free cake, with a light texture without any icing.  Of course, it also needs to be low fat and preferably sugar free too.  I am still working on this holy-grail of cakes but I thought I would share this recipe with you as it has definitely grown on me over the past couple of weeks.
    The recipe is originally found here, on the Big Hospitality website and was created by Christine Bailey who was the joint winner of the Gluten-free Chef of the Year.  This is a variation of the theme of "take a whole orange, puree it and fold puree into polenta-based recipe".  I like this recipe because Christine has addressed a couple of points that I always see as negatives with this style of recipe.  By zesting the orange and then peeling it, discarding the white pith, you omit those bitter notes which can overpower the zesty flavour.  Then by adding a gluten-free flour blend to the polenta she has also lightening the consistency of the cake which is great.
    This is a sugar-free recipe and that is worth bearing in mind before you take your first bite, even with the added honey, this cake is not sweet.  You can address that with the type of apricots you buy.  I used run-of-the-mill sulphured supermarket ones which added texture but no real sweetness to the recipe.  If you can choose unsulphured, organic apricots, those dark brown, unattractive fruits that tend to get ignored for their bright orange, less flavoursome counterparts  (squeeze the pack and make sure they are really squidgy if you can) then you will get a far richer sweeter flavour that will compliment this recipe perfectly.
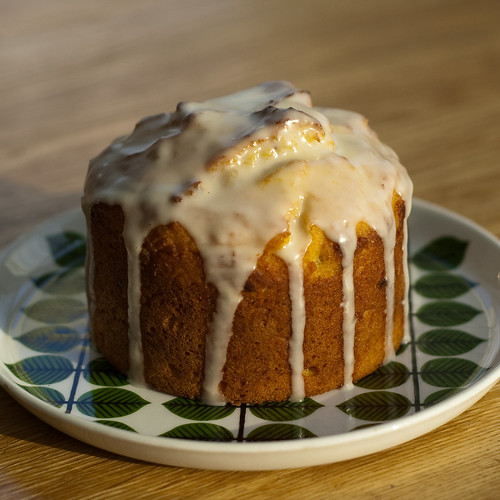
    I have copied the recipe just as Christine has written it though I made mine with dairy free margarine. My mixture curdled completely in the food processor but this makes no difference to the finished cake though, so don't be concerned if it happens to you too.  Instead of making one cake I split the mix into 2 x 5" round tins and 3 greased and flour dusted dariole molds.  The little ones took 15 minutes to bake and the 5" ones took 21 minutes.  I glazed one of the 5" cakes with a fresh orange juice and icing sugar (5 tsp icing sugar to 1 tbsp orange juice, I think) to serve for tea and have eaten the other, unglazed cakes for breakfast and they have been lovely!
    I hope you enjoy them too.

    Ingredients:
    • Zest of two oranges
    • 2 oranges peeled, cut into half
    • 200g dried ready to eat apricots
    • 125g unsalted butter (dairy free margarine*)
    • 3 eggs
    • 3tbsp honey or agave nectar
    • 100g GF flour (75g rice flour + 25g millet flour*)
    • 150g quick cook polenta (fine corn meal*)
    • 2tsp gluten-free baking powder
    Method
    1. Preheat the oven to 180°C, gas mark 4
    2. Grease and line a spring form 18-20cm cake tin
    3. Place the orange zest and oranges in a food processor and process to form a thick puree. Add the apricots, butter, eggs and honey and process again until smooth.
    4. Place the flour, polenta and baking powder in a bowl. 
    5. Add the puree and beat well. 
    6. Place in the cake tin and bake in the oven for 30 minutes until a skewer placed in the centre comes out clean. Leave to cool in the tin for 5 minutes then transfer to a wire rack. 
    * these are my annotations but otherwise the recipe and method are exactly as Christine's original recipe.

    Thursday, 7 January 2010

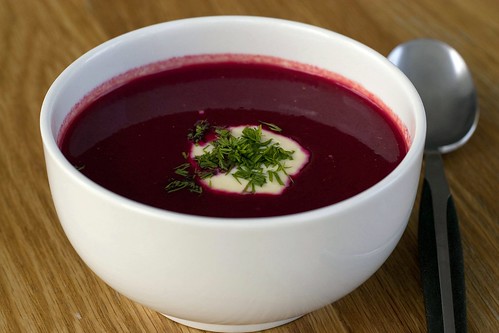
    beetroot soup recipe (borscht)


    I am not sure that I can get away with calling this Borscht as there are so many variations of recipe, by geography, nationality or personal choice.  This is really just beetroot soup, a lovely one that is easy to make. 
    beetroot soup
    The most difficult aspect appears to be getting hold of decent quality raw beetroot.  If you don't have a farmers market locally, please pass by the hugely expensive bunches at the supermarket and head instead for your local greengrocer.  In my local area, you have to get up early to get fresh beetroot.  This isn't due to its' sell-out popularity, sadly, but because they all sell beetroot pre-boiled but for this recipe, that isn't really what we want.  I try to pop in before 9 and can generally lay my hands on a few fresh purple nuggets, otherwise it is just a case of asking nicely and then collecting the following day.
    I am a big beetroot fan and do tend to eat a lot in stir fries, vivid pink sushi rolls and beetroot hummous.  It strikes me that beetroot should be the favourite vegetable of almost every girl from 2 - 12 as they dart in and out of their 'pink' phase, yet my daughter spent years hating beetroot, so much so that we took to hiding it in tomato pasta sauces and stews as well as in chocolate cake.  I  have only just discovered that I like lightly vinegared beetroot, which I have avoided due to memories of sharp squidgy chunks as part of a 1970's Sunday tea at my aunty's house. I was obviously just too young then!  It feels as though we used to visit aunty for tea almost every week, though I am sure that is not the case, as they had pretty busy lives.  Tea was a proper high tea.  Lettuce, tomatoes, salad cream (decanted), sliced bread (yippee!), slices of ham, pickled onions and a really good cup of tea.  I really miss Aunty's tea, it was strong but not bitter, dark yet not full of tannins and I loved the way the spoon clinked the china tea cup as I stirred in the sugar.  Delicious!  It is funny how memories stick in your mind.  At one stage the road collapsed outside their house, leaving a stonking great hole and no vehicle access.  In my head, this huge and slightly ominous hole was there for years ... though I am sure that the council must have filled it in quite quickly. 
    snowy bike
    Anyway, this recipe starts with my favourite cooking smell: the gently stewing of finely chopped onions, garlic, carrot and celery until soft and scented.   It is an easy soup to make, so jump in, have a go and enjoy the pink!

    Ingredients
    • 750g raw beetroot - peel and chop
    • 1 tbsp rapeseed oil
    • 1 carrot, peeled & finely chopped
    • 1 stick celery, peeled & finely chopped
    • 1 medium onion, peeled & finely chopped
    • 1 clove garlic, peeled & finely chopped
    • 1L chicken stock + additional water if required
    • 1 bay leaf
    • 1/2 lemon, juice only
    • salt & pepper 
    • soured cream, horseradish & dill to serve
    Gently fry the finely chopped onion, garlic, celery & garlic in the rapeseed oil over a very low heat until soft and aromatic.
    Add the heap of peeled and chopped beetroot
    Cover with stock and add extra water if required until you have 4cm above the level of the beetroot.
    Add a bay leaf if you have one and leave to simmer with a lid semi-covering until the beetroot is soft, around 45 minutes.
    Puree the soup then allow to simmer for another 10-15 minutes to thicken and concentrate the flavours.   Season with fresh lemon juice, salt and pepper before serving.
    This is delicious served with a horseradish cream and fresh dill.

    Enjoy.

    Wednesday, 6 January 2010

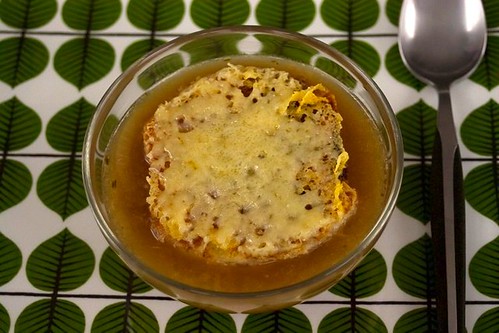
    french onion soup recipe


    On days like today, soup is one of the few things that can really warm you and get right to the heart of the cold.  We are lucky to all be sitting indoors, warm and dry whilst watching the "oh my goodness, there is snow in the south" drama unfolds on television.
    french onion soup, kate the bake, gluten free
    My mum is from Lancashire, my father from London.  We were brought up in London but spent many of our holidays under the age of 11 in Lancashire at my grandpa's house, the house my mum grew up in.  Not being a Coronation Street viewer as a kid, this type of house, street and town were completely alien to me: row after row of 2-up, 2-downs with a lean-to kitchen, outside loo and coal store.  The dark-roofed terraces clung tightly to the steep hills running down to the mills in the town at the bottom of the valley.  I was far more familiar with a landscape of wide suburban street with tidy front gardens, pampas grass and polished cars in the drives of red-brick semis and bungalows, or ostentatious faux-georgian detached houses with white marble fountains & statuettes on their ludicrously tiny attempts at "sweeping drives".
    There was never enough snow in the outer London suburbs when I was a kid.  Mum used to commiserate with us (whilst thanking God that she didn't have to stay home from work with us too often!) and tell us stories of heavy snow, woollen stockings and long walks to school.  We didn't have much truck with the long walks bit as we walked a mile and a half to school albeit in waterproof coats and poly-bag lined shoes.  The snow though, we envied.  As head of science at a girl's school across the Pennines, she would drive her Morris 1000 over the hills, behind the snow plough and says that she doesn't recollect a day when she didn't make it in to school eventually. 
    For most of this winter's cold spell, she has managed fine, living alone in Derbyshire.  We managed to persuade her to come to us for Christmas after her own Christmas plans fell through.  Unsuprisingly, we had to rescue her from Tonbridge station as they didn't even bother to run trains south on the day of her arrival.  Right now, she is at home looking out onto about 15 inches of snow.  She has gritted her paths, shovelled snow away from her garage doors and her neighbours have cleared tyre tracks down to the main road.  They have gone to work at the county offices some ten miles across the moors, scarcely batting an eye-lid at the snow. 
    Down here on the south coast, we have had to close the bakery because the industrial estate hasn't seen a gritting truck for, well, I am not sure how long.  Getting in this morning was difficult and as the snow continued to fall the tyre-tracks on the road disappeared into the soft white velvet layer.  After watching a 4-wheel drive and a quad bike almost come to blows outside, we decided it was sensible to beat a hasty retreat.  As the snow continues to fall this afternoon, I think of Mum and her sensible matter-of-fact attitude to the weather and think that we could use a whole lot of people like her down here, preferably running our councils!

    To the matter in hand - soup!  There was always a pan of soup on the go when I was a kid, but I could never get a recipe from mum, that wasn't the way she worked so that is how soups have developed with me.  What is in the fridge?  what needs to be used up?  OK, celery & stilton soup, bacon and green pea - see how it works?  I don't really get the idea of a recipe for a soup as I don't think that there are any hard and fast rules to soup-making, unlike baking, where technique and volumes matter enormously. I made this on yet another cold day and let it sit on the hob on a super low temperature (lower than a simmer) until it was wanted.  By the time we got to it the flavours were rich and concentrated which balanced perfectly with the others cheesy croutons, yet still worked for my un-adorned bowl.

    ingredients, use this volume of ingredients per person, making a minimum of 2 servings:
    • 1 large onion
    • 1 knob butter or 1 dsp olive / rapeseed oil
    • 1/2 clove garlic (roasted or confit if possible)
    • 1 tsp rice flour
    • 1/2 pint beef stock (cubes are ok, home made even better, if you have it)
    • 1/2 glass white wine
    • 1/2 bay leaf
    • 1 dsp (10ml) cognac
    • small sprig of thyme
    • salt & pepper
    method
    • caramelise the onions by adding them to a hot frying pan with the butter or oil melted.
    • stir rapidly so that the onions take on a dark rich brown colour but don't let them stick or burn
    • after 5 minutes, turn the heat down and add the garlic
    • allow the onions to cook through until they are a soft, sweet, stringy mass (this should take about 20-30 minutes)
    • sprinkle over the rice flour and stir into the onions trying to pick up as much of the caramelised goo (technical term, sorry!) from the pan
    • add the stock and wine, and bring to the boil

    • add the herbs and turn the heat down to it's lowest setting, without a lid, for 45 minutes or so
    to serve
    • gluten free bread for croutons
    • olive oil or butter
    • cheese
    croutons method*
    • whilst the soup is cooking for that last 45 minutes, preheat oven to 180° & cut one thick slice of gluten free bread per serving
    • brush each side of the bread with oil or spread with butter
    • cube into 3/4" chunks
    • place chunks onto a lined or greased baking tray and bake in the oven for 15-20 minutes, give them a quick shake if you remember about half way through.
    • once they are golden brown and crispy take the tray from the oven and leave to cool (don't forget that gluten free bread browns more quickly and suddenly than wheat bread)
    • pre heat the grill just before the soup is ready, and find some heat proof bowls to serve the soup in
    • when the soup is ready, bring it back up to the boil, add the cognac
    • put a serving in each bowl, sprinkle some croutons over then follow with a good thick grating of cheese
    • pop under the grill for a few minutes until the cheese is brown and bubbly (keep a close eye)
    • remove and serve immediately
    *when i can't be bothered with the grill method, we make the croutons in a non-stick (important) frying pan by dry frying and then just chuck some cheese over and allow this to melt on the croutons and the pan before tipping the whole lot over the soup.  it tastes the same but without the aggravation ... and sometimes that is all that counts!

    Sunday, 3 January 2010

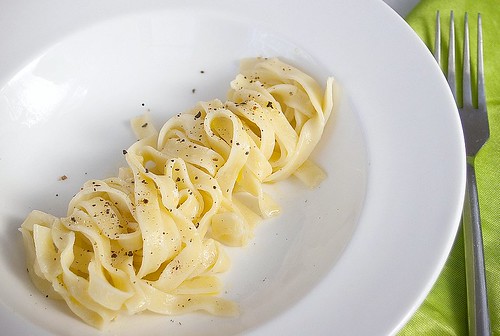
    gluten free pasta recipe


    I have been craving pasta and not just any pasta, but slippery gratifying ribbons of tagliatelle, a pasta style that I am yet to find as a commercial gluten free variety.  There has been a fair amount of pasta slurping going on around me at home recently.  I usually ignore the temptation and prep myself some more Vietnamese spring rolls or a quick stir fry.  But there is something about freezing temperatures which make it difficult to enjoy overdosing on raw veg.  This is definitely the time of year for something a little more substantial, so besides cooking up another batch of Nomato sauce & soup I am drawn towards a bowl of pasta.
    bowl of gluten free tagliatelle with garlic oil & sussex charmer cheese
    I was pondering on the merits of different types of pasta and the differing attitudes to fresh egg as opposed to dried pasta.  It dawned on me that cooking pasta al dente must vary according to the type of pasta you start with.  I am a bit British in my pasta tastes and tend to like my pasta cooked through.  The one exception to this is Spaghetti Vongole where I expect my spaghetti to have a little bit of bite.   So, if you are making and cooking pasta from scratch, how do you achieve that bite? as fresh pasta in my experience is chewy rather than brittle?  And if you can't get that al dente bite with fresh pasta, is the 'al dente' concept traditionally Italian? It is all a bit meaningless I know, but that is a small and possibly scary insight into the workings of my mind!
    gluten free tagliatelle with garlic oil & sussex charmer cheese
    Making pasta is not hard work as long as you are well equipped but it is, like all recipes that require special equipment, a leap of faith to invest in the first instance.  You can use this recipe for making spaghetti or tagliatelle, as well as hand shaping traditional Italian pasta.  One of my favourites is orechiette (little ears) which are easy to make from tiny chunks of dough - you can even make these without a roller, which might be worth a go before taking the plunge.
    I bought my pasta machine yonks ago, from Ikea.  It sat for ages in its' box quite literally gathering dust (and grease) on a top shelf above the hob for ages.  I used to gaze on the box proudly "look, I've got a pasta machine" but it was rarely used.  Since I started a gluten free diet, this has all changed.  A new place in the cupboard with the mixer and my food processor means it is easy to reach for and my diet has vastly improved with the addition of egg noodles, wonton wrappers & potsticker dumplings - all products of my beloved pasta roller. It is difficult to know whether a pasta machine is a good investment for you, but have a think about this.  Try to make this recipe, by hand, rolling out the dough.  If you like the taste, are not put off by the effort and find yourself thinking about making it again (having forgotten your aching arms and tired hands) then buy a pasta machine!  By the way, the ikea machine has fixed tagliatelle and noodle rollers on the same machine, so it was a versatile investment.  I haven't seen one in Ikea since but I know that they crop up on ebay intermitattantly selling for around a fiver under the brand / model name Ampia 150, worth the investment I think!

    I wanted to retain the yellow hue of traditional egg pasta, so besides the eggs I have included some yellow cornmeal in the dough.  If you can't eat corn, then substitute this with millet (for the yellow look) and potato starch for the corn starch (I can't eat potato starch so don't usually include it).  Egg pasta doesn't need to be rolled as thinly as noodles and wrappers which will be a bonus if you are doing this by hand, on the pasta roller I rolled from settings 1 - 5 before passing each sheet through the tagliatelle cutter.

    Ingredients
    • 150g rice flour
    • 50g fine corn meal (masa - yellow corn)
    • 100g tapioca starch
    • 100g corn starch
    • 100g glutinous rice flour
    • 10g kuzu starch
    • 1.5 tsp xanthan gum
    • 1 tsp psyllium husks
    • 4 eggs
    • 120-180ml (approximately) water

    method
    • sieve all the flour ingredients together
    • put all the dry ingredients into a mixer or food processor bowl
    • add the eggs with the mixer running
    • gradually drizzle the water in till the mix ressembles chunky breadcrumbs (you may not need all the water in the recipe)
    • tip the dough out onto a work surface dusted with tapioca starch
    • knead together to make a smooth dry dough and form the dough into even cube
    • wrap in a plastic bag and leave to rest for 20 minutes
    • cut a slice off the dough
    • roll two or three times (turning dough each time by 90 degrees) with a rolling pin till it is thin enough to pass through the machine without cracking
    • process the sheet through a pasta machine reducing the thickness each time to create a thin silky sheet, 5 passes worked well for me  (or keep rolling manually, turning and dusting with tapioca starch frequently)
    • if you have a cutter-attachment for your roller, use it now or slice the sheets into noodles or shapes of your choice (if you have the correct attachment you can pass the sheet through your machine to create the pasta shape of your choice)
    • set each finished batch to one side under a damp cloth until all the dough is processed
    Rolling tips:
    Keep the rest of the dough in a plastic bag whilst not rolling it.
    If the outer skin of the dough is dry when you start, wet your hands slightly and squeeze the dough until it is just moist (not sticky) and pliable again.

    You can dry the finished pasta fully if you like, simply by leaving it in the open air, turning each pile of noodles to ensure they are open to the air, then store in an air tight box.  Alternatively you can drape noodles or spaghetti over a drying rack (I have used a clean clothes airer).   If you don't want to dry them you can put them straight into an airtight box and freeze until you need them.  When I have room in the freezer, I also freeze the 'dried' ones in case I haven't managed to dry them completely.

    Whilst I was taking the photos I was snacking on the left over cooked pasta with remnants from my fridge.   I discovered that this pasta tastes great with tuna, cooked green beans, toasted hazelnuts and garlic oil  topped off with a grating of Sussex Charmer cheese (more on this later).
    Hope you enjoy this!

    Friday, 25 December 2009

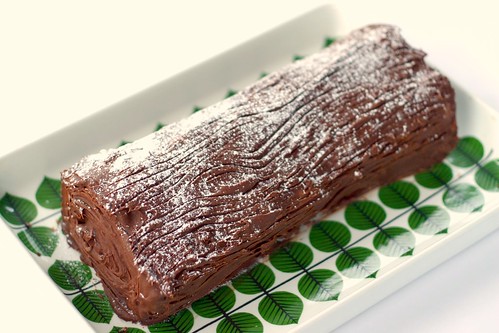
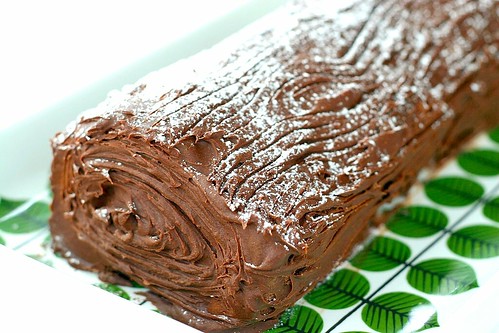
    Chocolate roulade, Yule log, Buche de Noel, gluten free naturally

    A couple of days ago, the teen popped outside to wait for a pizza delivery, which gave me a couple of minutes to write whilst she was not reading over my shoulder.  Apparently, according to her,  I am failing as a mother - again!  We went to the supermarket to do a pre-Christmas essentials shop, she picked up one festive food stuff after another from a shelves,  and each time I replied "Oh you don't need to buy that, I can make it".  And so on, ad infinitum.
    She was trying it on a bit, she knew we had already made home-cured salmon and sloe vodka, that the gluten free pastry for the mince pies was mixed and waiting to be rolled from the fridge.  However the cry went up when I saw her reach into a chiller cabinet for a huge premium-priced (but not delicious-looking) yule log.  She knew she was pushing her luck, so we read the ingredients list together, and she put it back of her own accord.  But did she moan!

    Chocolate logs are, I presume, historically an import from France where you find beautifully presented 'buche de noel'  with marshmallow mushrooms in patisseries just before Christmas.  When we were kids, making a chocolate log was the only reason that we could persuade Mum to buy a supermarket Swiss roll, though we thought that they were the height of sophistication Mum was not convinced - imagine how excited we were when we later discovered Wall's Artic Rolls!  So I can really understand the desire for a delicate rolled chocolate sponge filled with chocolatey buttercream with a bark-styled buttercream dusted in icing sugar snow.
    Anyway, whilst she is outside I will whisper to you that I've made this recipe, a gluten-free chocolate roulade and decorated it as a Chocolate Yule Log for our Christmas dinner.  I want this to be a suprise for her as the teen is not a fan of Christmas pudding.  For her, the main event will be a forerib roast with yorkshire puddings and all (yes, all!) the trimmings especially creamy horseradish.  I am already looking forward to the look on her face when she sees it, even though she will probably be too stuffed to eat any till later in the day!

    I've used a Mary Berry recipe for the ingredients which is naturally gluten free.  I am a great fan of Mary Berry and found that her foolproof recipes were a great way to build my confidence and learn the basics when I first starting baking cakes.  Roulades look impressive but are not that tricky as long as you have a good recipe to start. For the yule log, I have used a different techinique from Mary Berry, in that I prefer to roll the sponge before it cools and unroll to fill before re-rolling.  The key to making this is confidence.  Believe that the sponge will be cooked enough even though it is only in the oven for 20 minutes.  Be confident in rolling your sponge, and do it quickly before it can cool down and break.  And gently unroll the cooled sponge to fill it before re-rolling.  Knowing that I am going to cover the outside of the roll with buttercream icing means that I can patch up any cracks that I create as I roll, unroll and roll again.
    The Mary Berry method here suggests rolling the sponge once it is cold and filled.  This is great if you don't want to make the roulade as soon as you have baked the sponge and especially good for summer roulades when you are decorating the dessert with little more than a sprinkling of sugar. 
    Once you have made one and discovered just how straightforward they are, don't forget that this roulade recipe is a fantastic dessert for any time of year.  Filled with cream or chocolate, cherries in summer or blackberries in the autumn (preferably without the chocolate buttercream 'bark') this is a lovely dessert for anytime of year!


    Sponge ingredients:
    • 175g 70% cocoa solid chocolate in 1cm sq pieces
    • 175g caster sugar
    • 6 medium free range eggs, separated
    • A pinch of salt
    • 2 level tbsp cocoa, sieved
    Method
    • Set the chocolate to melt either in the microwave or in a bain marie, remove from the heat as soon as it is melted and allow to cool slightly 
    • Lightly grease a 13"x9" (33x23cm) swiss roll tin
    • Line with non-stick baking paper 
    • Pre-heat the oven to 180°C / Gas Mk4
    • Whisk the egg whites with a pinch of salt until stiff peaks are formed (but before they become dry)
    • Add half the castor sugar and beat until combined
    • Transfer the egg whites into another clean mixing bowl 
    • Now whisk the egg yolks and the rest of the sugar together until they are light and creamy and trebled in volume (at least 5 minutes, so use an electric mixer)
    • Add the melted chocolate to the egg yolk mix and mix gently to combine
    • Add one spoon of the egg white mix to the chocolate mix and fold in.
    • Continue adding the egg whites, until fully combined
    • Then add the cocoa powder and stir till combined
    • Pour the mixture into the prepared tin, spread to the corners and level the top
    • Bake in the oven for 20 minutes until just firm to the touch (the top of my sponge puffed right up whilst in the oven, so I stuck a skewer in a few places to let the steam out and the skin deflated)
    • Whilst the sponge is baking lay a second sheet of baking paper on the counter and sprinkle with a little castor sugar
    • Remove the baked sponge from the oven and flip the baked sponge over onto the sugared baking paper
    • Peel off the backing paper from the sponge and roll up the warm sponge using the base sheet of baking paper, starting on one long side and working quickly but gently to create a roll - folding a long edge of paper over the sponge and then using the long edges of the paper to guide the roll, a bit as though you are rolling up a christmas cracker.
    • Tuck the edges of the paper in around the finished roll and leave to cool
    Filling & icing
    • 100g plain (70%) chocolate, melted with
    • 150g milk chocolate
    • 100g double cream (nearer room temperature than very chilled)
    • 100g icing sugar, sifted
    Melt the chocolate
    Add the cream to the chocolate and stir till combined
    Add the icing sugar to the cream mix and beat till creamy
    Add a little more icing sugar to thicken or cream if the mix is too thick to spread
    Unroll the sponge and trim the edges to get a neat even finish
    Spread one third to one half of the chocolate cream filling on the sponge and re-roll quickly, don't worry if it breaks use the filling as glue to hold the bits together - you can cover up the damage afterwards with the chocolate cream coating!
    Spread the remainder of the chocolate cream over the outside of the roll and leave to set for 15 minutes.
    Using a fork, drag the prongs across the surface of the iced log to create the effect of tree bark, cover and chill in the fridge until you are ready to serve.
    Dust with icing sugar before serving.

    Friday, 18 December 2009

    gluten free gingerbread for Christmas biscuits and decorations


    The Autumnal rain has finally given way to clear skies and the temperature is dropping with every day that passes.  I had originally written this saying I was half hoping for a mythical white Christmas, and right this second my dreams have been fulfilled (though slightly early!) as I gaze out of the window onto dark street enrobed in the first snows of this winter down here on the south coast.
    Christmas is just around the corner and we are finally getting ourselves ready for the holidays.  One of last year's Christmas cakes is unwrapped and ready to be decorated with marzipan and candied fruits, rum-mince pies made with fruits that have marinaded all year, and gingerbread for decorating the tree as well as eating, of course.
    The gingerbread recipe that I use is less sweet and far more fragrant than traditional crunchy English gingerbread.  My daughter & her friends were not that keen on bought gingerbread when she was little so I tried to create something more suited to their tastes.  She still likes this now so I haven't changed the recipe or spice blend in years.  The biscuits are subtly fragrant with a blend of spices which conjure up, in our household, the start of Christmas.  Whilst these baked we put the tree up and the smell of spices mingling with the rich pine tree confirmed that Christmas had definitely arrived in our house.  Then, every year, we would snuggle down in fleecy blankets under the light of our advent candle and read a chapter of Jostein Gardner's Christmas Story.  I love this Christmas ritual that still continues today, especially as my daughter is no longer the toddler enraptured by a fairy story, but a philosophy-studying young adult who cites this an enjoyable influence on her path to adulthood (I am so glad I didn't choose Rudolf, the Red-Nosed Reindeer!).

    Adding the spices to the sugar & butter mix and gently cooking them together creates a more rich and fragrant dough than you get by adding spices directly to the dry ingredients, in much the same way that you would cook off the whole spices before making a masala for an Indian dish.  You can adjust these spices to suit your tastes, dropping the cloves (maybe) and increasing the ginger if you prefer.
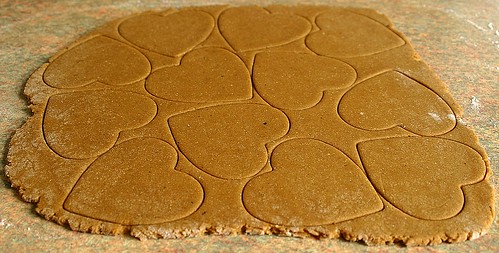
    This recipe can make thick soft biscuits or crisp thin ones.  If you are making decorations for the tree then crispier ones are better so roll the dough out to 5mm, bake the cut biscuits for 18 minutes, then allow to cool.  Once they are cool, pop them back onto trays and put them back into the re-heated oven for a further 6 minutes, then leave them to cool in the oven.  These biscuits will be crispy and robust enough to hang from the tree.  If you want soft gingerbread roll the dough out to 8mm and bake for 16-8 minutes until the biscuits are cooked through but still soft.  Let these biscuits cool on the baking tray for five minutes before removing to a cooling tray.

    These biscuits look great decorated but as the moisture will make the biscuits a little softer it is better to ice them closer to Christmas or when you are going to eat them.  My icing nozzles are still tucked away somewhere in the loft so decorating these will happen later this week and I will add some photos later on.

    Gingerbread recipe
    • 70g dairy free margarine or butter
    • 125g light muscavado sugar
    • 100g golden syrup
    • 35g treacle / molasses
    • 60 ml rice milk 
    • 3/4 tsp ground ginger
    • 1/2 tsp ground cinnamon
    • 1/2 tsp ground fennel seeds
    • 1/2 tsp ground coriander seeds 
    • 1/4 tsp ground cloves
    • 1/4 tsp ground nutmeg
    • 300g rice flour
    • 100g millet flour
    • 100g tapioca flour
    • 60g sweet (glutinous) rice flour
    • 1 tsp xanthan gum
    • 2.5 tsp gluten free baking powder
    • a pinch of salt
    • 3 medium freerange eggs (150g)
    • 1 tsp vanilla extract
    Method
    • measure the spices directly into a small saucepan.
    • if your scales have a tare function you can weigh the sugar, syrup, treacle and butter directly into the pan
    • add the milk and warm the pan on a very gentle heat, keep the temperature low enough to be able to dip your finger in comfortably (not that you need to do this as part of the recipe!)
    • sift all the flours together with the baking power and xanthan gum
    • beat the eggs and vanilla extract together in a mixer or food processor
    • add all the flour and then the sugar mix and beat on the mixer
    • once the dough has come together stop the mixer and scrape onto a plate
    • cover and chill (either in fridge or outside depending on your weather) until the dough is between 8-14°C
    • pre-heat the oven to 150° C
    • dust the work surface with a little rice flour and tip out the dough
    • divide the dough into 4 sections
    • working 1 section at a time, roll out as per instructions in the introduction and cut out using decorative cutters
    • if you are making these to hang on the tree, use a straw to punch out a little hole so that you can thread a ribbon through
    • place the biscuits on a lined baking sheet and continue with the rest of the dough
    • roll and re-cut the trimmings until all the dough is used
    • bake as per introduction
    • allow to cool completely then pack into airtight containers to store for icing.

    Sunday, 13 December 2009

    candied chillies with sweet chilli syrup


    This was inspired by a twitter comment that Clotilde from Chocolate & Zuccini recently.  The French, like the Italians, have a history of creating and eating candied fruits in a way that the Brits seems to have missed. Yes, we have glacĂ© cherries and chopped mixed peel but that is about it. In France in the run up to Christmas you will find platters of individually candied fruits - figs, mandarin oranges, melons, pears and pineapple as well as chestnuts, greengage plums, peaches, apricots and clementines. Beautifully presented, glowing translucent fruits.

    The link Clotilde gave is to a company called La Fabrique de Douceur here. Their chillies, along with the other fresh fruits they make are lucious and beautiful to look at but I think they are only available in France.
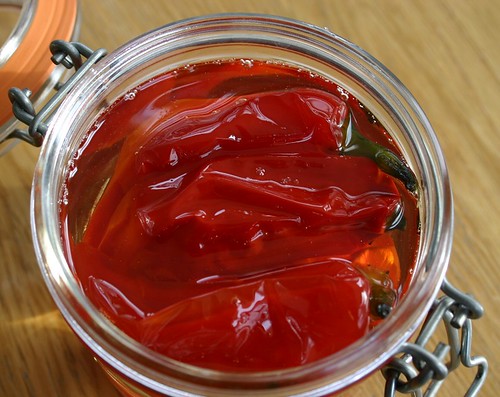
    Reading through their website reminded me that I have quite a few chillies at home which I can't eat due to allergies. Rather than simply throw them away I thought I would have a go at candying them, just to see what would happen. So here is a simplified version of candied chillies.   The sweet and spicy syrup would make a delicious drizzle over ice cream or a fruity tart, whilst the chillies themselves could be used in biscuits or ice cream, or served as they come with cheese.

    As you can see this quick version gives you the flavour but not the texture of french-style candied fruit.
    These are very quick and easy to prepare and if you have any chilli-heads as friends, they would make great easy foodie presents too.

    Candied Chillies in sweet chilli syrup


    Ingredients:
    • 8-12 fresh mild to medium red chillies
    • 450g white sugar
    • 450ml water
    • boiling water
    • sterilised jar & lid big enough to contain the chillies
    method

    • pour about 1L freshly boiled water into pan and add the chillies.
    • bring the pan to the boil and blanch the chillies for 1 minute.
    • drain the chillies and refresh in cold water.
    • add the equal volumes of sugar and water to the pan and bring to the boil
    • add the chillies and cook at a gently boil for 30-40 minutes.
    • during this cooking, sterilise the jar in the oven or in boiling water for 15 minutes.
    • when the chillies are cooked, lift them out gently and place in the jar
    • pour the syrup over and screw the lid on
    • allow the jar to cool before storing in the fridge.
    To be honest, I don't know how long these will last after cooking, but since the chillies are blanched and so sweet, I am sure that 2-3 months is quite reasonable as long as they are completely submerged in the sugar syrup.  I have a couple of ideas for recipes to use these in which I will add in the near future.  Enjoy!

    Thursday, 3 December 2009

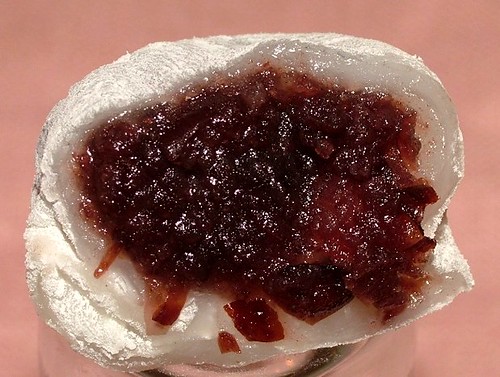
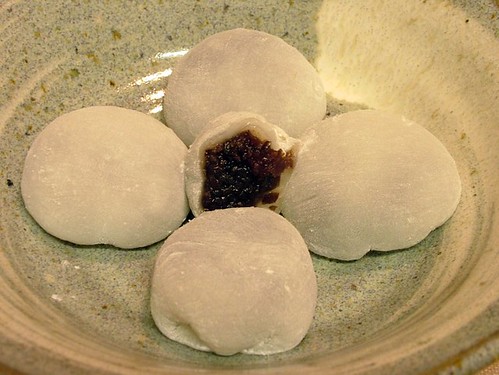
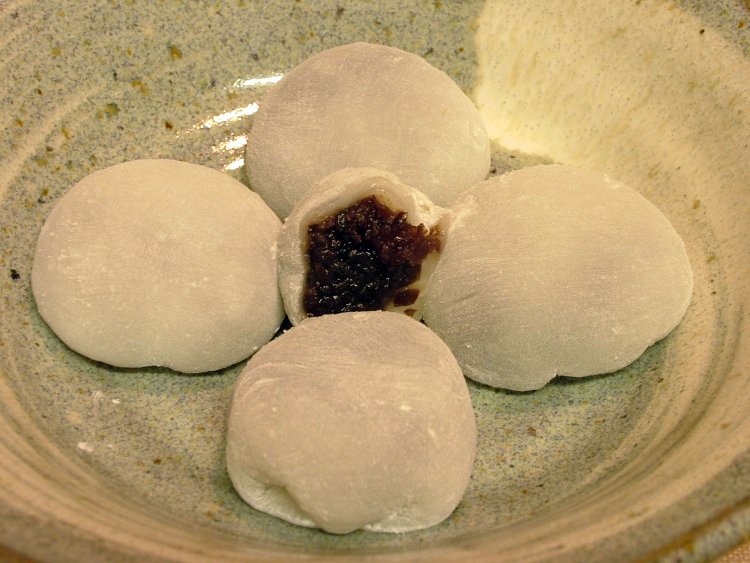
    daifuku mochi , recipe and method


    Being gluten free as well as unable to eat fat limits the sweet treats that I can indulge in.  Whilst this is wonderfully healthy, I do crave the occasional sugary bite.  I was entranced by these soft pillowy chewy treats called daifuku mochi when I first saw them and I was delighted to discover that they are naturally gluten free.
    I have found them in long life packs at our local Oriental ingredients store and whilst they taste delicious and are immediate, but that hasn't stopped me wanting to try to make them for myself.
    Handling the dough is a joy to anyone used to baking gluten free.  The warm translucent paste is stretchy and pliable in a way that most gluten free doughs never are.  Stretching and pressing gently will allow you to create a thin sheet of dough which can then be cut to form the sweets, though I was very tempted to roll it up and start again, just for fun!
    These daifuku are filled with anko, which is a thick sweetened puree of aduki beans.  The teen loves them filled with sweetened peanut butter paste but my favourite is a thick spicy squash or pumpkin puree.   I didn't have any pumpkin around, so went for the more traditional filling of aduki beans.

    This recipe makes 12-15 sweets.  Making the sweets themselves took about 1 hour from beginning to washing up (using pre-cooked bean paste).  The sweets can be stored covered for 24 hours before serving or frozen, so they could be made in advance to serve as desserts or sweets.  I had wanted to take photos of the method but the whole process is both dusty and sticky that action photos were not possible, sorry!

    Anko (sweet red pean paste)
    • 175g aduki beans
    • 85g white sugar
    • 1/2 tsp salt
      method:
      1. put the aduki beans in 1.5L of cold water and bring to the boil.
      2. let boil at a rolling boil for 10 minutes, then take off the heat.
      3. put a lid on the pan, and set aside for 6-8 hours or overnight.
      4. drain the beans and return to the pan with 1.5L fresh water
      5. bring to the boil again and turn down to a simmer
      6. continue to cook, topping up with boiling water as necessary.
      7. cook the beans until soft for 45 mins to 1 hour
      8. drain the beans thoroughly, rinse the pan then put the beans back in
      9. add 175g sugar (or more to taste) and 1 tsp salt
      10. return pan to the heat and stir to dissolve sugar and salt
      11. mash beans: you can do this using a potato masher, a stick blender or a food processor
      12. if you want very smooth puree, you can sieve the mashed beans to remove the skins (I didn't)
        1. set aside to let the puree cool whilst you make the daifuku dough

        Daifuku dough
        • 100g glutinous rice flour
        • 50g white sugar
        • 165ml water
        method:
        1. line a lipped baking tray with baking parchment and dust thickly with corn or potato starch
        2. sieve the glutinous rice flour into a rice cooker or saucepan
        3. stir in 50g sugar then pour on the water, stirring continuously
        4. stir thoroughly to ensure there are no lumps
        5. turn the rice cooker on or set the pan over a low heat for 10 minutes
        6. allow the mixture to cook, stirring once or twice until it is thick and sticky (you may find you need to add a little more water to ensue the paste cooks to a translucent mass without a hint of powder remaining). 
        7. scrape up the hot paste - it will look like a lump of gluey mashed potato, and completely un-usable, but don't worry, it's fine!
        8. tip the hot paste out onto the lined baking tray
        9. dust your hands and the top of the dough with more starch
        10. press the dough out using your fingers / knuckles to create an even sheet about 4-5mm thick, this takes a little while but isn't that much different from pressing out a wheat dough for a pizza base.
        11. when you have created an even(ish) layer, cut out one piece at a time using a knife, pastry cutter or glass 6-7cm wide.  If you use a knife and cut triangles you will have no wastage at all, otherwise there will be some trimmings.
        12. place 1 tsp of cold bean paste in the centre of  the cut dough
        13. bring opposite sticky edges of the dough together and squeeze to seal, then squeeze all the seals together to create a join underneath,
        14. dust the bottom of the sweet with a little more starch to seal
        15. set each sweet in turn on serving plate
        16. if you are left with some trimmings from the dough, you can re-roll and make some more.  you will have to knead the dough a bit harder to bring it all together before you can press it out again and cut into pieces.  these last few daifuku mochi will have thicker sken and be a bit chewier - I actually preferred these to the rest I made!
            When you are clearing up, don't throw away the starch, pass it through a clean sieve to remove any pieces of dough then store for future use.  And finally, don't throw any pieces of dough down the sink as it will solidify as it dries and block the drain.  Put your utensils to soak then scrape the wet dough off into the bin instead.