I love speculoos biscuits. I mean, I really really love them! I used to get excited every time I discovered one of those slim, delicately spiced and caramelised biscuits nestled on the saucer almost hidden by my coffee cup. Until quite recently, though, I could only experience that thrill in Europe, not at home in the UK. Now times have changed and I could, if I wanted, buy bulk packs of speculoos in my local cash and carry (though in the UK they are just called caramelised biscuits, or some such). And now of course, even if I wanted to eat them, I couldn't, because they contain wheat.
So, when food blogger and writer David Lebovitz wrote a post on speculoos spread I was envious and intrigued in equal measure. I read the post a couple of times and then carried on as normal ignoring the faint pangs of jealousy growing in the pit of my stomach. Ignoring, that is, until one morning a few days later when the sun was shining, my kitchen was quiet and I, for once in a very long time, actually felt like cooking.
I searched around the internet until I found an ingredients list for the Lotus brand of 'Speculoos a Tartiner'. It made me laugh to read it - 57% crushed biscuits, sugar and vegetable oil to make a sweet smooth spread. Duh, how obvious!
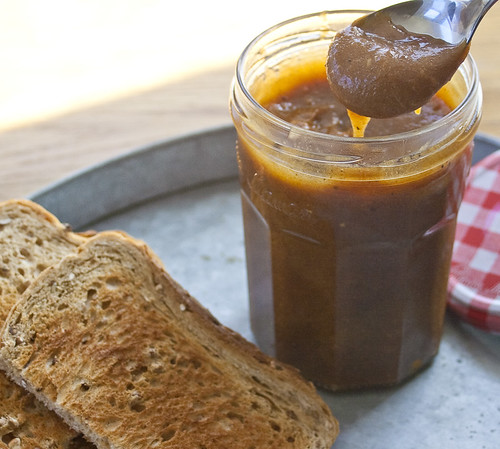
Somewhere in the depths of my freezer I had a gluten free half batch of David Lebovitz's Chez Panisse Ginger Snap dough which needed to be eaten. I figured that I could mix up some speculoos spices, sprinkle over the dough, knead it in and bake the revised version. This might on be an unorthodox way to make Speculoos but in this case, imperfections don't matter as I am going to grind up them up anyway!
One of my favourite memories of speculoos is the blend of spices mingling with the rich caramel flavour, so I decided that since I was already going to use my food processor to grind the biscuits, I might as well also make some caramel and grind that up to make caramel powder to use instead of sugar. So by 8.10 in the morning I was pouring a cup and a half of nut brown caramel onto my lined baking sheet to cool and preparing my spices to add to the defrosting log of ginger biscuit dough. One day, I may come back to this recipe again and create a proper gluten-free speculoos biscuit from scratch, but for now the buttery spicy dough of David's Chez Panisse ginger snap recipe is definitely delicious enough to satiate my immediate desire for this sweet creamy spicy spread.
I added extra spices to the dough to give a touch of speculoos fragrance to the ginger and cinnamon of the cookie dough. My mix contained white pepper, coriander, nutmeg, clove, cardamom seeds and anise but you can add or remove spices to suit your palate (or dig out your favourite speculoos recipe and bake those, of course!). You can of course use shop-bought speculoos biscuits instead but if you do you might need to reduce the caramel powder to 90g as speculoos are a bit sweeter than the ginger biscuits I used.
The spread will go through a strange "Oops, I've failed" phase as you mix it together. In fact, it looked so odd that I didn't even bother taking photos of the method as I was so sure that it had gone wrong! But I persevered and I was very glad I did as the crumbly lumpy mess slowly transformed into a smooth creamy spread.
There is, of course, a flaw in my plan: I have absolutely no idea what the original 'speculoos a tartiner' tastes like so I have nothing to compare my own version to. I can however confirm that it is delicious: gently spicy, sweet and smooth but with a few crumbs for texture. If you can resist tasting this for a day or two, you will be rewarded with an even richer, more rounded flavour.
At the end of the day when the teen appeared, I mentioned that I had been messing around the kitchen but got no reaction (that's teenagers for you!) so I was amazed to discover the contents of the jar had almost disappeared the next morning ... I am now mixing up the next batch of cookies, I'll be making two jars this time!
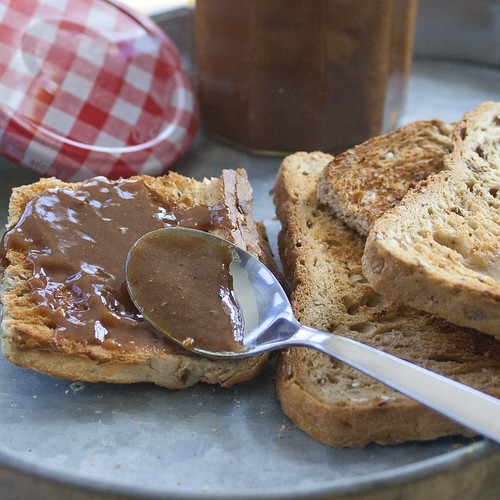
ginger bread spread recipe (to make 1 jar)
ingredients:
- 160g speculoos cookies or ginger snaps (as per details below)
- 120g ground caramel powder
- 90g sunflower oil (or other neutral oil)
- 60ml water
- 15g nutritional soya lecithin (this will stop the spread separating once mixed & stored in the jar, it is great if you happen to have some but it is by no means essential)
- 15ml lemon juice
- 1/4 tsp sea salt

- weigh 160g cookies into a food processor and process to a fine-ish powder, make sure there are no chunks left.
- add 120g powdered caramel (or 90g depending on your taste) and process again to combine.
- sprinkle in the lecithin (if using) and process again till fully combined.
- leave the processor mixing and add 1/4 tsp sea salt through the feeder tube.
- now pour in 90g oil and let the mix process to a rough puree
- pour in the lemon juice and don't panic when the mix turns into thick pasty lumps, it is OK (promise!)
- gradually tip in the water watching the mix as it becomes smooth and homogenous. stop adding water when you think you have the consistency you want - if you are using wheat-flour biscuits you may find you need slightly less water than with gluten free.
- stop the processor and taste the spread, add a little more lemon juice if you like.
- decant into a sterilised jar and store in the fridge for up to 2 weeks.
- a half batch (with extra spices) of David Lebovitz's chez panisse ginger snaps*
- extra spices ground in coffee grinder: 3 white peppercorn, 1 black peppercorn 1 cardamom pod, 2 clove, a good grating of nutmeg, 1/2 star anise.
- if you are making your own biscuits, add the extra spices at the same time as those in the recipe and follow the method as shown.
- * to make the recipe gluten free replace the flour in the recipe with 260g rice flour PLUS 1/2 tsp xanthan gum or use your favourite gluten free mix.
- 200g white sugar
- 135g water
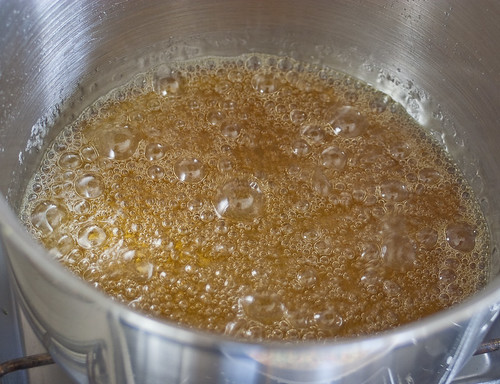
- line a large heavy baking sheet with non-stick baking paper and set aside.
- take a large heavy based saucepan, sprinkle the sugar and water into the pan and it on a gentle heat without stirring.
- leave the pan on the heat allowing the sugar to dissolve and the syrup to boil gently.
- keep an eye on the gently boiling syrup as it begins to colour, leaving it until it is a rich middling brown colour.
- pour the syrup onto a lined baking sheet and leave it to set.
- once the caramel is cold and set, break it up into small pieces and place them in a food processor.
- whizz until the caramel becomes a fine yellow powder, then tip out of the processor and store in an airtight jar.



 Posts
Posts

