Showing posts with label preserves. Show all posts

Saturday, 6 February 2010

orange & cardamom marmalade recipe


During our mammoth kitchen clear-out, I felt it my duty to venture right to the back of (nearly) every cupboard and the fridges to investigate the contents.  Right at the very back of the little fridge snuggled a jar with the merest scrapings of its' contents remaining inside.  This is a really bad habit of mine.  When I am totally in love with a food, I can never bring myself to finish it, in case I forget it, or I am craving the flavour one day.  I am not entirely sure of the reason but I know that it reflects an element of my personality that a psych would probably make a mountain out of!
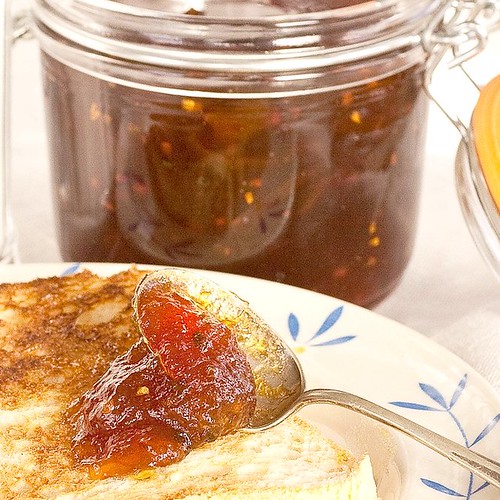
orange & cardamom marmalade on toast 2a
The jar concerned bears a black lid and label with contents almost as dark, and is the remnants of our last jar of Kush Cuisine's Orange & Mango Marmalade with Cardamom.  When we used to sell at farmers markets in London we would see them at the Blackheath market.  I say we, but in fact my alternate Sundays never coincided with them, and it was my husband who attended on those days whilst I was working back in the bakery.  And so it was him who came home with this delicious thick marmalade studded with deeply perfumed crunchy cardamom seeds.  I love it, and having given up the markets, have had to ration myself to the occassional serving in order to make the jar last longer.  And then one day there was one last serving left in the jar and it was pushed further to the back of the fridge to save rather than actually finishing it.

Today though, I made rice flour drop scones for breakfast and feasted on them with the last of this delicious marmalade, safe in the knowledge that the citrussy smell wafting through our kitchen was heralding the creation of my first ever batch of marmalade, flavoured with cardamom in deference to Kush's masterpiece.

If you ever find yourself at a farmers market in London, do check out Kush and grab a jar of their delicious marmalade ... alternatively, of course you could have a go at this recipe and see how your own version matches up!

cardamom seeds, pods & seville orange 1a
I have based my recipe and method on a combination of this recipe on Delia's site here and a recipe from The Times here, have a look (and you will be able to see how my impatience changed the methods!)  This can be  a bit time-consuming to make and you need to plan in advance.  Obviously getting your Seville oranges is the first mission as they are only in season in January and February.  If you can lay your hands on some, but don't have time to use them, stick them in the freezer and you will be able to make the marmalade whenever you fancy.


Seville bitter orange marmalade infused with cardamom

Ingredients:

  • 1.5kg seville oranges
  • 10g black cardamom seeds (after podding)
  • 2kg granulated sugar
  • 2.2l water

Equipment:
  • 2 large pans with a lid & some foil, 1 x muslin square (I am using a new baby square), big sieve & bowl, jam thermometer or a few chilled saucers, 6-7 x 500g jars with lids & waxed paper to seal.
Method:
  1. Wash the oranges and scrub with a bit of washing up liquid if they are coated in a shiny layer of wax.
  2. Place in the large pan and fill up with water
  3. Bring to a boil, and reduce heat to a simmer. Seal the top of the pan with a piece of foil and then place the lid over.
  4. Simmer at a very low temperature until the oranges are softened by a combination of the steam and hot, hot water - this took about 2 hours for me.
  5. Whilst the oranges simmer, de-seed the green cardamom pods by toasting the whole pods gently in a frying pan until they swelled up in  the heat, open the pods with your finger nail or the tip of a sharp knife and scrape out the seeds.  There is no denying this is tedious work so if you can find good quality ready-seeded black cardamom seeds, I suggest you use them!
  6. Leave the oranges to sit in the water until cool enough to handle (retain the water afterwards).
  7. Place the sieve over a big bowl.  Slice each orange in half, using a spoon scrape out the pith, pips and inners of each orange half into the sieve.
  8. Add all the orange inners to the water your cooked your oranges in and bring this to a rolling boil to reduce by half in about 20 minutes.
  9. Whilst this is boiling, warm your sugar either by placing the sealed bags on your radiator (my lazy method) or sprinkling the sugar into a couple of baking trays and placing in a low oven at about 100°C for 10-15 minutes.
  10. Slice your orange skins into thick or thin strips - depending on what you prefer in your marmalade.  For me this is short thick chunks (though thin slivers are much more photogenic of course!).
  11. Once the twenty minutes is up and the orange liquid is reduced by half, place the sieve over your second pan and drain the cooked orange liquid into the clean pan.  Scrape through the sieve with a big spoon to extract as much of the juices and goodness into the pan below.
  12. Add the orange peel to the pan of juices along with the cardamom seeds.  Bring this to the boil and slowly add the sugar stirring constantly to ensure it dissolves quickly.
  13. Once the sugar has dissolved turn up the heat and boil rapidly for 10-15 minutes.Whilst this is happening, wash your jars and lids then sterilise in the oven at 150°C for 15 minutes.
  14. Check the setting point of the marmalade - if you have a sugar thermometer you are looking for the temperature to reach 106°C (220°F).  If you don't have a sugar thermometer grab a chilled saucer and scoop out a spoonful of the syrupy dark juices onto the saucer.  Leave to sit for a minute or two then tilt the saucer from side to side.  If the liquid is set, the skin will stop the marmalade running across the saucer as you tilt.  If not, the liquid will run and needs to boil for another 10 minutes or so.
  15. Repeat the test until the marmalade is ready and once setting point has been reached, take the pan off the heat and leave to sit for half an hour to cool a little.
  16. Ladle the cooled marmalade into your cooled sterilised jars and place a piece of waxed paper over the top before placing a lid on each jar.
Notes - I found that the oranges were a bit over cooked - when I came to remove the pith and inners the skin fell apart making the whole process very messy.  This also made it harder to cut the skin into even shreds so I ended up using a pair of scissors and sandwiching several pieces together to cut..  In future I would only boil for an hour, then leave to cool for a maximum of 2 hours and hopefully this will do the trick.

Sunday, 24 January 2010

garlic confit


Garlic, this is a staple in most kitchens, a delicious and easily identifiable ingredient that enhances so many dishes that we enjoy.
At home, we have started making a simple garlic confit which makes using this essential ingredient that bit quicker and easier.  Of course there are some recipes where the fresh pungent flavour of the whole cloves is still best, but we have found that many, in fact, most of our meals benefit from the lighter touch of a clove or two of confit garlic and a drizzle of its' aromatic oil.
Thomas Keller advocates the use of garlic confit in many of his dishes and gives a method for this, along with other confit concepts in his book Bouchon.
In our kitchen a jar of confit garlic sits to the right of the gas hob alongside some freerange eggs, a pot of sea salt, a lemon, a couple of lighters (to light our broken hobs), a pepper grinder, some honey and - at present - a jar of fennel-infusing vodka (which really should be stored in a dark cupboard instead). With just a little bit of work every few weeks, it is possibly the most useful ingredient in our kitchen especially as it speeds up the process of making a quick evening meal dramatically.  But there are just 3 cloves left at the bottom of our jar, so it is time to make some more.
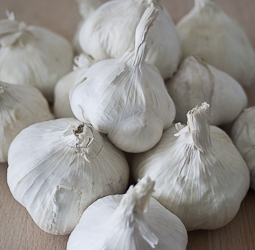
garlic clovesIt can be a bit fiddly to make as each clove of garlic should be peeled completely before use, but I have found a slightly easier method of making which at the same time saves your finger nails from the inevitable spikes of garlic skin which wedge just under the nail and hurt like hell as you peel.  So get yourself three or four heads of garlic, separate out the heads of garlic into individual cloves and remove the outer layers of paper by rubbing.  At this point try your cloves in the jar you are planning to use, to ensure they fit, then wash and sterilise the jar.
Place all the cloves into a large saucepan and cover with boiling water.  Simmer for a couple of minutes until you see the odd pieces of skin floating to the surface.  Drain the cloves and put them into a bowl.  Now the outer skins should separate really easily, so with wet fingers (to stop the skin sticking to you) take the rest of the skins off and pile the cloves onto a piece of paper towel to dry.  Soon you will find yourself with a heap of naked white cloves ready to be preserved in oil.
Pop the garlic back into the large saucepan and cover with oil, I use a cold pressed olive or rapeseed oil. If you are a keen user of infused oil, you can add more oil to the pan, perhaps an inch above the level of the cloves.  This will give you extra oil to bottle later on.
Heat the garlic and oil until the oil begins to boil, now turn the heat down to a very low simmer.  Leave the garlic simmering gently in the oil for around 40 minutes.  The cloves should be soft and tender but still pale and creamy. 
If you are a fan of caramelised garlic, you can cook the garlic at a slightly higher heat, to create a more caramelised clove. It is very much personal taste as to which you prefer. 
We use a spoonful of oil and a clove of preserved garlic in virtually every savoury dish we make.  I love the simplicity of use as well as the rounded and more subtle flavour of the preserved garlic, just mash a clove onto the pan using the back of a spoon or spatula and you are done.  As it is already cooked, we don't need to worry about preparing and cooking the garlic before adding to a dish and that harsh flavour you can get if the garlic isn't cooked through is no longer an issue.  Personally, I don't find caramelised garlic as useful in the kitchen though I love it in it's own right.  I certainly couldn't use a whole jar of caramelised garlic withough having to get seriously creative.  Occassionally I will roast a head of garlic wrapped in foil in the oven, then keep this in the fridge squeezing the cloves as I need them into sauces, mayonnaise or just onto a cracker for a snack.
garlic confit in jar

Sunday, 13 December 2009

candied chillies with sweet chilli syrup


This was inspired by a twitter comment that Clotilde from Chocolate & Zuccini recently.  The French, like the Italians, have a history of creating and eating candied fruits in a way that the Brits seems to have missed. Yes, we have glacĂ© cherries and chopped mixed peel but that is about it. In France in the run up to Christmas you will find platters of individually candied fruits - figs, mandarin oranges, melons, pears and pineapple as well as chestnuts, greengage plums, peaches, apricots and clementines. Beautifully presented, glowing translucent fruits.

The link Clotilde gave is to a company called La Fabrique de Douceur here. Their chillies, along with the other fresh fruits they make are lucious and beautiful to look at but I think they are only available in France.
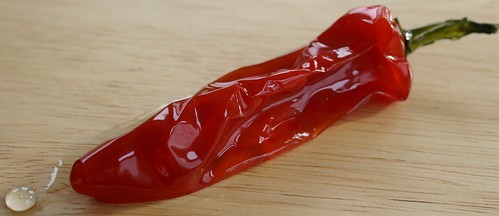
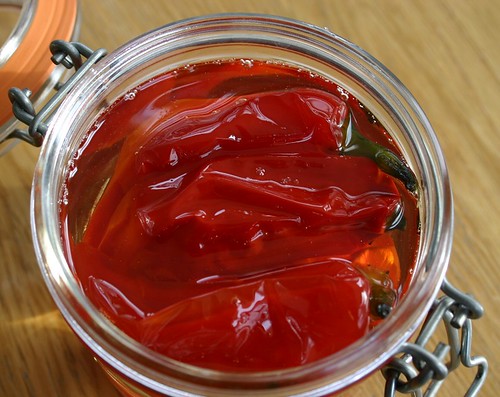
Reading through their website reminded me that I have quite a few chillies at home which I can't eat due to allergies. Rather than simply throw them away I thought I would have a go at candying them, just to see what would happen. So here is a simplified version of candied chillies.   The sweet and spicy syrup would make a delicious drizzle over ice cream or a fruity tart, whilst the chillies themselves could be used in biscuits or ice cream, or served as they come with cheese.

As you can see this quick version gives you the flavour but not the texture of french-style candied fruit.
These are very quick and easy to prepare and if you have any chilli-heads as friends, they would make great easy foodie presents too.

Candied Chillies in sweet chilli syrup


Ingredients:
  • 8-12 fresh mild to medium red chillies
  • 450g white sugar
  • 450ml water
  • boiling water
  • sterilised jar & lid big enough to contain the chillies
method

  • pour about 1L freshly boiled water into pan and add the chillies.
  • bring the pan to the boil and blanch the chillies for 1 minute.
  • drain the chillies and refresh in cold water.
  • add the equal volumes of sugar and water to the pan and bring to the boil
  • add the chillies and cook at a gently boil for 30-40 minutes.
  • during this cooking, sterilise the jar in the oven or in boiling water for 15 minutes.
  • when the chillies are cooked, lift them out gently and place in the jar
  • pour the syrup over and screw the lid on
  • allow the jar to cool before storing in the fridge.
To be honest, I don't know how long these will last after cooking, but since the chillies are blanched and so sweet, I am sure that 2-3 months is quite reasonable as long as they are completely submerged in the sugar syrup.  I have a couple of ideas for recipes to use these in which I will add in the near future.  Enjoy!